Posted on

Longarm Quilting – New Hampshire

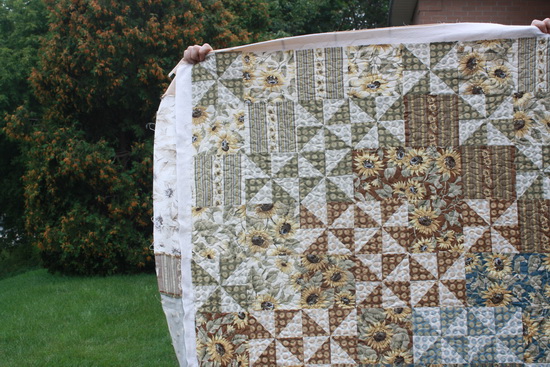
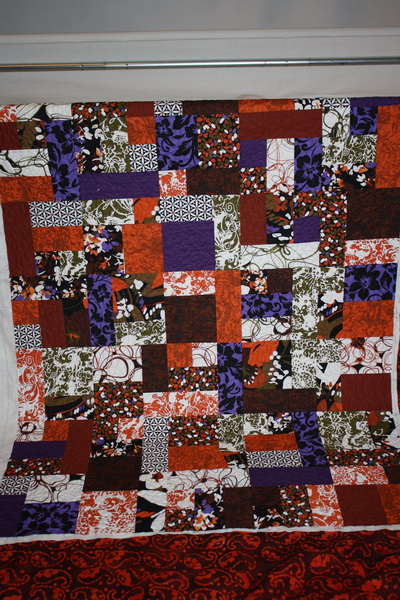
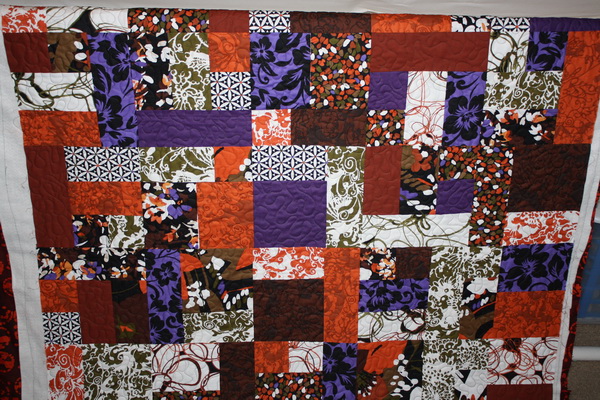
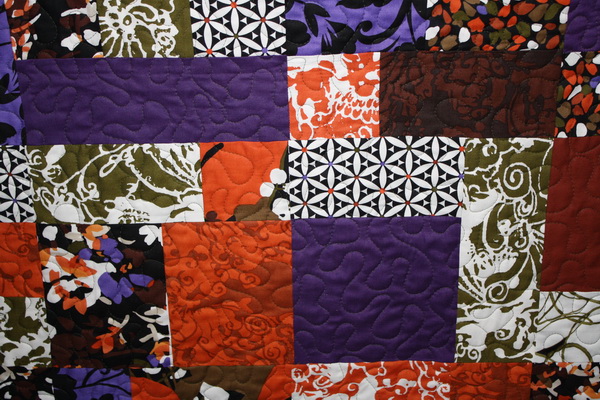
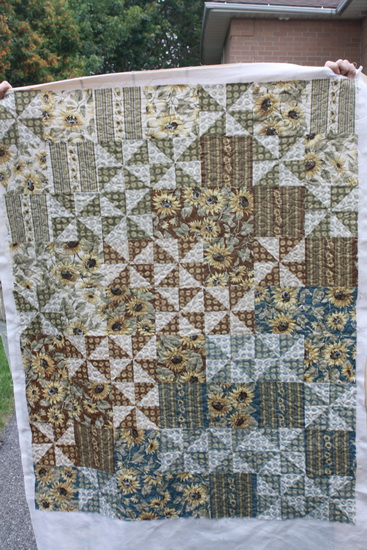
Today I was able to finish the second quilt I have here for a customer.

I fell more and more in love with this quilt as I was working on it.

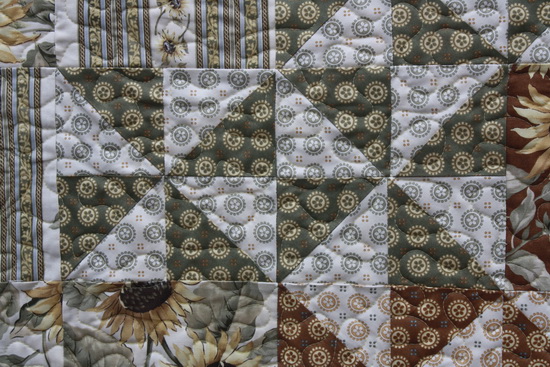
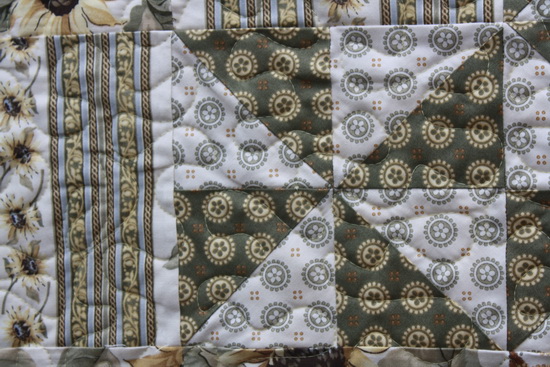
I am digging the random placement of the pinwheels, but how she kept like colors grouped together.

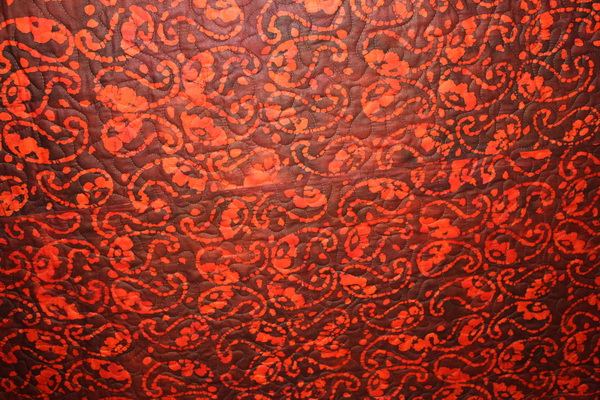
I used a butter yellow So Fine! thread for this quilt. I love how this thread just snuggles right into the quilts.

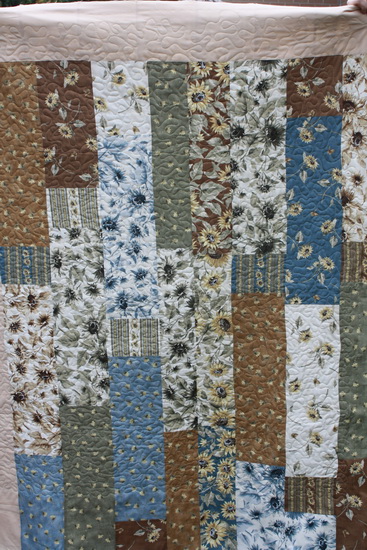
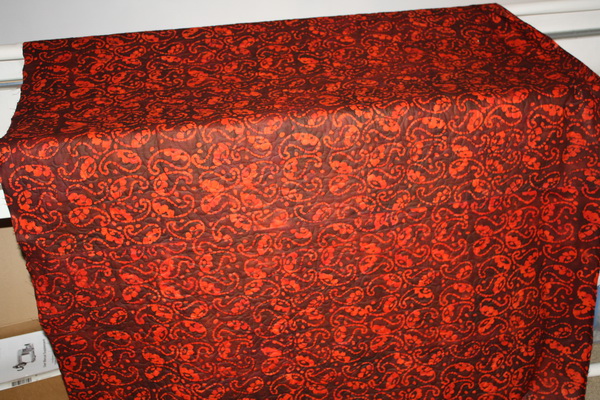
She did a pieced back, which made it just as interesting as the front.

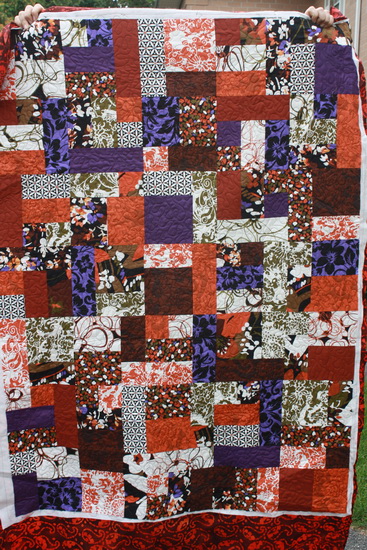
I was also able to take a better picture of the first quilt I did for her and I thought I would post it here.

If you are interested in my longarm quilting services, you can see more information regarding it at my store (here).

I have some exciting news as well. Be sure to keep an eye on the blog!! I will soon be having a huge giveaway. You have seen them around the interwebs I am sure, but now we will be having our very own giveaway for this:

More details to come soon!!

Happy Quilting!
Rachel

Posted on

Family Reunion Applique Quilt

A while back I picked up a pattern called “Family Reunion“. As soon as I saw it, I knew it had to come home with me. The pattern is made by Lori Holt from Bee in My Bonnet. Here is a picture of the completed quilt:

Lori has created some of my absolute favorite applique patterns. I love her creativity and if she ever made a vintage Halloween pattern I think I would have just died and gone to heaven!! I have slowly been working on this pattern for 6 months or so.

I am doing this one with needle-turn applique. I have tried quite a few methods of applique, some of which I have shared on blog.

When I started the blocks for this pattern, I tried the method that was included with the directions. It worked out very well compared to other ways I have tried needle-turn, but going around the smaller curves was still pretty difficult for me.

Then I was perusing the interwebs and stumbled on a different method for needle-turn. I decided to give it a try to see if it was any easier around those smaller parts. The new method actually worked wonders on all those spots that were difficult for me.

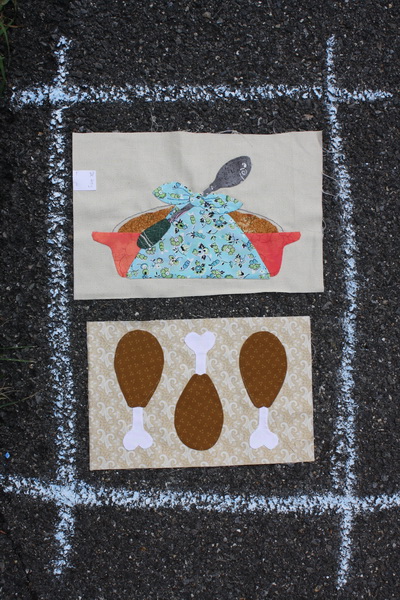
I will do a tutorial for you on another thread, but I wanted to share the blocks I have done already. This is such a fun quilt to work on and applique is a wonderful project for sitting in front of the TV.

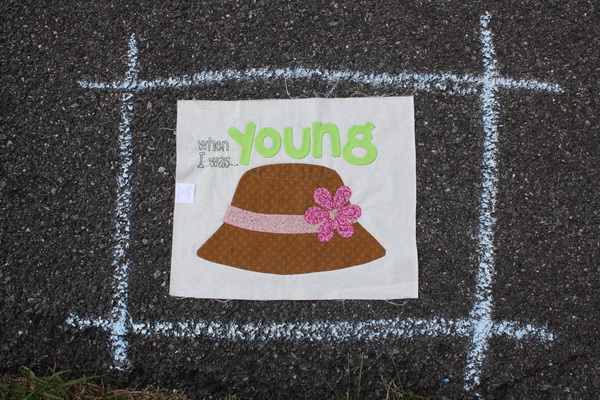
We do have this pattern in the shop (here), as well as some other patterns by Bee in My Bonnet. (Click the pics to see the patterns):

I have a 20% coupon code for any Bee in the Bonnet pattern. Just use the code “BONNET” (without the quotes) when checking out. I cannot wait to get other people hooked on these wonderful patterns.

Happy Quilting!
Rachel

Posted on

Longarm Quilting – New Hampshire

Finally! I have had this customer quilt for a little bit, and was hoping to have it, and it’s two buddies, done by mid-August. Of course my longarm had a whole other idea. It decided to start giving me a hard time, and wasn’t working properly. It was very frustrating to have that happen, but sometimes things don’t always go the way you want them to. I have learned that the hard way. Luckily my longarm is now working as it should, so I can get cracking on these beautiful quilts. Today I was able to get quilt #1 done. I took some quick pics of it, it is raining out (supposedly we are going to be getting the remnants of a hurricane soon), so I had to take the picture right on my longarm. Not the best showcase of her impeccable workmanship, but I promise to take better pics soon!

I used a hunter green So Fine! thread on the quilt. It really blends in with the back, and give it a nice soft texture and detail on the front. I am really happy with how this quilting turned out. I hope it is enjoyed by the owner as well! Off to complete the other two quilts I have.

Happy Quilting!
Rachel

Posted on 3 Comments

Getting Ready to Homeschool

With only 27 days left until I am done with my job (is it sad that I have a counter on my iGoogle page?), I thought I would post a little update on our homeschooling adventure. The last time I posted I got some wonderful encouraging comments from mamas that homeschooled, mamas that didn’t homeschool, mamas that wanted to homeschool, and even some peeps with no kiddos! The encouragement meant so much to me especially right at that moment because the final decision had just been made, and it was a scary one. Now that it has been a few months, and I have had time to process it all, I am at peace with this decision and I know, without a doubt, that it is the right one. Plus training your replacement at your job makes it very real, very quickly. 🙂

My son and I have been doing a few things to prepare for what’s to come. Our plan is to spend the time between leaving work and daycare (first of August) and going to Disney in mid-September detoxing from our former lives. In the homeschooling world, this is called de-schooling. A time where you just relax, go with the flow, and don’t put too much pressure on yourself to get stuff done, so you can make the transition more easily from a school environment to a home environment. Our intent is not to recreate school at home. I want to inspire my son to learn, but right now his only frame of reference for learning is school. Sit at your desk, do a workpaper, take a test, etc…. He still asks me if we will do these things when we are home. Even though he learns so much in a different way at night with me, the school environment is his only frame of reference for “official” learning. This is why I feel de-schooling is so important. I prefer to call it “detoxing” because that’s what it feels like to me. He has to shake off the idea of learning from a sitting-in-a-school-building perspective, I have to shake off the idea of what “work” looks like, and we both have to come to a new place where we can learn, grow, and work together. I have been reading a book on my Kindle about this very topic, I have really enjoyed reading it and will take some of her ideas to heart when we start this period in our journey. Here is a link to the book if you are interested:

My son is extremely curious and loves to learn. I have no worries about taking a more relaxed approach to learning with him. There may be some kids who, if you didn’t tell them what they needed to learn, would choose to learn nothing. This is so not my son. Every day he comes up and asks me questions. Like yesterday, he asked me “How does a basketball go flat? Does the air come out a little every time you bounce it?” A simple question, but honestly I don’t know. I mean of course it doesn’t come out in gusts or a ball would go flat all the time, but eventually balls do go flat. So is it the change in air pressure around the ball, or it is as my son surmised that a tiny bit of air leaks out each time you use it and over time that adds up to a flat ball? I told my son honestly that I wasn’t sure. Yes I could make guesses from what I know about air pressure, but the science of it, the real answer, I don’t know. And he told me back that maybe it was something we could learn about when we homeschool. That comment made my heart soar. He gets it. He finds things in the world he is curious about, and knows that we will have the opportunity to learn them when we are home together.

As I said, we have been preparing for this transition in our lives. I recently joined a large online group of homeschoolers. It is a local group, so although my interaction with them has only been mostly online so far, there are plenty of opportunities to meet up with other homeschoolers for trips, play dates, or co-ops. I haven’t been able to interact in person too much yet as I am still working, but it’s nice to see that the group will be there once we are home. Along with connecting with other homeschoolers, I have been trying to find inexpensive activities that we can do. One thing I found, that I think anyone can enjoy, was a site called Kids Bowl Free.

Basically you can sign your kids up for bowling at a local bowling alley. Your kids will get 2 free strings of bowling every single day during the summer. There are a ton of bowling alleys available in every state (just a warning, when looking at the text list of states, they aren’t in alpha order, so scroll through the whole letter to find your state), so if you are interested, you should be able to find one for your kids. Most alleys will allow kids up to age 16 or 18 and it’s for the whole summer. The alley we signed up for allows kids up to age 18, and goes until October 1. You can also pay a one time fee of $25 and get 2 strings a day for up to 4 adults. We went ahead and did this for my husband and I, and between the savings for our son and us, the $25 has already paid for itself with one game of bowling. Even though we still have to pay for shoe rentals, this will be a great activity that my son and I can do during the week. I like to have a few things like that available for when there is a lull and we just need a break. Plus bowling teaches great hand eye coordination.

Another thing we have been doing to prepare is buying books. Not school books really, but books on interesting topics we may want to learn more about. We have a great store nearby that is aptly named The Used Book Store, and the majority of their books are $1.29 to $2. Every so often they will have a 50% off sale, and my son and I have been bulking up on books during that time. We have gotten many biographies (most of which he reads as soon as we bring them home):

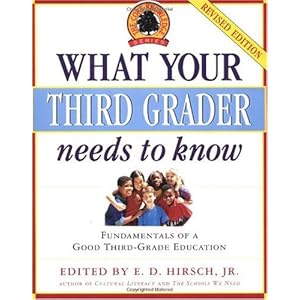
We have also picked up science books, how-to books, books about inventors, a road map to Mars, books about bugs, insects, animals, history books, books on astronomy, ancient Egypt, China, Japan … There are just so many interesting books and topics! I have been using a book called What Your Third Grader Needs to Know as a basis for topic ideas.

This is a great series by E. D. Hirsch and I have heard homeschooling mamas from all styles of homeschooling use this book as a guideline. I was lucky enough to find this whole series at The Used Book Store as well, so not only is it a great resource, it was a great deal. I am not going to follow this book page by page with my son, but it does give me a good outline to see some topics that are appropriate for his age. E.D. Hirsch has also released the outline of all the books in PDF form, so even if you can’t buy the books, you can have an idea of the topics covered for each grade level. You can find the free outline here.

We also look for books at yard sales and the flea market, as you can usually get books for a quarter this way. I am trying very hard to have a keen eye as I buy books. I want to buy books that will inspire a topic of learning for my son. So although it would be easy to buy up a couple hundred books in one fell swoop, we have only managed to amass about 90. The books we have gotten all relate to a topic of interest, and will be used as one tool in exploring the topic further. I have been using a site called Library Thing to help me keep track of the books we buy specifically for homeschooling. I can easily assign tags to the books, like History, Science, Biographies, Astronomy … this allows me to see what topics are covered in the books we own. I can also have a separate list for the books that my son has read. It is a requirement of the state that we pass in a reading list, and this site will help me keep track of that for him.

I know this has been a rather wordy post, but I just wanted to share some of the things we are doing for homeschooling. If you are a homeschooler, I would love to hear what you do to inspire learning in your kids, if you are thinking about homeschooling, I hope this post is an inspiration to you, and if you can’t homeschool, maybe some of the ideas here will help you during the non-school hours with your kids. Learning and growing happens all the time. Just last night, I brought one of the aforementioned books with me to the restaurant we were having dinner at. While we were waiting for the table, my son learned how a rainbow is made, if a black widow spider eats her mate, and why space is black. We aren’t officially homeschooling yet, but that doesn’t mean there aren’t interesting topics in the world that we wouldn’t like to learn more about.

Happy Learning!
Rachel

Posted on 3 Comments

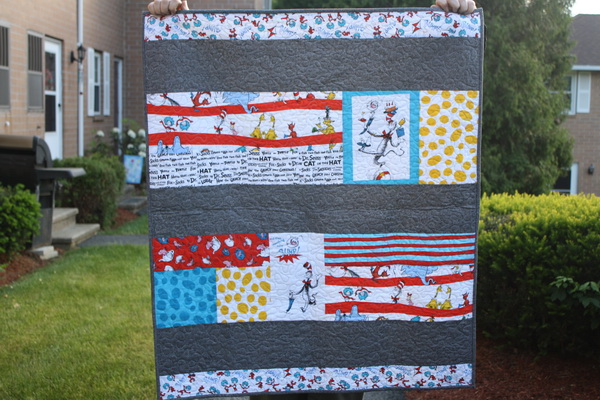
Dr. Seuss Baby Quilt

I haven’t had a whole lot of time to work on personal projects lately, but recently I found out that a friend of mine was pregnant! Not only that, but she and her husband decided to quit their jobs and travel Europe for 2 months. Then they would be moving to New Zealand. She is from New Zealand, so I figured she would go back one day, but it was sad to see her go. I wanted to make her a little something before she left, so I decided a baby blanket would be fitting. Even though I still owe two very special people baby blankets, I was on a time crunch with her, so I whipped this one up in a day a few weekends ago.

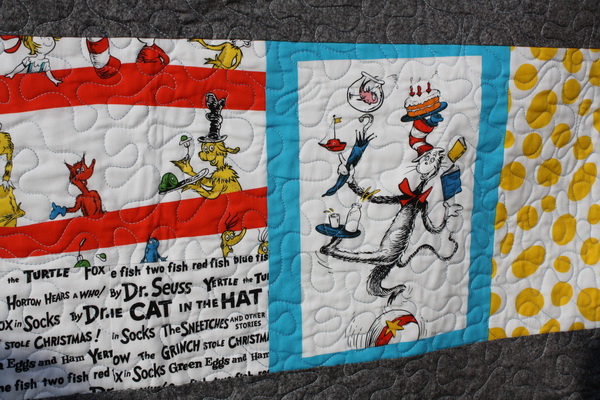
I used my stash of Dr. Seuss fabrics, since the sex of the baby is still unknown. I figured Dr. Seuss is a pretty gender neutral theme.

The other fabrics in the quilt were what I had in my stash from other projects that never went anywhere. The grey on the front was supposed to be the backing to a quilt that will never get made. And the backing fabric is a lovely dot pattern. I had originally picked this fabric up to make a hand bag, but that project never panned out either. This piece of fabric was just the right fit for the quilt too. I didn’t have to seam it at all, which made the whole process so much quicker.

I meander quilted this on my longarm, and I think it turned out just lovely. I have always loved the look of a nice all over meander as it really ties everything together once the quilt is done. I really didn’t like the grey before quilting, but after, it just blends in so well.

I wasn’t sure what to do for the binding, so I decided to play it safe and went with the same grey I used in the top.

If you think you have seen this quilt before, it’s because I used the pictures of it as the example for my longarm quilting services, which you can read more about here. If you are interested in having one of your tops finished up this way, contact me about getting a 25% discount. Another bonus for getting the longarm services done with me, if you buy batting at the same time you will get a 10% discount on your batting. I can be reached at HappyQuilting at DewberryLane dot com.

I am very pleased with this little quilt, I even remembered to put a label on it!! That way all the New Zealanders will know that this quilt was handmade by someone in the US.

My friend seemed very pleased with the quilt, and I hope her new baby enjoys it as well. Now I must get my behind in gear and get to finishing up two more promised baby quilts.

Update: I now have this pattern for sale! You can buy it in my Craftsy shop here or on Etsy.

Happy Quilting!
Rachel

Posted on 3 Comments

Raw Edge Applique Tutorial

This was written for Stash Manicure, but I wanted to share it here as well. I hope you enjoy!

Those that visit my blog know that Halloween is my absolute favorite holiday. In fact I have Halloween decorations up year round! The funny thing is, I never actually made myself a Halloween quilt. I have been collecting Halloween fabric for 2 years, but because it is my favorite holiday, I always felt it had to be the perfect quilt. This year I decided to change that and I ended up making two Halloween quilts. One of them is an applique quilt called ‘Don’t Drink and Fly’.

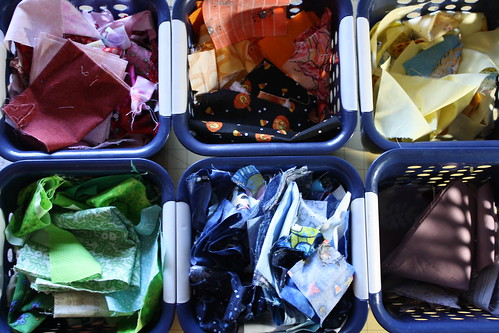
Applique gives you a great opportunity to use up all those scraps you have hanging around. I am a lover of scraps. Many of my scraps come from other people, for which I am very grateful. I prefer to work with other people’s scraps as it gives me a larger variety of scraps than I could ever come up with on my own. Not too long ago, I organized my scraps by color.
IMG_0755

I have considered mixing up the color and organizing them by size, but since doing applique, I have found the color method to be the best one. You can see that I am a little slim on some colors, I am always on the hunt for a new set of scraps to refill my buckets!

The ‘Don’t Drink and Fly’ pattern is from Eat Cake Graphics and is available in my shop here.

If you have never seen their quilt patterns before, be sure to check them out. They are so much fun!

When I received this pattern, I had never done applique before. I tested a few different methods, and found most of them to be too time consuming for me. I finally decided to use raw edge applique for this quilt. The pattern calls for needle turn applique, so I had to be careful about getting everything facing the right direction when I made the quilt with raw edge. Today I am going to give you a quick tutorial on how I did raw edge applique for this quilt top. Since my quilt top is already done and I didn’t take any process pictures with it, I will be making a small wall hanging instead.

Tools
Steam a Seam Lite 2

IMG_0761

Sharp scissors
Light box or Sunny Window
Iron
Pencil

Fabric requirements
All fabric can be found in your stash! That’s what is great about applique, the pieces are small, and you can easily use scraps you have hanging around. When I am done the tutorial I will show my completed quilt top and the one from the pattern, you will see that I changed a lot of the colors to fit the scraps I had on hand. I was also able to find a large piece of fabric I could use for the background, again a bit different from the pattern, but it works and it got that fabric out of my stash!

Step One
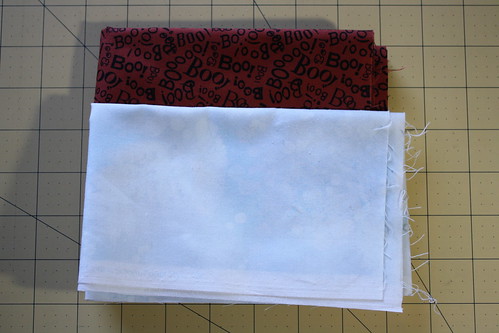
The first thing you want to do is prepare your background. My wall hanging will have a solid background and a border. I chose two fabrics from my stash for this.
IMG_0751

You want to iron your background fabric really good, I prefer to use starch, but it is not necessary. Having an unwrinkled background will make laying out your pieces much easier.

Step Two
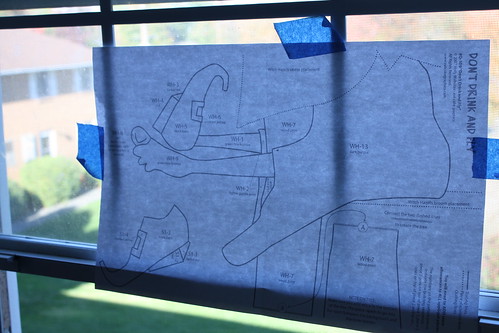
Once your background is pressed you want to trace the basic layout of the pattern to the background fabric. When I did my original quilt I just taped the pattern right side up to my window, but you could also use a light box if you have one.
IMG_0756

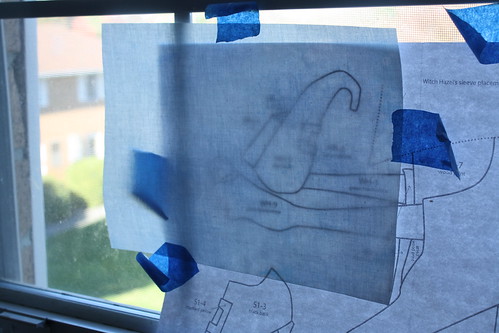
Next tape your ironed background fabric over the pattern, face up. Be sure to center everything right where you want it to go. For my wall hanging I am only doing a small portion of the pattern, but for a full quilt design, you will want to trace everything now to ensure that it is all centered properly.
IMG_0757

Trace your pattern to the front of your background fabric using pencil. You only need to trace enough lines to get an idea for placement of your pieces. Remember, some of the smaller detail parts will be on top of other pieces, so a placement line on the background would not help much.
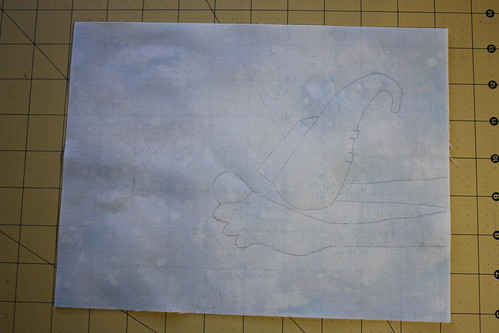
IMG_0758

Step Three
Next we want to get our pattern traced onto the Steam a Seam Lite 2. With Steam a Seam, the material gets ironed to the wrong side of the fabric, because of this we need to reverse the pattern before we draw our lines on the Steam a Seam. If we do not, we will end up with a mirror image of our pattern and nothing will fit with the background lines we just drew.

The first thing I do is turn over my pattern taped to the window. Now the pattern is taped with the back facing out. This gets me my reverse image I need to trace.
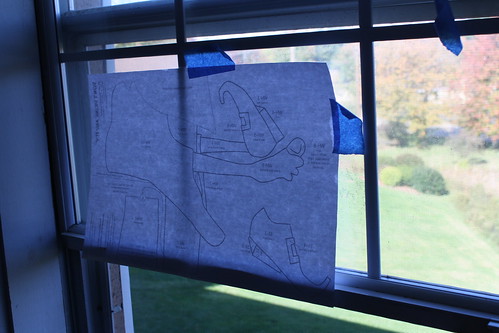
IMG_0759

Now you can just trace each piece of your pattern on to the Steam a Seam. For the edges that are supposed to look like the are under another piece, draw a dotted line on that edge. For all the edges that are supposed to look like they are on top, draw a solid line. When placing the pieces on the Steam a Seam, you want to leave about a 1/4 inch next to any dotted lines, you do not need to leave much space next to solid lines.
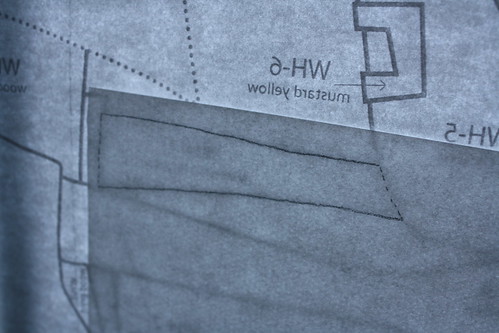
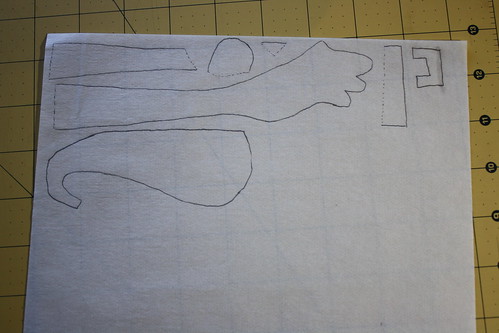
IMG_0762

IMG_0764

Step Four
Now that you have your pieces traced, you want to pull scraps for each piece.
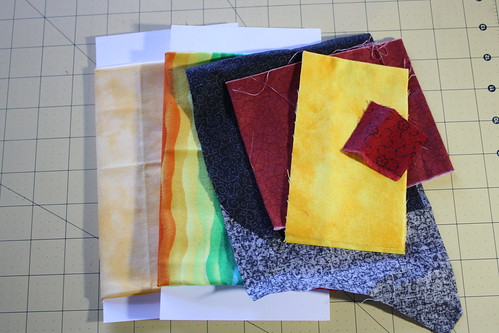
IMG_0766

Iron all your pieces nice and flat (again I personally use starch). Then rough cut each pattern piece out from the Steam a Seam Lite. I do not cut on the lines yet, leave a little edge around the whole thing, and a little more than 1/4 inch next to the dotted lines.
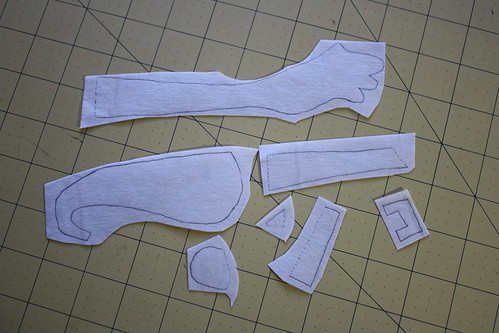
IMG_0767

Now peel the paper that does not have your pattern on it from the Steam a Seam Lite and iron it to the wrong side of your chosen scraps according to the package instructions.
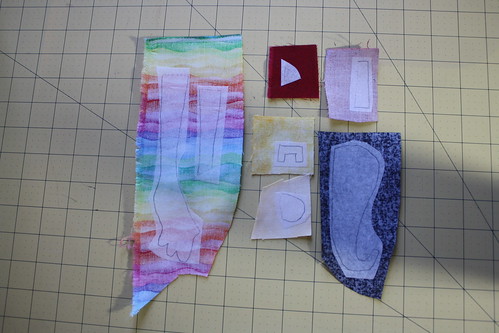
IMG_0768

Step Five
Now that your pattern pieces are ironed to the back side of your fabric, you want to cut them out. When cutting, you want to cut directly on the solid lines, and you want to leave about a 1/4 inch edge on the dotted lines. This will help you tuck these pieces under other ones.
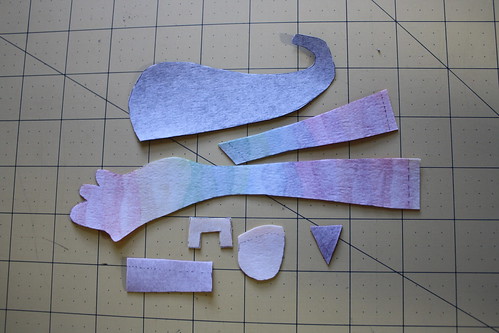
IMG_0770

Here’s a close up of one of the pieces so you can see the extra bits next to the dotted lines.
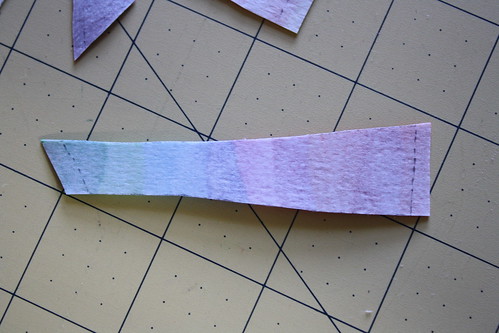
IMG_0772

Step Six
Now we need to get our pieces on to our background fabric. Lay out your background fabric, find each piece and peel off the paper from the Steam a Seam Lite, and place the piece on the background.

Do not iron it on yet.
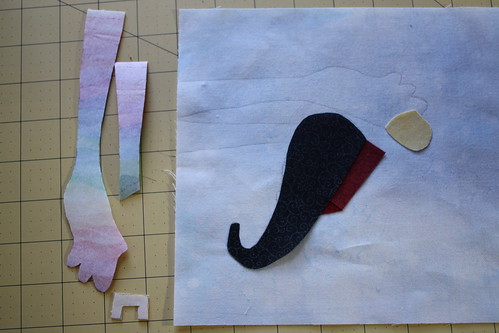
IMG_0773

The Steam a Seam has a little tack to it, so your pieces will not slide around. Place each piece on according to your drawn guide. Keep in mind pieces that should be over and under each other, and remember that you have a little bit extra on the pieces that should be under something else, so those edges will not line up with your guide exactly. Use your pattern as a visual while you are doing this. Since the pieces are not ironed on yet, you can move the pieces around, or trim a few things, until you get the look you want.
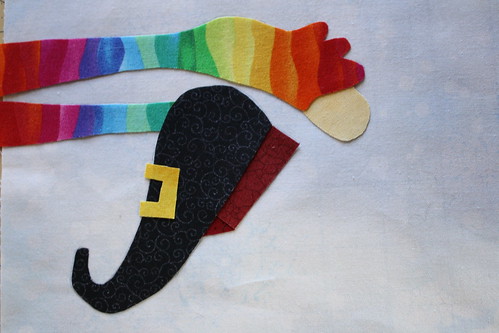
IMG_0775

Step Seven
Once all your pieces are in place as you like them, iron everything down. Remember you cannot undo this! So be sure everything is as you want it before you iron.

Now you can add your borders and finish your top as you would like.
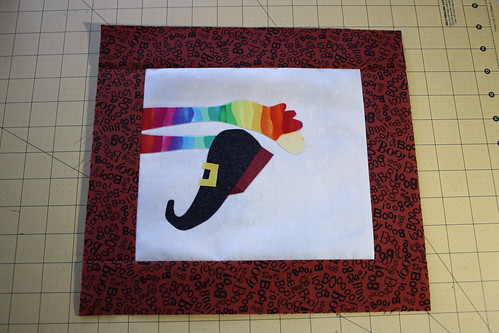
IMG_0778

I hope this tutorial helps you do a raw edge applique quilt. This type of applique is very quick and easy. Once you have your top complete, you can sew around the edges of each piece with invisible thread or like colored thread to tack everything down. I have not done this yet on my quilt.

Here is a picture of the ‘Don’t Drink and Fly’ quilt from the pattern:

And here is my version of this quilt:

IMG_0779

I have not done all the details on this yet, but you can see that many of my fabric choices are different from the pattern. This is because I wanted to use the scraps I had on hand. I did not have to buy a single piece of fabric to make this top! Applique is a great way to trim down your stash, I hope you will give it a try.

If you are looking for more applique patterns, I sell my own at my Etsy shop, Scrapendipity Designs.

Happy Quilting!
Rachel
Posted on 3 Comments

Now Offering Longarm Quilting Services!

I am very excited to announce that Dewberry Lane is now offering longarm quilting services!! If you are like me, you tend to have more tops laying around the house then you have completed quilts. Why not let us finish them up for you, so they can be used and loved? A quilt isn’t really a quilt until you see your loved ones snuggling under it in quilty bliss. In order to help you make this happen, we are currently offering a meandering quilting pattern for only $0.013 per square inch.

Since this is a new service we are offering, if you book your quilt in the month of June, you will receive 25% off the cost!! ($30.00 minimum applies) How can you pass that deal up? You can visit the store for more details on our services:

Longarm Quilting Services

I can’t wait to help all of you turn tops into quilts!!

Happy Quilting!
Rachel

Posted on 1 Comment

A Quilting Life

Today I am sponsoring a fun giveaway over at A Quilting Life.

The prize is an applique pack that includes a pttern from Eat Cake Graphics called December 26th, a 6-pack of Kimono silk thread, a pack of freezer paper, and a pack of sharps needles. Everything you will need to get started appliquing! This prize pack is valued at over $50.00. And don’t worry, if you have never attempted applique before, this pattern has wonderful instructions to help guide you.

Be sure to head on over to A Quilting Life (here) to enter.

Also, my June newsletter will be coming out this weekend, so be sure to sign up (here)! All newsletter subscribers will be automatically entered into our monthly drawing for a free pattern.

Happy Quilting!
Rachel

Posted on

We Have a Winner & a Finish!

Wowee!! Thank you so much to everyone that stopped by my blog for the Sew Mama, Sew Giveaway. I had well over 600 comments and many of you felt my blog was interesting enough to start following it. I really appreciate that. I used random.org to pick a winner on Friday, and have contacted them. The big winner was Leah, who had this to say:

“My most treasured quilting tool is my rotary cutter for sure. We are the best of friends, spending almost every day together. She has only nicked me once and I forgave her. After all, we are BFFs :)”

Congratulations!! The awesome thing is that Leah was actually comment #1 on my blog!! Who says that being the first to comment means you won’t win? I will be sending your prize out tomorrow Leah!

So this weekend was Memorial Day weekend. My husband was in the military, so we always take time to remember those men that we knew that have fallen. We are very blessed that many of the men we were friends with are safe at home with their families now, but sadly a few were not so lucky. If you didn’t take the time to silently thank our soldiers yesterday, please try to remember to do that today.

It was a pretty productive weekend for me actually. Since I got back from MQX, I have been bound and determined to figure out the problem with my longarm machine. I was having issues where it would freeze up and completely stop if I slowed down too much while sewing. This, of course, really makes it hard to have sharp points, because you have to slow down a bit to get those. Additionally I was having lots of issues with eye-lashing thread on the backs of my quilts. This is very frustrating as I purchased the machine with the hope of quilting for others eventually, but if I can’t get these issues fixed, there is no way I would put anyone else’s quilt on there!

So I sat down on Saturday and did some research on Google to see if I could find some fixes. There were a few suggestions for the whole stopping when I slow down thing, which I did. Then for the eye-lashing, I pulled out my new tension gauges and figured out how to check the proper tension for my top and bottom threads. I put in a new needle, and crossed my fingers. I threw a quilt that my son helped me create and just went to town.

I was super surprised to find that all my issues were fixed! The machine still has a little bit too much vibration, but I think that may be because my table isn’t quite level.

For the quilting, I tried a simple design that I learned from my MQX class. I was able to get pretty sharp points, and when I slowed down to make them, the machine kept plugging along. I need to work on slowing down overall to help keep my stitches more consistent, but I am very excited for what I have already been able to do!

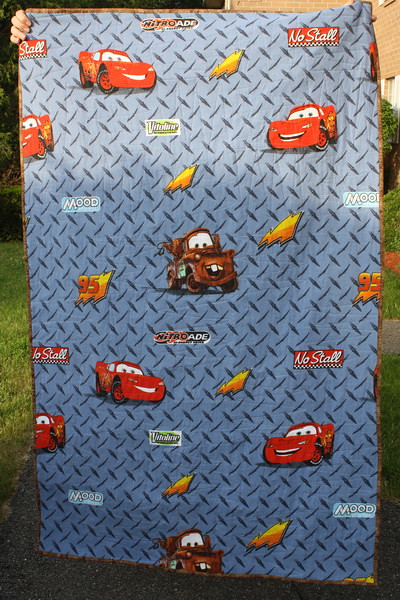
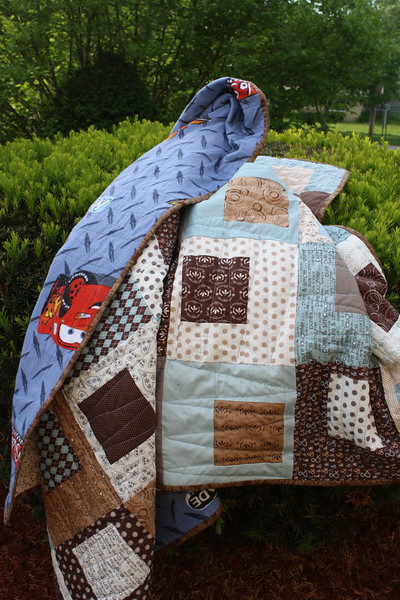
This is the back of the quilt, I know many people would think I am crazy to put ‘Cars’ on the back of this beautiful front, but this is 100% my son’s quilt. He picked the fabric for the front, he picked the pattern, I made the blocks themselves, but he did the placement of them. So he got to pick the backing, and he picked this cars sheet I picked up from a thrift shop.

I went with a simple brown fabric for the binding. I figured that would help keep the front looking nice and separate it from the backing.

Seeing the backing and the front together does make me cringe and smile at the same time. It makes me cringe because it is such a beautiful, grown-up front, and the back is such a kid-quilt backing. But it makes me smile too because it is just so my son to combine these two things.

I am still practicing on my quilting, but I have my meander down pretty good. I am hoping to be able to offer my services to others pretty soon. I will probably just focus on doing a simple meander for people, which will keep the costs really low. I will keep you updated on this if anyone is interested in my services.

Happy Quilting!
Rachel

Posted on 1 Comment

Random Bookmark of the Day

Last night I was perusing some of my bookmarks in vi.sualize.us. If you have never heard of that site, it’s similar to the newly popular Pin It site (can’t think of the name right now), but has been around for years. You can use the site to keep track of web bookmarks using one picture from the page. I really enjoy using it as it gives me a nice visual of ideas. I thought it would be fun to use a random number generator to pick one of my bookmarks/pictures to share with you. I have a lot of quilty stuff in there, as well as scrapbooking and cooking, so it’ll be fun to see what gets picked to share.

So I have 442 pictures saved in my account. Using random.org, it told me to share picture number 167 with you. So here it is:

Well isn’t that just darling?? This is a funny picture from i can has cheeseburger. I have this blog in my feed reader for when I need a little giggle. Usually this site puts funny captions on pictures of cats, but this one was so random I found it quite amusing and decided to bookmark it!

I hope you are having a great Friday! You should take a browse through your own bookmarks today, you never know what amusing things you might find! (If you find something totally random, feel free to share it here with us!)

Happy Quilting!
Rachel