Posted on 8 Comments

Seeing Squares – Empty Bobbin Pattern

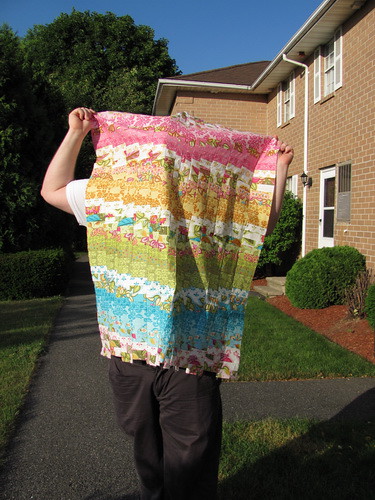
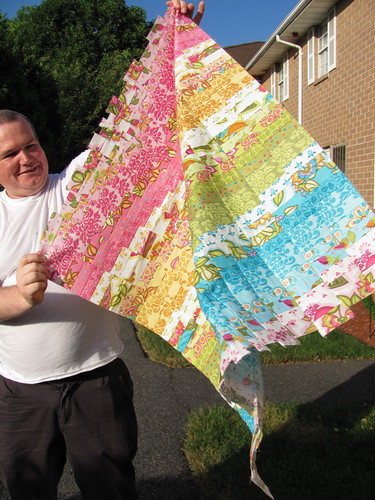
I have been following the Empty Bobbin for quite a long time. Recently she showed a beautiful quilt that she made for a friend. I have been eyeballing her pattern called “Seeing Squares” for quite a while, and after seeing this version, I knew I had to make it.

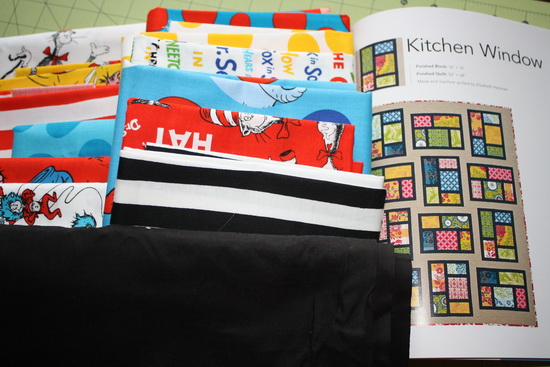
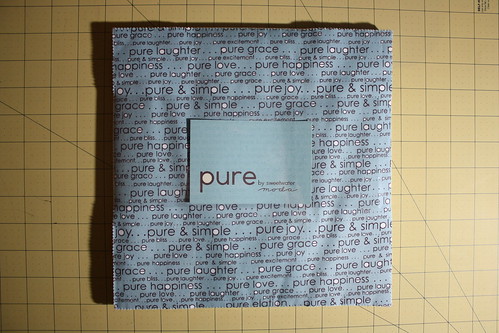
I headed over to Pink Chalk Fabrics (another blog I love to follow) to pick up the pattern.

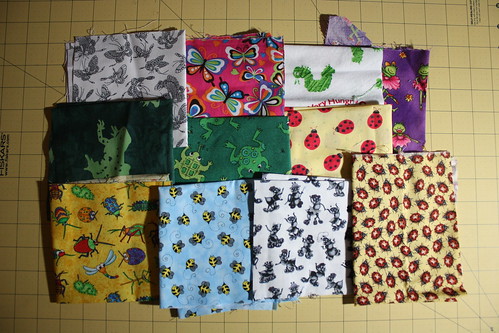
It arrived very quickly, and I knew exactly what fabrics I was going to use for it as soon as I got it. A while back I picked up a few bags full of solid fabric scraps from a yard sale. The pieces ranged from a few inches to half yard. I would estimate there was a total of 7 yards of scraps in all different colors and I literally paid $2 for all of it. I haven’t found a good way to use them yet, and I just thought this quilt would be perfect.

A day or two after I found the pattern, I was reading another favorite blog, Sew Create It. She was hosting a challenge called Sew Into Solids.

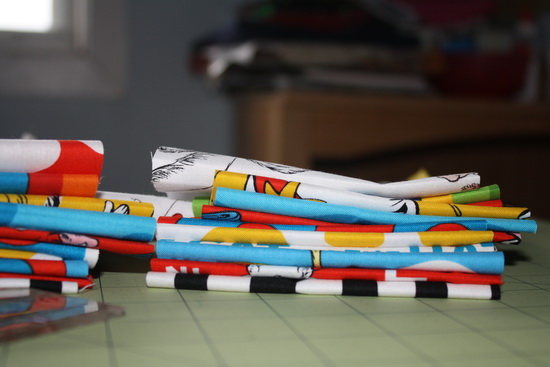
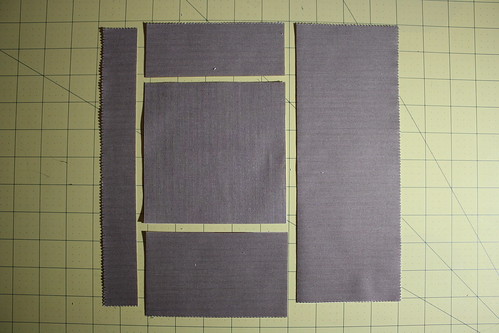
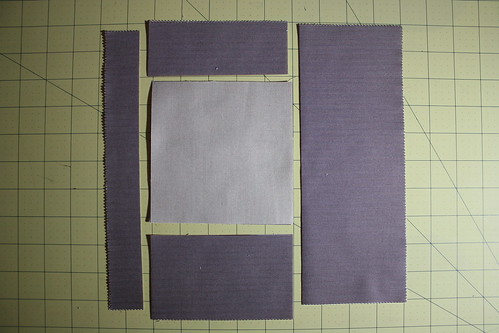
This was the perfect inspiration I needed to get going on this quilt. The first step was to get all the squares cut. If I was using yardage, it would be easy to cut the squares, but since I was using scraps, it was more of a project. I had to iron everything out, then figure out which pieces I could cut the larger squares from, then cut the rest from the smaller pieces. The size quilt I am making has 500+ squares.

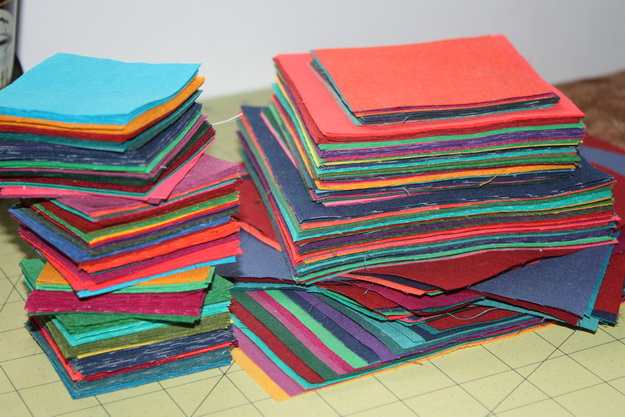
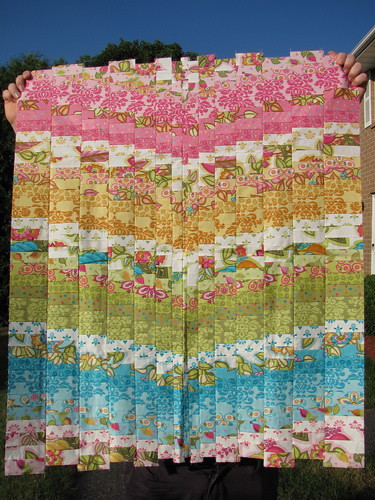
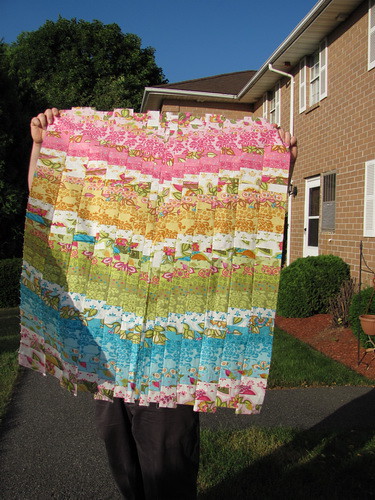
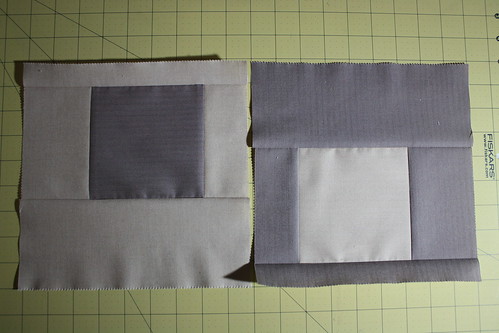
It took me 2 days to cut all these! It was quite a project, but now I can get to the fun of sewing!! The larger blocks are cut up further and sewn back together so they are multi-colored. I started a few of them.

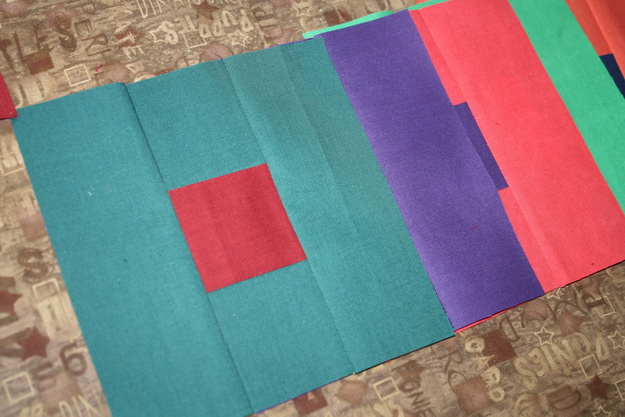
It’s actually a very easy pattern that is laid out great. It’s one of the easiest I have worked with so far. I am excited to see it all come together. If you are interested in trying out some solids only quilts, be sure to take a look at the Sew Into Solids flickr group.

Happy Quilting!
Rachel

Posted on 2 Comments

Craft Buds Giveaway

Craft Buds is a wonderful website that has a lot of information for the business side of crafting. Many of us have thought about making our favorite hobbies into a viable business, Craft Buds is there to help us with that. I love reading their blog posts as they provide so much useful information.

Craft Buds is having a linky party on their site for the month of September. They are celebrating craft books.

Throughout the month, they will have loads of information on getting your own craft book out there for the public to see. They are also encouraging crafters to link up to their projects that they have made from craft books. If you do link up one of your projects, you will be entered to win one of many prizes.

Dewberry Lane has donated a prize, The Practical Guide to Patchwork.

This book is written by Elizabeth Hartman. I have been following Elizabeth’s blog for some time, and I am in love with all her patterns and this book.

To be entered for a chance to win this book, all you have to do is link up to a project you have made from any craft book. Just head on over to Craft Buds (here).

I am going to try and make a quilt top from Elizabeth’s book this month. I am going to be out of town for a week, so I am not sure if I will be able to complete the project before the end of the month, but we will see. I have picked the project and the fabrics I am going to be working on.

And I started cutting the strips of fabric I need.

I don’t have the second, lighter solid fabric that is needed for the pattern yet, but my plan is to make the blocks to the black borders, and then pick up the other fabric when I can. I will update the blog as I finish more steps!!

Happy Quilting!
Rachel

Posted on

Family Reunion Applique Quilt

A while back I picked up a pattern called “Family Reunion“. As soon as I saw it, I knew it had to come home with me. The pattern is made by Lori Holt from Bee in My Bonnet. Here is a picture of the completed quilt:

Lori has created some of my absolute favorite applique patterns. I love her creativity and if she ever made a vintage Halloween pattern I think I would have just died and gone to heaven!! I have slowly been working on this pattern for 6 months or so.

I am doing this one with needle-turn applique. I have tried quite a few methods of applique, some of which I have shared on blog.

When I started the blocks for this pattern, I tried the method that was included with the directions. It worked out very well compared to other ways I have tried needle-turn, but going around the smaller curves was still pretty difficult for me.

Then I was perusing the interwebs and stumbled on a different method for needle-turn. I decided to give it a try to see if it was any easier around those smaller parts. The new method actually worked wonders on all those spots that were difficult for me.

I will do a tutorial for you on another thread, but I wanted to share the blocks I have done already. This is such a fun quilt to work on and applique is a wonderful project for sitting in front of the TV.

We do have this pattern in the shop (here), as well as some other patterns by Bee in My Bonnet. (Click the pics to see the patterns):

I have a 20% coupon code for any Bee in the Bonnet pattern. Just use the code “BONNET” (without the quotes) when checking out. I cannot wait to get other people hooked on these wonderful patterns.

Happy Quilting!
Rachel

Posted on 2 Comments

My Mother’s Quilt

My grandmother started my mother’s quilt in the early 90’s I believe. She hand pieced the entire thing. Here is a shot of the hand piecing from the back of the quilt.

IMG_0421

The whole quilt is made up of individual diamonds, which end up looking like stars because of the color arrangement.

IMG_0427

The whole quilt is not very big, I wish I could make it bigger, but I don’t think I have enough fabric left over. It will have to be more like a twin size quilt, though a queen would fit my mom’s bed better.

IMG_0423

The fabrics in this quilt are obviously quite old, but there is one in particular that makes me smile. The yellow check below is the same fabric my grandma used in my baby blanket. I dragged my quilt around with me until it literally fell to pieces, so it makes me smile that a piece of it lives on in this quilt.

IMG_0428

One of the issues I am going to have in finishing this quilt will be the edges. I am not sure I can leave them as is, as putting a binding on that will be very hard for me, but I would also hate to cut the quilt to make the edges straight. I may end up appliqueing the edges onto a straight binding. We shall see.

IMG_0425

I will machine quilt this for my mom once I am better at using my machine. That means I probably won’t finish it for at least a year! I want it to be finished perfectly for my mom.

Happy Quilting!
Rachel

Posted on

Bug Jar Quilt

During the big ‘Fall into Fall’ giveaway, I had a visitor comment on one of my other posts. The visitor was Mary of Needled Mom. She left me a comment on my Quilt Show Part 2 post saying that she had previously made the ‘Bug Jar Quilt’ that I mentioned wanting to make. Here is the quilt from the quilt show I went to see:

My own thoughts on this one were “Love this quilt. It is a commercial pattern and I will make it someday. I just have to get the pattern … and the fabrics … and well … the time. But someday I will!”, so when Mary said she had made it before of course I asked her where she got the pattern as I had been looking for it for some time. Mary had made the quilt many years ago for her grandson, but she took a peek through her stash to see if she still had a copy of the pattern. Unfortunately she did not, but she did find an Etsy seller for me that did have a pdf copy of the pattern. Click on the pic below to be taken to the pattern for sale.

I had never heard of the seller, bcheri, before. I am hesitant to buy pdf’s of patterns as sometimes people just scan in their copy, which is obviously against copyright laws. The picture of the pattern didn’t have the pattern makers name on it, so I just wasn’t sure if the Etsy seller was the pattern maker, but I decided to take a chance on it anyway. The pattern is not a reproduction at all. The pdf is not scanned, it is an original pdf pattern. From the pdf itself I was able to determine that, Beth Maddocks of Piece By Number, is the pattern maker and the owner of the Etsy store I bought it from. That came with great relief as I could feel very comfortable using the pattern now. Beth had great service, she had the pattern to me within 24 hours of payment, and she followed up to be sure the pattern didn’t end up in my spam folder. I would highly recommend her as an Etsy seller.

I let Mary know that I had picked up the pattern, and thanked her for helping me find it. She then asked for my address as she wanted to send me a few buggy fabrics she had found in her stash. A few weeks later these pretties showed up on my doorstep:

IMG_0909

Awesome right?! This gives me such a head start on collecting buggy fabrics!! It’s not always easy to find a good variety in a store, so I may do a trade for more buggy fabrics as well, but Mary’s generosity certainly got me started!

I am excited to get started collecting fabrics for this quilt, and even more excited that I may actually get this one done someday. Writing this blog has just been a fun way to share my projects with the world (as my husband only pretends to care), and meeting people like Mary is the icing on the cake!

Happy Quilting!
Rachel

Posted on 2 Comments

Honey Bun Bargello

After I finished putting together the top for my Funky Chicken quilt, I had a few blocks left over. I offered these blocks up to a few of the other members of the swap so they could have some extras to play with when making their quilts. In exchange I just asked that they send me a few scraps since I love to play with other people’s scraps for my quilts. Well one girl was nice enough to send me a whole honey bun! A honey bun is a roll of about 40, 1 1/2 inch strips. All the strips come from one coordinating line of fabric. I had never worked with a honey bun before, so I was excited to give it a try. After thinking about a pattern, I finally settled on a Bargello pattern. Here is the top I made.

IMG_0076

I had Kris help me take that picture, of course it was windy out when we took the pics, so getting this just right took a few shots. Just for fun, here are a few outtakes.

IMG_0070

IMG_0071

IMG_0062

Happy Quilting!
Rachel

Posted on 4 Comments

Pure Layer Cake

Recently I won a $25 gift card to the Fat Quarter Shop. I decided to put this to good use to pick up a layer cake of the ‘Pure’ line by Sweetwater for Moda. I have been in love with this line since before it came out when FQS just had previews of it up. This was a great chance to pick it up.

IMG_0911

I enjoy shopping at FQS, they always have quick service and their stuff is well packaged. While I was waiting for my layer cake to arrive, I perused the web for some patterns that would work with a layer cake. I wanted to try and make a quilt with only this layer cake, no extra fabric added. I knew it would be a challenge, but I did find a wonderful pattern on the Moda Bake Shop blog. This is a fun blog where all sorts of people post tutorials for making quilts, many of which are using Moda’s pre-cuts, which is wonderful. I ended up picking the ‘Boxed in Quilt’ pattern by KarrieLyne of Freckled Whimsy. (click the picture to be taken to the pattern)

She wrote the pattern to go with the Lollipop Layer cake, which has a few solids in it, but she mentioned that you could also do a layer cake with no solids, and just move the centers around. This is what I decided to do this with the ‘Pure’ layer cake. When the layer cake arrived, I paired up 40 of the squares, trying to have a decent contrast between the pairs.

IMG_0912

Each of these pairs will have one fabric for the outside and one for the inside. Then it will be reversed. This allows each pair will make 2 blocks. The layout will be 8×5, and with the blocks finishing at 8.5 inches, the quilt will be 42.5×68. If I add a border on, I think this will make a nice sized quilt.

I had 2 extra squares because the layer cake came with 42 squares and I only needed 40, so I did a quick test of the blocks. You can see how the middles get changed and the two blocks end up being a reverse of each other.

IMG_0914

IMG_0916

IMG_0918

This was my first time working with a layer cake. I am not quite sure how I like it. The pinking is a bit annoying, though I know without it; these blocks would be a stringy mess. I haven’t actually made more blocks yet, but by the time I am done this quilt, I think I will be very acquainted with working with a layer cake. My son Kolby has already laid claim to this quilt, so I better get cracking on it!

Happy Quilting!
Rachel

Posted on 2 Comments

Baby Girl Quilt

I have had very rare opportunities to make a quilt for a girl thus far. I only have a son, my sister only has a son, and all my friends have boys. So it came with great joy to hear that my sister would be having a baby girl in December. I cannot wait to make all kinds of girly things!! First up was a baby quilt.

IMG_0726

I hadn’t trimmed one side for this pic, but all I did was cut random strips of patterned fabric from one line and interspersed it with a pretty pink batik. Here’s a closer shot of the fabrics I used.

IMG_0728

It was very simple to make, but I think it came out so adorable!! This is my very first all pink quilt. Let’s hope the baby doesn’t surprise us and come out a boy though! Here’s the fabric I will be using for the back:

IMG_0736

I can’t wait to get this one quilted up. Next up for the baby girl, a tutu!

Happy Quilting!
Rachel

Posted on 7 Comments

Halloween & Stash Manicure

Today I have the honor of guest posting at Stash Manicure. I decided to post a tutorial for the raw edge applique that I used in my ‘Don’t Drink and Fly’ quilt.

IMG_0779

Be sure to check it out here.

If you are visiting me for the first time from Stash Manicure, welcome!

Today I would like to share some of my Halloween decorations in my home. Halloween is my favorite holiday, so much so that I even have some decorations that stay up year round.

Before I show you my decorations though, I want to show the second Halloween quilt I made this year. The quilt I showed for the tutorial at Stash Manicure was one of two Halloween quilts I have ever made. I have shown the second one here before, but I took a better picture of it.

IMG_0784

This Halloween quilt was not actually made by me. I collected the fabrics over a span of 2 years, and never actually made a quilt because I always felt it had to be perfect. When I joined a quilting bee, I decided to have the participants make blocks for me. Their ideas and blocks made for a way better quilt than I could have ever made for myself.

Okay, now on to my home decorations! One of my permanent Halloween displays is in my bedroom. A few years ago, I had a few Halloween signs that really didn’t have a good place to go in my home at Halloween time, so I decided to hang them in my bedroom permanently. The collection grew from there.

IMG_0045

As I find neat new signs, I add them to this wall. The shelves on this wall have some smaller pieces of our Halloween village as well.

IMG_0922

Every time I come in my bedroom, this wall makes me smile.

Another permanent display in our house is the area above our kitchen cabinets. This is hard to take pictures of, but I have a bunch of Halloween related knick-knacks up there.

IMG_0267

I also have a few large old horror movie posters framed and placed around the house, plus a Halloween embroidery I did framed and hung in our bedroom. These permanent Halloween displays make me happy year round.

Here is a shot of all of our non-permanent Halloween decorations right when we pulled them out of storage. Most of the stuff in here is for our Halloween village.

IMG_0245

We have quite an extensive Halloween village. The whole village cannot currently stay out year round simply because we do not have the room, though someday we hope we can have it out year round. For now we set up part of it on our dining room table and the other part on a side table we have.

IMG_0260

IMG_0261

IMG_0262

IMG_0263

IMG_0264

IMG_0258

IMG_0259

I also do a little outside display for Halloween. The two bigger pumpkins here are fresh from my mom’s garden.

IMG_0273

There are a few other little corners of Halloween in our house too that I don’t have pictures of right now. Our house is small and to be honest I don’t have a great home decorating eye. I would love to be able to transform our whole home into a spooky house, but we just don’t have the storage space for all the things that would require. So for now, we are happy to have our little corners of spooky.

I hope you enjoyed my mini Halloween tour, be sure to check out Stash Manicure for my applique tutorial today.

Happy Quilting!
Rachel

Posted on 1 Comment

Don’t Drink and Fly

While I was waiting for the new batting and thread for my long arm machine to arrive, I decided to give one of the patterns I had laying around a try. About six months ago, I discovered Eat Cake Graphics. Someone had made one of her patterns and posted it to the quilting forum I visit sometimes. I was smitten with all of the patterns but only picked up two for now. Here are the two I grabbed.

Fluffy Says Boo

Don’t Drink and Fly

They have sat around for a while because I couldn’t quite decide how I wanted to do my applique. My previous try at needle turn applique went well, but it was pretty time consuming. I don’t want these quilts to be heirlooms, I would like to be able to get them finished quickly. So a while back I bought some fusible webbing to try my hand at raw edge applique, but truth be told I was a little nervous to try it.

Finally last week I just jumped in and did it. It was actually a lot easier than I thought it would be. It’s not quite finished as I still have a little needlework to do, but here is a picture of it almost finished.

IMG_0339

I am not sure how I am going to finish the edges yet, I am probably going to wait until I am better on the longarm to attempt to it there, but I really like it so far. This one will probably get hung up somewhere in my house.

I still have Fluffy Says Boo to make, maybe when I do that one I will take some pics of my process. I just need to figure out which fabrics I want to use for the cats, it’s not as easy as it would seem!

Happy Quilting!
Rachel