Posted on 1 Comment

Iron on Transfer Paper — Light vs. Dark

There is a huge difference between iron on transfer paper for light shirts and iron on transfer for dark shirts. Today I am going to explain those differences. First of all, the paper you buy should clearly state on the front if it is for dark fabrics or light fabrics. You can see in these pictures this is in the top right corner.


The light paper comes 10 to a pack and the dark paper comes 5 to a pack, so bear that in mind when planning your projects.

The biggest difference between the two papers though is the paper for light fabrics is clear and the paper for dark fabrics is white. This will make all the difference in creating your shirt. When you are making shirts with any type of paper, it is important to trim the paper. Even the clear paper will leave behind a trace of the paper, so the closer you trim the better overall look you will have.

Since printers do not print white, you have to use the paper to create white on your projects. The paper for light fabrics is clear, so any parts of your design that are white will show up as the color of the shirt. When you have white sections in your designs and use this paper, it will be best to put it on a white shirt so your white parts stay white. Here is an example of this:


You can see the cream colored pins stay cream colored on this white shirt.

If you use the paper for light fabric with a design that has white/light parts on a color shirt, those white/light parts will be the color of the shirt. This is not wrong, just a different look then you might be going for. Here is an example of this:


You can see that the cream colored pins are now the grey color of the shirt.

The paper for dark fabrics is white. So the color of the shirt will not show through at all. But this is like printing to a white sheet of paper, so if you are unable to trim the design exactly you will have white around those parts. However, this is the only way to keep white sections of your design white on a color shirt. Here is an example of this:


You can see that the pins are white on this blue shirt, but there is also white around the lettering on this design. You just have to trim as best you can.

If you have a design with no white and black or dark colors only, you can use the clear paper to put it on a lighter colored shirt. This will give the illusion of floating text. Here is an example of that:


But remember this will not work with light colors in the design because the color of the shirt will over power it.

And a design that is easily trimmed out can be put on a color shirt with no problems using paper for dark fabrics. This will give you a very professional look. Here is an example:


Often if a design has text and someone wants to put it on a dark color shirt, I will suggest putting a border around the design. This will give an easy place to trim and I can put a little design inside the border so you don’t just have a stark white background from the paper for dark shirts. This is a great workaround for getting text on a darker shirt. Here is a mock-up example of this:


I hope this helps you choose which color shirt/type of paper you should be using in your projects! If you ever have any questions, please feel free to contact me and I am happy to help you decide what is best to use.

Happy crafting!
Rachel

Posted on

Tutorial for Black Text on a Color Shirt with Iron on Transfers

Using iron on transfer is very different than screen printing. You cannot always get the same look, but the cost savings of being able to do it yourself is great. Screen printing is not a DIY project, but with a little practice you can get a screen printed look even with iron on transfers. Today I am going to show you how to get black text on a color shirt with no white around the text. This method really only works for dark text and a shirt that is not too dark. If the color of the shirt is too close to the color of the text, then the text will not show up well at all. Keep that in mind when picking out a shirt color.

Materials
1 Shirt in a fun color
1 Sheet iron on transfer paper for White/Light shirts
Printer
Iron
Pillow case
Smooth, heat proof surface

Instructions

First you will want to print your design. Be sure the paper you are using is for light/white shirts. I have a lot of fun options available in my shop, Scrapendipity Designs. Here are a few that would work great with this tutorial!

If you do not see a design you like there, please feel free to contact me. I am always willing to do a custom order. The design I used for this tutorial is not for sale unfortunately. Remember to pick a design that is either all black or a very dark color, this method may not have the desired results if your design is too close in color to your shirt color. You will have to print a mirrored version of the design. All of the iron on designs in my shop include this in the file you receive.

Once the design is printed,

trim the design. Cut a shape that is close to the design, but you do not need to be exact here.

It’s more important to have a shape that doesn’t have a lot of corners as that will make it more difficult to pull the paper up later.

Pre-heat your iron to the cotton setting with no steam.

Per the instructions that come with the paper, you want to use a smooth, hard ironing surface that is NOT an ironing board. Place your pre-ironed pillowcase on this surface and then place your t-shirt on your pillowcase.

Iron your t-shirt so you have a nice smooth surface to work with.

Place your design on the shirt, being careful to place it exactly where you want it to show up on the shirt.

Using firm pressure, place the iron on each part of the design for 20 seconds lifting the iron completely to move it to the next spot. Once you do the whole design once, turn the iron in a different direction and repeat. This will prevent getting spots where the iron vents are and helps apply the design more firmly.

Once the design has cooled completely (about 2 minutes), pull the backing paper off of the design.

Your shirt is done! This method leaves a glossy version of the design behind. If there are spots that are whiteish, you can put the backing paper back on exactly and re-iron, just remember to let it cool completely to get that glossy look.

If you want more of a matte finish to the design, instead of pulling the design off when it is cool, you will want to pull it off while it is piping hot. You literally iron the design and pull the paper up immediately. If it cools at all, this method won’t work right. It’s scary at first, but works great! There will be a little ink left on the backing paper with this method.

You are left with a matte version of the image and I have found that I have no issues with washing when I use this method. The flash I used to take this picture makes the edges show up more than they do in real life, I promise!

That’s it! Please feel free to contact me directly if you have any questions about applying black text to a color shirt (rachel at scrapendipitydesigns dot com). This is a great way to get a screenprinted-like look for a fraction of the cost!

Happy ironing!
Rachel

Posted on 1 Comment

Scrappy Irish Chain Quilt Pattern (Tutorial)

I am not sure if this is considered a pattern or a tutorial, I guess it’s a pattern since it ends with a finished product, but I always feel like when I just blog about it, I should call it a tutorial! Either way, my post about my Scrappy Irish Chain quilt is one of the more popular ones on my blog. I get quite a few Google hits from people looking for this type of quilt. The Original Post does not have an actual tutorial on it, so I thought I would make one up. This gave me a good excuse to test out EQ7 and some pattern writing skills too! My hope is to make some actual patterns to sell using EQ7, but of course first I have to have good practice with it. So you get the benefit of all my practice patterns! Here is the original quilt I made:

I only had black fabric at the time, but I love how it looks and it’s very different from other Irish Chains I have seen. I really should take the time to get some new pictures of it, but for now, I will just teach you how to make your own!

*One side note, this tutorial will have solid borders, but mine has pieced borders. I couldn’t figure out how put that together in EQ7, so I just stuck with the solid borders. Someday I will figure out how to describe the pieced borders for you.

Tip: When you are making a new pattern, I would highly suggest making a test of each block first to be sure that the instructions are correct before you cut into all your fabric. Pattern writers try their best to make no mistakes, but no one is perfect and it’s best to find out there is a mistake when you have only cut a small amount of fabric than after you cut it all. This also gives you the chance to test the technique and understand how it works before you have to assemble the whole thing.

Materials Needed
Based on fabrics that are 42 inches wide

3 Yards background fabric
3 Yards scrappy fabric

Finished Quilt Size
56.5 inches x 79 inches

Directions
This quilt is made up of 2 blocks.


Block A


Block B

We will be putting these two blocks together to form the whole quilt.
 
 
Assembling Block A

We will be making 35 of these blocks. Cut 140, 2-inch squares from the background fabric. From various scraps cut, 735, 2-inch squares.

For one block, you will need 4 pieces of background fabric, and 21 pieces of scrap fabric.

Refer to the image above for the correct placement of the pieces. When sewing try to press the seams for each row all in one direction. Then alternate the direction for each row, this will make assembling the rows much easier. Here is a guide for sewing.

BF=Background fabric
SF=Scrap Fabric
> or < = Direction to press seams Row 1
SF > SF > BF > SF > SF

Row 2
SF < SF < SF < SF < SF Row 3
BF > SF > SF > SF > BF

Row 4
SF < SF < SF < SF < SF Row 5
SF > SF > BF > SF > SF
 
 
Now sew the 5 rows together, I find it easier to sew in pairs rather than just adding one row at a time. Here is my method:

Step 1: Sew together 1 + 2; 3 + 4
Step 2: Sew together 3&4 + 5
Step 3: Sew the last 2 sections together

You will have 35, 7.5 inch blocks when you are done.
 
 
Assembling Block B

We will be making 35 of these blocks. Cut 70, 2 x 5 inch rectangles and 35, 5 x 8 inch rectangles from background fabric. From various scraps, cut 140, 2 inch blocks.

For one block, you will need 4 pieces of scrappy fabric, 2, 2 x 5 pieces of background fabric, and 1, 5 x 8 piece of background fabric.

Refer to the image above for the correct placement of the pieces. To each end of the 2 x 5 rectangle, sew one scrappy square. You will make 70 of these pieces. Take two of these, and sew them to each side of the 5 x 8 rectangles.

You will have 35, 7.5 inch blocks when you are done.
 
 
Assembling the Quilt

To assemble the blocks, you will be alternating the blocks in each row. There will be 7 blocks in a row, with each row starting with the opposite block as the one above it. Please refer to the picture as a guide, but here is a placement guide as well.

A B A B A B A
B A B A B A B
A B A B A B A
B A B A B A B
A B A B A B A
B A B A B A B
A B A B A B A
B A B A B A B
A B A B A B A
B A B A B A B

Once each row is assembled, sew them all together. Once again, I like to sew the rows together in pairs. This will make assembly much easier than sewing one row on at a time. Be sure to match up the seams as you are sewing as well. My method of sewing these rows together is as follows:

Step 1: Sew together 1 + 2; 3 + 4; 5 + 6; 7 + 8; 9 + 10
Step 2: Sew together 1&2 + 3&4; 5&6 + 7&8
Step 3: Sew together 5&6&7&8 + 9&10
Step 4: Sew the last 2 sections together
 
 
Assembling the Borders
For the borders, cut 7, 2.5 inch strips from background fabric, selvedge to selvedge. This will give you 7 strips approximately 42 inches long. Trim the actual selvedge part from all the strips, squaring up the ends in the process.

Take two strips and sew them together end to end to form a strip that is about 84 inches long. Repeat. You will now have 2, 84 inch strips. Sew these strips to the left and right sides of the quilt. The strips will be larger than the quilt on the top and bottom. When pinning, be sure to leave a little extra on each side for easing in. Start pinning the borders on in the middle of the quilt and work your way out. Be careful not to stretch the blocks as you are pinning. Once the borders are sewn on, trim the ends so they are square with the top and bottom of the quilt.

Take one more strip and cut it in half, sew each half to another strip forming two strips that are about 63 inches long. Attach these to the top and bottom of the quilt in the same manner as above.
 
 
And your top is done! Now just use your preferred method of basting, quilting, and binding your quilt. Then take a step back and enjoy all your hard work!

If there are any questions about this tutorial or if I have made any mistakes, please feel free to let me know! I considered turning this into a PDF as well, if that would be useful to anyone, let me know in the comments and I will get on that.

Happy Quilting!
Rachel

Posted on 2 Comments

Quick, Easy, and Cuddly Quilt Finish

This has to be the absolute quickest finish I have had in a while. While we were at the local quilt store the other day, my son found this super soft nubby fabric. I know there is a good name for it, but I can’t think of it right now. It is usually used for the back of baby blankets, but my son just loved the feel of it. So I picked up a yard of it (it is 60 inches wide) and then 2 yards of fabric from the clearance rack as well.

This is a very simple quilt, no piecing. I pulled out one of my Puff battings, throw size I think, and laid it out flat. If your batting has a scrim side, be sure that side is face down.

Then layer the fabric for the top on the batting face up.

Then the last layer is the backing fabric. Place this one face down on all the layers.

Make sure everything is nice and stretched out and smooth. Be sure that your kitties are out of the room, or this might happen.

No worries though, kitty marks smooth out very easily. 🙂 🙂 If the edges of your top fabric are not straight, draw a line up each edge. This will be your sew line, so be sure it is at least 1/2 inch from the shortest edge of the fabric.

Pin through all three layers right along the line you drew. Pin all 4 sides, leaving an opening about 8 inches long or so on one side.

I started sewing this with my walking foot.

But found that my regular foot worked just as well. I didn’t do a very good job of spreading out my fabrics so I did get a bunch of tucks on the nubby fabric as I sewed (with both feet), but it really did not make a difference as because of the nap of the fabric you couldn’t see them at all.

Sew around all 4 sides leaving the 8 inch opening unsewn. Once you are done, clip the edges back to a 1/2 inch from the sew line, clip the corners a little closer, but do not cut through the stitching. Turn the quilt through the opening you left and push out the corners. Adjust everything so it lays flat. This is a weird photo, but you can see the corner turned out here.

Fold back the top and bottom fabrics a 1/2 inch and pin the opening closed.

Top stitch 1/4 inch from the edge all around 4 sides. You do not need to hand stitch the opening closed as this top stitching will close up the opening for you.

Once the top stitching is done, your quilt is finished and ready to be loved!

Sorry if this isn’t the most polished tutorial, I just tried my best to take pictures as I was making it, but didn’t really plan it our real well. LOL If you have any questions as you are trying it, be sure to ask! This is a very quick and simple quilt, I didn’t do any ties or quilting as I did not want to interfere with the softness of the nubby fabric.

Happy Quilting!
Rachel

Posted on

Boxy Stripes – Quilt Block Tutorial

I have been working on a new project and I thought I would post a tutorial here for everyone. I know I have been blog absent lately, but it was a very busy winter!! We are still homeschooling, but I also have a work from home job now. This is one of the things what led to me having to close down the shop unfortunately. As much as I would like to be able to do it all, it’s just not possible. I have some ideas in the works for other projects, but for now I am happy to just be quilting again!! You should be seeing me around these parts a lot more for a while. Hope that’s okay with everyone!!

I will explain a bit more about this project in another post, but I saw a lovely quilt from Red Pepper Quilts, and I knew I had to make it (that link will take you to the quilt). I didn’t see a tutorial on her blog for this, but it really is a rather old block anyway. I was able to figure it out pretty quickly. I decided to share my steps here so others may have as much fun as me!! Here is the block we will end up with today:

These blocks are not difficult per say, but they can be time consuming. There is a lot of fussy cutting and fussy placement involved to get everything to line up. You will see in my inspiration quilt, that she didn’t always care as much if everything was perfectly lined up, but I am a little bit of a perfectionist so I am going to try my best to get them to all line up just right!! My instructions are my perfectionist way of doing this block, but please feel free to adapt to your level of perfectionism/speed preference. I would not sit down and make 100 of these blocks in one sitting, I might go insane that way. My plan is to do a few at a time as I am doing other projects to break up the time spent and not feel like I am under a spell. 🙂

Please let me know if you have any questions after reading these, I just made them up real quick as I did one block, so I may have left something out.

Supplies
Starch
Striped Fabrics
Scissors
Ruler with a 45 degree line
Rotary Cutter
Sewing Machine
Iron

The first thing you want to do when making this block is to starch your fabric. I know many of you do not use starch, and I am sure these would turn out fine without it, but since we are working with bias edges, I prefer to starch my fabric so there is less pull.

Be sure that you iron the starch really well so the fabric is no longer wet. Wet fabric is floppy fabric and we do not want that here.

Before we get to cutting the fabric, be sure that you have a ruler with a 45 degree line. You can see in my picture that I have highlighted that line with ruler tape.

This is the line we will be using the most for these blocks, so make sure sure you are familiar with it!! 🙂

Now take your ruler and place the 45 degree line on the top of one of the stripes. Since the stripes are all the same size in this block, it makes it easier. I will place my 45 at the top of a red stripe for all 4 triangles. If the stripes were different widths, you would want to be sure to always place your line at the top of the same stripe in a new repeat every time. This way your triangle has the same stripes all the way down to the point.

The next part takes a little practice, but with a firm hand you can do it!! Run your rotary cutter up the ruler to just past that 45 degree line. The right side will be easier, the left side takes practice. I use my right hand and just be sure my rotary cutter is against the ruler. It’s awkward, but it works. Your triangle should pull away easily.

You can see in that pic, that my 45 degree line is not the top stripe on that piece, so what I do is mark with an arrow which stripe is my top stripe and then I cut it later. I will use a rotary cutter or scissors, whichever get me a more precise cut. (For this particular block I used scissors).

Then you just move your ruler down the fabric to the next line that has no cuts in it and repeat. Since you are farther down the fabric, you won’t be able to just run your rotary cutter right off the fabric, so just mark your top line and cut your triangle out with scissors now.

This is what your fabric looks like when 2 triangles are cut.

On this fabric I was only able to fit 3 triangles top to bottom, so I moved next to the first triangle I cut. Since my stripes are all the same, I was able to flip my ruler to save fabric, but if my stripes were not all the same, I would not be able to do this.

Now you have your 4 triangles cut.

You may notice that your stripes are not exactly even (you can tell by the center points).

But that is okay, so long as they are pretty close, we are going to do some more fiddling to get them just right.

For this block, it’s best if you don’t use a quarter inch foot that has the guard. There may be time where some of your fabric goes over that quarter inch, and you don’t want anything to get caught up. I use my regular old foot and I have a good visual on what is roughly a quarter inch from the top of the foot. You do not need an exact quarter inch for this block as we will be trimming to size at the end anyway.

Place two of the triangles right sides together.

Take one side and push the fabric back or forth until the stripes line up precisely.

This will cause a slight gap/overlap on the opposite side, but that is okay. This will be on the outside of the block and will get trimmed away when you square up the block. (This pic shows the other side, the side you are going to sew on should be flush)

Pin your block on the edge where you lined up the stripes. Be sure not to pin with the stripe, your pins won’t be straight that way!! I do this all the time, so if you find you do, just move them. LOL

Sew the triangles together.

Do the same for the other two triangles and go ahead and chain stitch (run them through the machine without cutting the thread).

Once they are both sewn, lay them on your ironing board facing the exact same way.

Iron the seams to set them.

Then iron the block open with the seams to one side. I personally would not iron the seams open rather than to one side at this point as it will make your life easier to have those interlocking seams at the next step.

Iron the next side open the same way.

Now you have both sides open.

Place these two right sides together.

You will see that your seams nest together, make sure they are right up against each other.

Now here comes the fiddly part. Once again we want to be sure our stripes line up. This may mean that your top edge is slightly off set. You will always keep the middle seam nestled, but slide the top block up and down along that “spine” slightly until your stripes are all lined up. You can see in this image that my blocks are offset by less than 1/8 inch, but my stripes all line up.

Pin again, and sew. You will sew a quarter inch from the shortest edge, which is why it’s good to have a visual on the top of your foot for where that quarter inch is. Remember though if you are off a bit on your quarter inch, that is perfectly fine, they will be squared up at the end.

Set your seam with an iron.

This seam can be ironed open or to one side, I always do one side anyway, but it won’t make a difference at this point.

Now stand back and enjoy your handy work.

See how those lovely stripes line up?

Square up your blocks utilizing the 45 degree line on a ruler. (No pics of this sorry!)

I hope this tutorial is useful to someone. If there are any questions, do not hesitate to ask!!

Cheers!
Rachel

Posted on 3 Comments

Raw Edge Applique Tutorial

This was written for Stash Manicure, but I wanted to share it here as well. I hope you enjoy!

Those that visit my blog know that Halloween is my absolute favorite holiday. In fact I have Halloween decorations up year round! The funny thing is, I never actually made myself a Halloween quilt. I have been collecting Halloween fabric for 2 years, but because it is my favorite holiday, I always felt it had to be the perfect quilt. This year I decided to change that and I ended up making two Halloween quilts. One of them is an applique quilt called ‘Don’t Drink and Fly’.

Applique gives you a great opportunity to use up all those scraps you have hanging around. I am a lover of scraps. Many of my scraps come from other people, for which I am very grateful. I prefer to work with other people’s scraps as it gives me a larger variety of scraps than I could ever come up with on my own. Not too long ago, I organized my scraps by color.

IMG_0755

I have considered mixing up the color and organizing them by size, but since doing applique, I have found the color method to be the best one. You can see that I am a little slim on some colors, I am always on the hunt for a new set of scraps to refill my buckets!

The ‘Don’t Drink and Fly’ pattern is from Eat Cake Graphics and is available in my shop here.

If you have never seen their quilt patterns before, be sure to check them out. They are so much fun!

When I received this pattern, I had never done applique before. I tested a few different methods, and found most of them to be too time consuming for me. I finally decided to use raw edge applique for this quilt. The pattern calls for needle turn applique, so I had to be careful about getting everything facing the right direction when I made the quilt with raw edge. Today I am going to give you a quick tutorial on how I did raw edge applique for this quilt top. Since my quilt top is already done and I didn’t take any process pictures with it, I will be making a small wall hanging instead.

Tools
Steam a Seam Lite 2

IMG_0761

Sharp scissors
Light box or Sunny Window
Iron
Pencil

Fabric requirements
All fabric can be found in your stash! That’s what is great about applique, the pieces are small, and you can easily use scraps you have hanging around. When I am done the tutorial I will show my completed quilt top and the one from the pattern, you will see that I changed a lot of the colors to fit the scraps I had on hand. I was also able to find a large piece of fabric I could use for the background, again a bit different from the pattern, but it works and it got that fabric out of my stash!

Step One
The first thing you want to do is prepare your background. My wall hanging will have a solid background and a border. I chose two fabrics from my stash for this.

IMG_0751

You want to iron your background fabric really good, I prefer to use starch, but it is not necessary. Having an unwrinkled background will make laying out your pieces much easier.

Step Two
Once your background is pressed you want to trace the basic layout of the pattern to the background fabric. When I did my original quilt I just taped the pattern right side up to my window, but you could also use a light box if you have one.

IMG_0756

Next tape your ironed background fabric over the pattern, face up. Be sure to center everything right where you want it to go. For my wall hanging I am only doing a small portion of the pattern, but for a full quilt design, you will want to trace everything now to ensure that it is all centered properly.

IMG_0757

Trace your pattern to the front of your background fabric using pencil. You only need to trace enough lines to get an idea for placement of your pieces. Remember, some of the smaller detail parts will be on top of other pieces, so a placement line on the background would not help much.

IMG_0758

Step Three
Next we want to get our pattern traced onto the Steam a Seam Lite 2. With Steam a Seam, the material gets ironed to the wrong side of the fabric, because of this we need to reverse the pattern before we draw our lines on the Steam a Seam. If we do not, we will end up with a mirror image of our pattern and nothing will fit with the background lines we just drew.

The first thing I do is turn over my pattern taped to the window. Now the pattern is taped with the back facing out. This gets me my reverse image I need to trace.

IMG_0759

Now you can just trace each piece of your pattern on to the Steam a Seam. For the edges that are supposed to look like the are under another piece, draw a dotted line on that edge. For all the edges that are supposed to look like they are on top, draw a solid line. When placing the pieces on the Steam a Seam, you want to leave about a 1/4 inch next to any dotted lines, you do not need to leave much space next to solid lines.

IMG_0762

IMG_0764

Step Four
Now that you have your pieces traced, you want to pull scraps for each piece.

IMG_0766

Iron all your pieces nice and flat (again I personally use starch). Then rough cut each pattern piece out from the Steam a Seam Lite. I do not cut on the lines yet, leave a little edge around the whole thing, and a little more than 1/4 inch next to the dotted lines.

IMG_0767

Now peel the paper that does not have your pattern on it from the Steam a Seam Lite and iron it to the wrong side of your chosen scraps according to the package instructions.

IMG_0768

Step Five
Now that your pattern pieces are ironed to the back side of your fabric, you want to cut them out. When cutting, you want to cut directly on the solid lines, and you want to leave about a 1/4 inch edge on the dotted lines. This will help you tuck these pieces under other ones.

IMG_0770

Here’s a close up of one of the pieces so you can see the extra bits next to the dotted lines.

IMG_0772

Step Six
Now we need to get our pieces on to our background fabric. Lay out your background fabric, find each piece and peel off the paper from the Steam a Seam Lite, and place the piece on the background.

Do not iron it on yet.

IMG_0773

The Steam a Seam has a little tack to it, so your pieces will not slide around. Place each piece on according to your drawn guide. Keep in mind pieces that should be over and under each other, and remember that you have a little bit extra on the pieces that should be under something else, so those edges will not line up with your guide exactly. Use your pattern as a visual while you are doing this. Since the pieces are not ironed on yet, you can move the pieces around, or trim a few things, until you get the look you want.

IMG_0775

Step Seven
Once all your pieces are in place as you like them, iron everything down. Remember you cannot undo this! So be sure everything is as you want it before you iron.

Now you can add your borders and finish your top as you would like.

IMG_0778

I hope this tutorial helps you do a raw edge applique quilt. This type of applique is very quick and easy. Once you have your top complete, you can sew around the edges of each piece with invisible thread or like colored thread to tack everything down. I have not done this yet on my quilt.

Here is a picture of the ‘Don’t Drink and Fly’ quilt from the pattern:

And here is my version of this quilt:

IMG_0779

I have not done all the details on this yet, but you can see that many of my fabric choices are different from the pattern. This is because I wanted to use the scraps I had on hand. I did not have to buy a single piece of fabric to make this top! Applique is a great way to trim down your stash, I hope you will give it a try.

If you are looking for more applique patterns, I sell my own at my Etsy shop, Scrapendipity Designs.

Happy Quilting!
Rachel

Posted on 5 Comments

Paper Piecing with Freezer Paper

Today I am going to talk about a little known form of paper piecing. I do not claim to be the originator of this method in any way, shape, or form. I first saw the method demonstrated on the Twiddletails website when I jumped into her Geese in the Forest paper piecing quilt pattern. I have shown my progress on this quilt here before, but I am enamored with this quilt.

I am not sure if she is the originator of this paper piecing method, but this is how I do all of my paper piecing now. Even my Dear Jane blocks get done in this method. I love it!! I am going to do a tutorial for you today. My method is slightly different from the tutorial I saw on Twiddletails. I hope you like it enough to give it a try as it’s really not that hard, and you will discover so many benefits over the traditional way of paper piecing (which I will point out as we go).

Before you get started, you need freezer paper. You can find this at the grocery store in rolls. That is what I used when I started, but then I discovered this stuff:

This is freezer paper that is cut into sheets that fit in your printer. In my tutorial I used the rolls because I didn’t have any of this on hand when I was taking the pictures (a few months ago actually). But let me tell you, this pre-cut stuff is well worth the slightly added cost. Trying to tame the curled paper to fit in your printer is no treat. We do have this in the store of course, C. Jenkins Freezer Paper, and it is 10% off retail right now.

Once you have your freezer paper, you will want to print your pattern right on there. Be sure to print on the papery side, not the shiny side. Any ink-jet printer will work (laser printers will work too, just use Google to find directions), as the papery side is just like normal paper. If your block is directional, please remember that your block will be a mirror image of what is printed, so if the pattern has not already done it for you, you may need to use an image software to flip your design before printing. Once printed, cut the pattern out on the seam line. Follow your pattern instructions to determine where else to cut, you are not cutting out each individual piece, just the blocks that will be paper pieced together.

Now I pick out my pieces of fabric for the block, I usually rough cut the shapes of each piece leaving a generous seam allowance.

You can see that I have cut down the line in the middle of the block. This is specified in the instructions for the block. Some blocks will have no extra cuts, some will have a few, just be sure to follow your pattern.

In these pics you can see that I have hand written numbers on the pieces. This corresponds to the fabric I will use. You certainly don’t have to do this part, but it does make it a lot easier to keep everything in line while you are piecing. The printed numbers are for the actual paper piecing, they will tell us what order to sew in.

Take your fabric piece number one, and lay it right side down under spot number one. The wrong side of the fabric should be touching the freezer paper. Make sure to leave at least a 1/4 inch around all the sides. Iron the freezer paper to the fabric. Try to only iron in the number one spot, it will make doing the rest of the block so much easier.

Fold along the line between the number one and number two spot. You should be able to see your lines easily through the back of the freezer paper.

Pick your fabric piece number two up.

This part is where we come across one of the benefits of this method of paper piecing over traditional paper piecing. With regular paper piecing, you have to place the piece of fabric on the opposite side of where it is going end up, so it is kind of a guess as to the size of the piece of fabric you need, especially with something like triangles. This can be such a waste of fabric in the long run. With this method, the piece you are filling is folded back to the right spot, so you can hold your piece up to the light and line it up perfectly. This allows you to cut pieces that are close to the correct shape and waste less fabric.

Place piece number two behind piece number one with right sides together. You can see where piece number two is folded in front, and the fabric itself is placed perfectly to fit it. We will be sewing along the folded edge of the freezer paper.

You can start sewing at the beginning of the fabric, and sew right along the edge of the folded edge of the freezer paper (do not sew through the freezer paper, just right next to it).

This is where we have another benefit of this method over traditional paper piecing. You do not have to stop when you reach a line. Since we are not sewing through the freezer paper and are folding the freezer paper back, there is nothing in the way of our sewing. You start at the beginning of the two pieces and sew all the way to the ends of the fabric, you don’t have to stop at the end of the freezer paper, just continue the straight line off the fabric.

Because you are going to the end of the fabric, you can actually chain piece these blocks, you can see here I went to the end of my first piece and then slid my second one under the needle behind it.

This makes the blocks go much faster and is much easier than the “stopping at a certain line” method of traditional paper piecing.

Once your line is sewn, you want to trim for your quarter inch seam. Just line the quarter inch line of your ruler up on the seam (folded edge of the freezer paper) and trim to a quarter inch.

Unfold the freezer paper and fold the fabric for piece number two back into place. Iron the piece to the freezer paper, making sure to iron only in spots number one and two.

Next fold along the line between spot number one and three, and repeat all of the above steps. Continue on in this way for each spot.

If you have multiple pieces for the block, you will need to join them together now.

First trim around all the block edges, lining the quarter inch line of your ruler up to the edge of the freezer paper. Trim your quarter inch seam.

Now lay the two pieces right sides together, if you trimmed properly, you should be able to line the top and bottom of the pieces up and have accurate results. Pin the pieces together in the seam allowance.

Sew right along the edge of the freezer paper. If everything was lined up right, you should also be sewing along the edge of the freezer paper on the bottom.

Open up the block and iron the seam. I ironed this one open since there is a lot of bulk.

Turn your block over and admire your work.

The freezer paper on the back can now be peeled off. This is another added benefit to this method. With the traditional paper piecing, the stitches are sewn right through the paper, which can make getting the paper off hard and possibly stretch the block. With this method, there is nothing sewn through the paper so the freezer paper will peel right off of the back without distorting your block.

You may want to use Google to find a simple, free pattern for paper piecing. Any block that can be done with traditional paper piecing can be done with this method. I find this method to be so much easier than the traditional method and I think, once you try it, you will too.

Happy Quilting!
Rachel

Posted on 10 Comments

Binding Tutorial

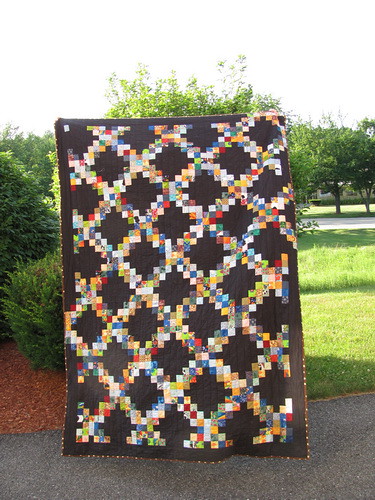
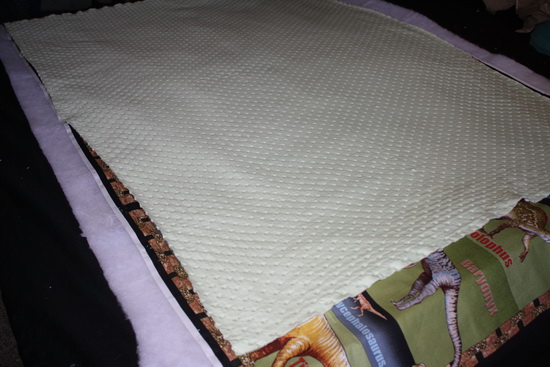
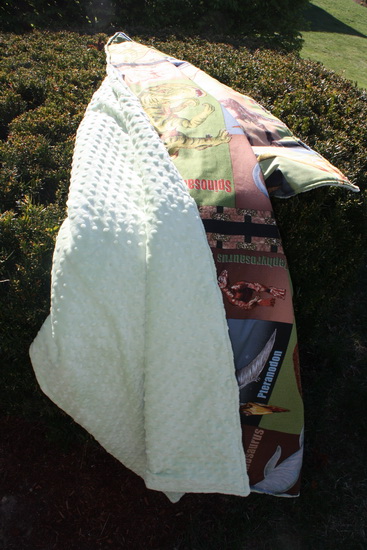
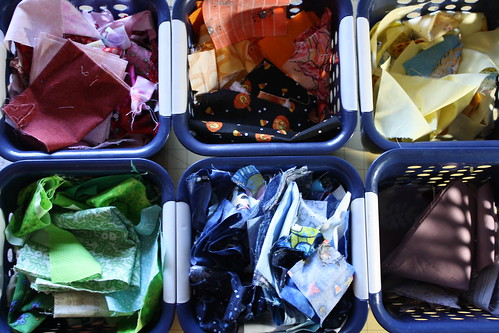
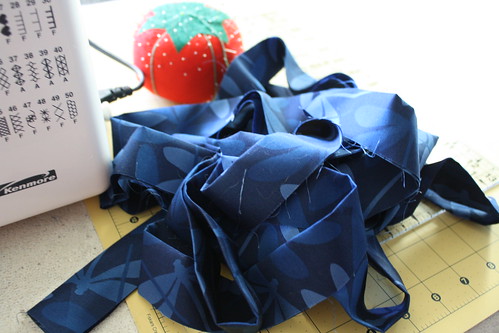
I was recently finishing up a quilt, and I took some pictures so I could give you a tutorial on how I bind a quilt. The method I use was picked up from a couple different places around the web. I have combined them to come up with what I think is the easiest way to do a straight grain, double fold binding. I do not in anyway claim this method as an original idea at all, I am only showing you how I do it!

The first thing you need to determine is how long your binding should be. Measure your quilt on all four sides. Add those numbers together and then add another foot to that. This number will be the minimum length you need for binding, the extra 12 inches allows for seaming your strips and a little room at the end for the final seam.

The quilt I am working on today was 41×42, so I need to add all four sides plus my extra foot as follows:

41 + 41 + 42 + 42 = 166

166 + 12 = 178

So I need a minimum binding strip of 178 inches long.

If I am cutting my strips from an uncut piece of fabric, I will estimate that I have 40 usable inches of fabric from selvedge to selvedge. So I take my minimum binding amount and divide it by 40 then round up to the next whole number to get the total number of strips I need for my binding. If your fabric is shorter or longer than 40 inches from selvedge to slevedge just replace 40 with that number in this calculation. If you are using random lengths of fabric for your binding, just make sure you have a strip long enough to meet your minimum number.

178 / 40 = 4.45

Rounded up 4.45 = 5

So I will need to cut 5 strips that are 40 inches long to get the length I need for my binding.

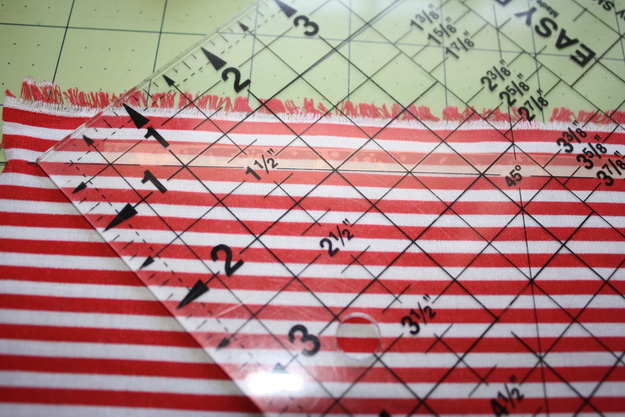
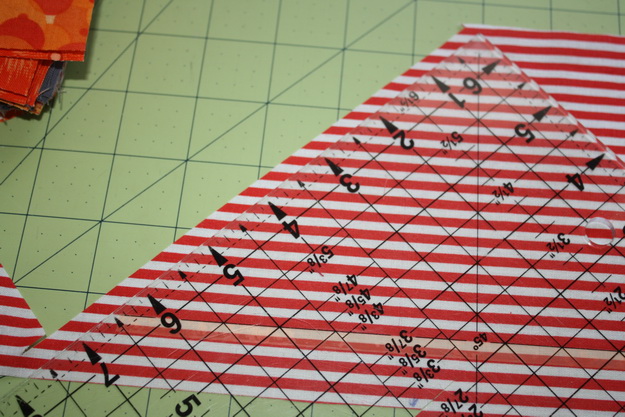
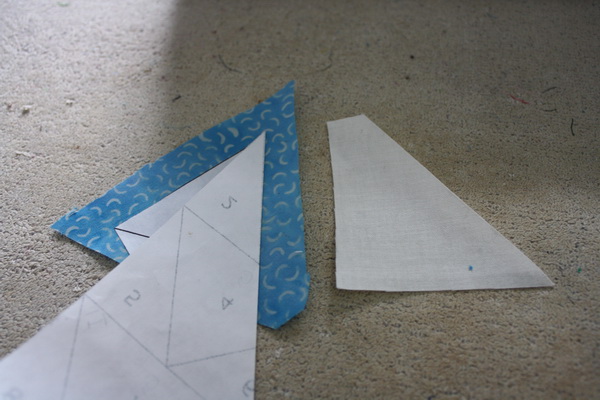
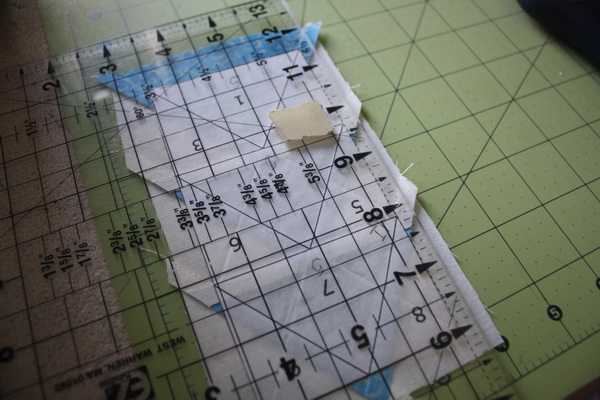
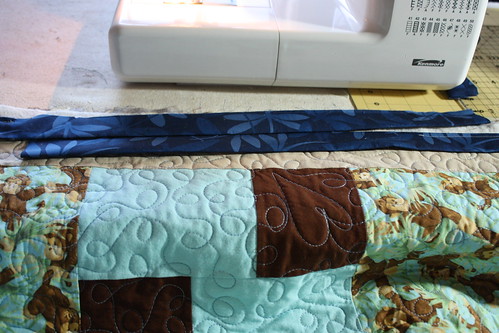
Now we need to actually cut our binding strips. I cut all my binding strips to 2.25. For this quilt I will cut 5 strips from selvedge to selvedge at a width of 2.25. (Oh and I just noticed that my ruler is actually placed at 2.75, not 2.25 …. I was wondering why my binding was so wide!! Make sure you do it right and cut at 2.25, unless you want a really wide binding like I have now!)
IMG_0510

IMG_0511

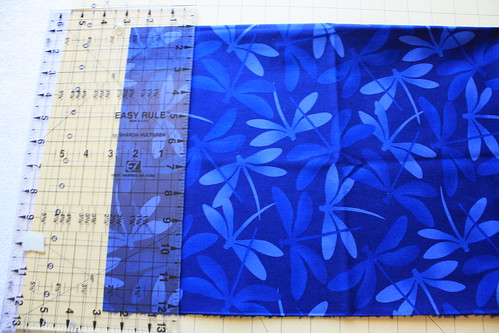
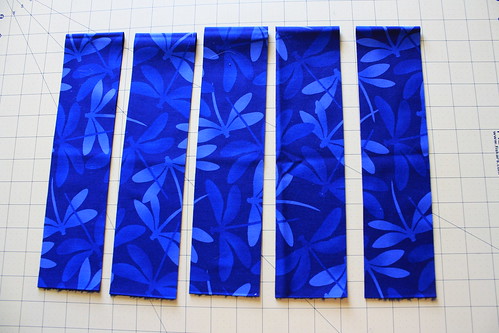
Once my strips are cut I trim all the selvedges off the ends and make sure the ends are square. I do not bother to shorten one of my lengths so I only have 178 inches of binding, I will just use the full 5 strips and trim the extra at the end. This is easier and I don’t have to ever worry about having a binding that is too short.
IMG_0512

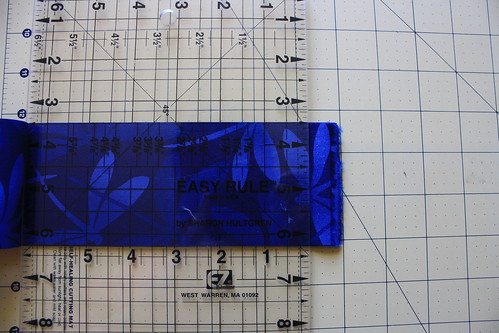
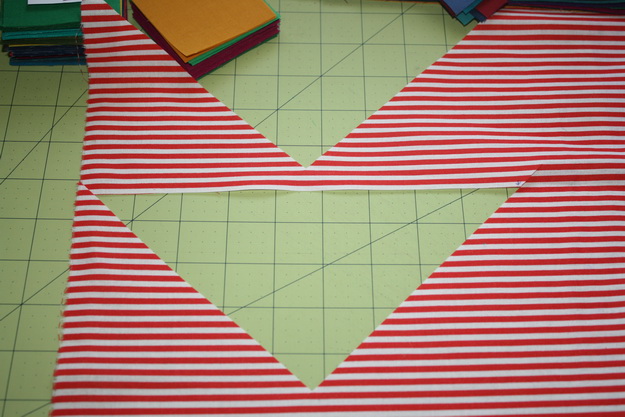
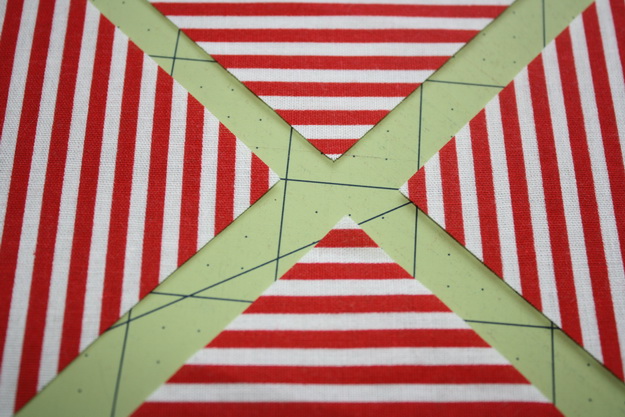
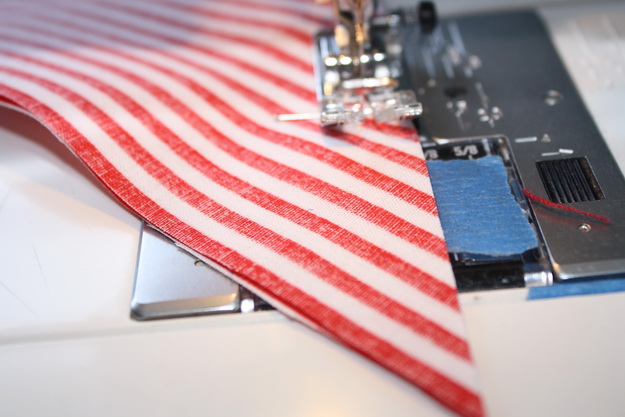
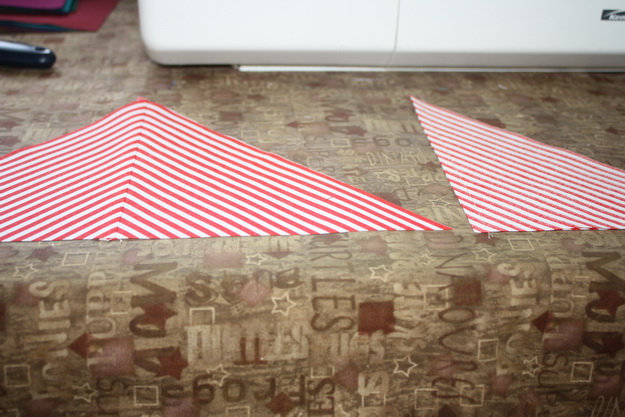
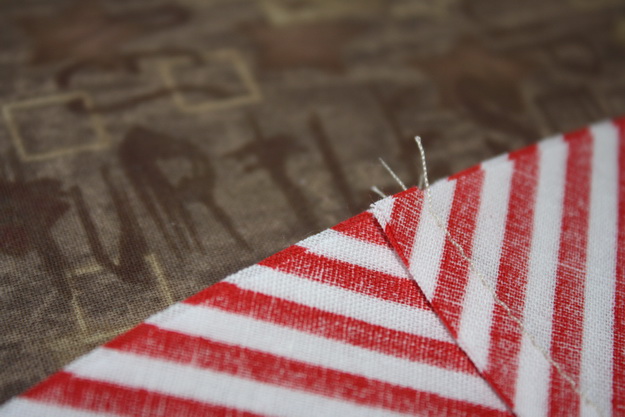
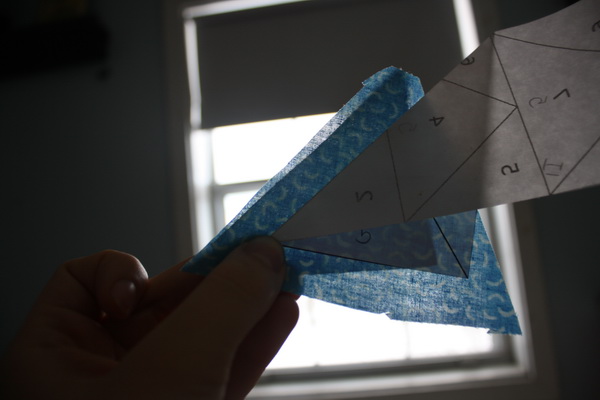
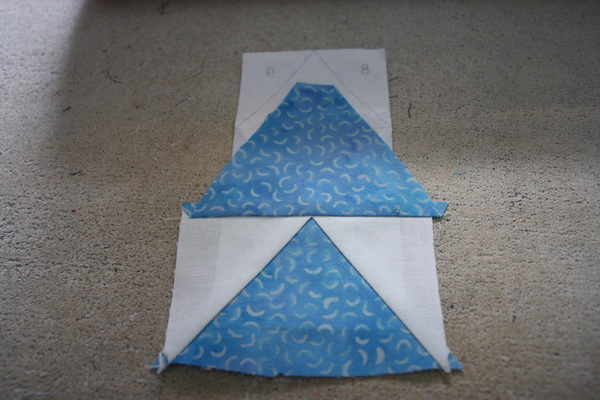
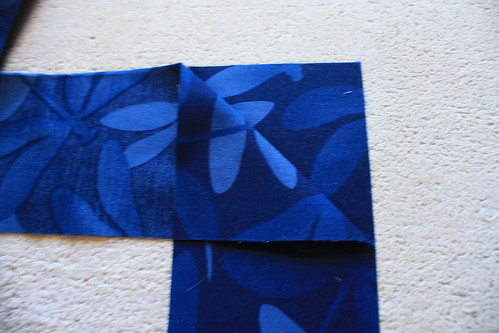
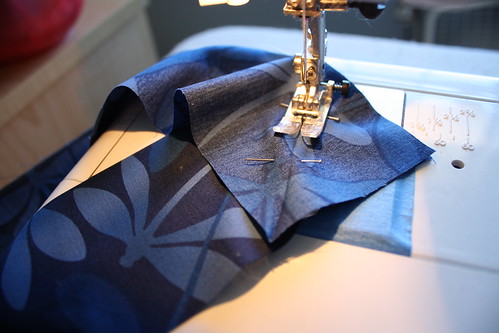
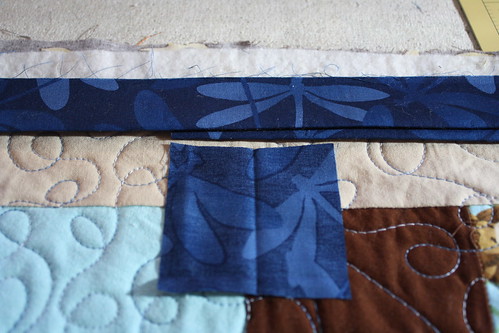
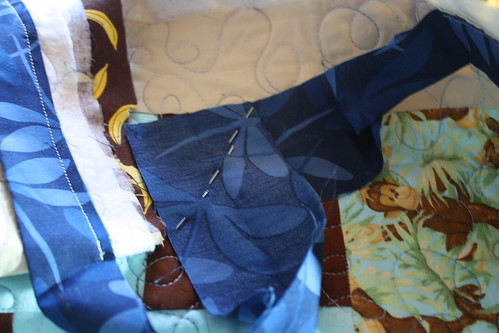
Next I join my strips at an angle. I do not do a straight join because I find that looks pretty bulky when the quilt is finished. When joining binding this way it is important to be sure you are sewing in the right direction. First I lay one end of a binding strip face up, then I place another on top face down to make a corner.
IMG_0513

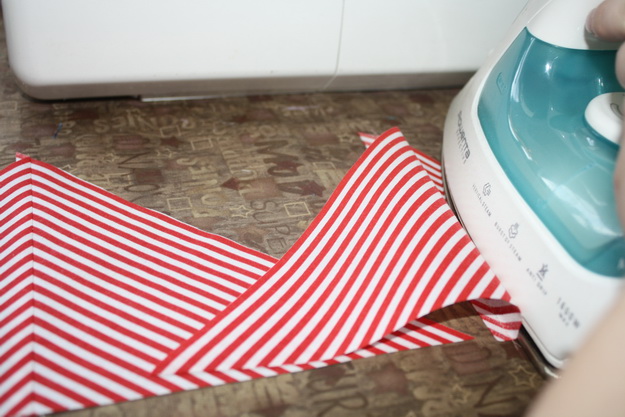
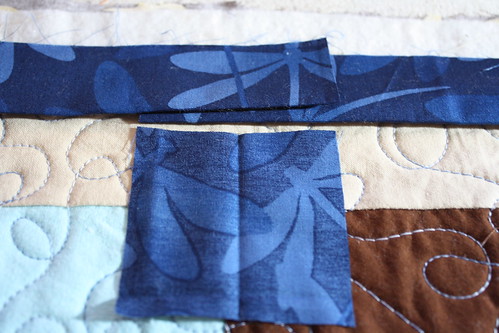
We are going to press our sew line. Take corner of the top strip that is on the outside of the square you have formed and fold it to the inside corner as shown in the picture.
IMG_0515

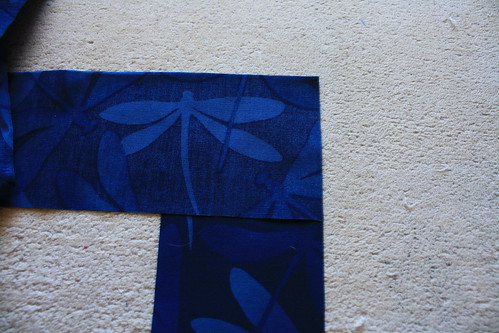
I always test to be sure it’s folded right by lifting up my strip to see if I get a nice looking binding. I have sewn this line the wrong way once and didn’t realize till my ears were all cut. So be sure to do a quick check.
IMG_0514

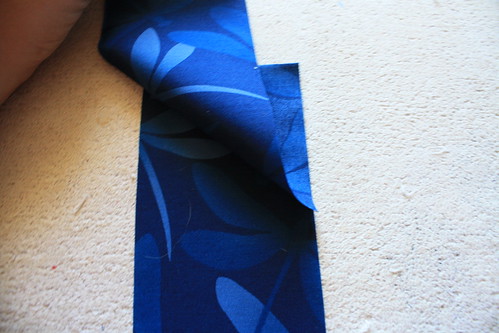
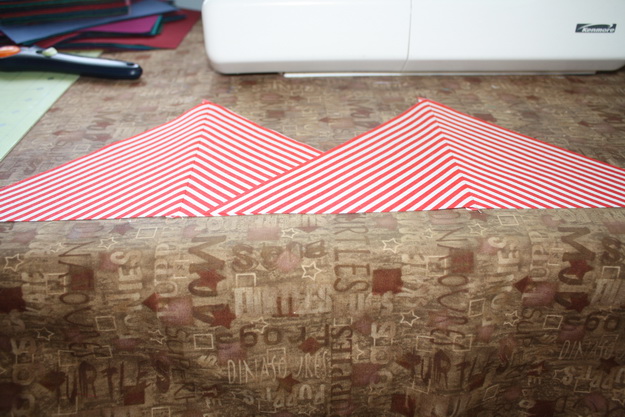
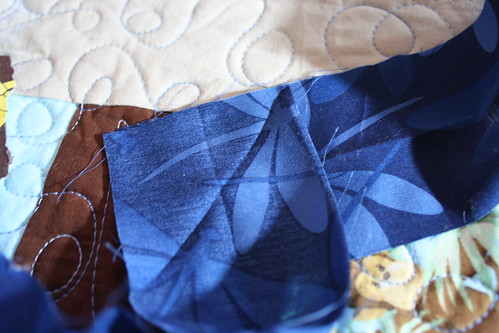
Once you know you have your fold right, iron the seam line down. Now take all five strips and lay them on your ironing board all face up. We are going to iron all the seam lines now. Just fold the corners in the exact same way as you did the first strip and iron. So each strip should have a folded end and a non-folded end.
IMG_0516

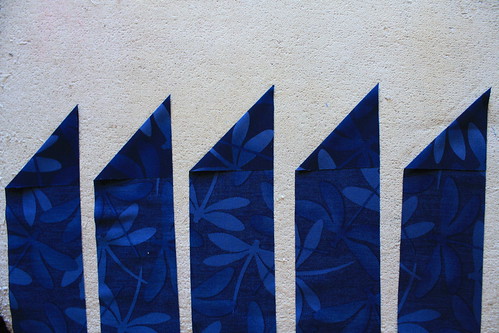
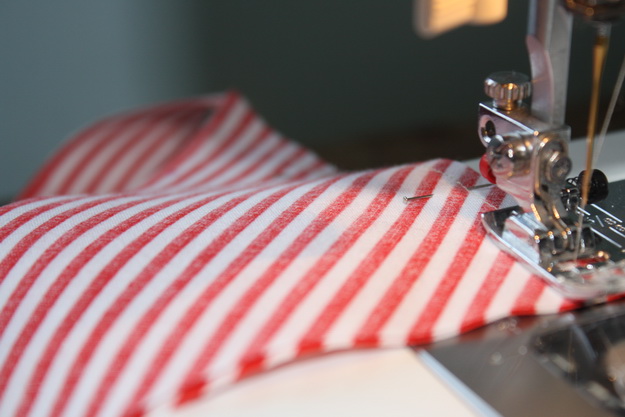
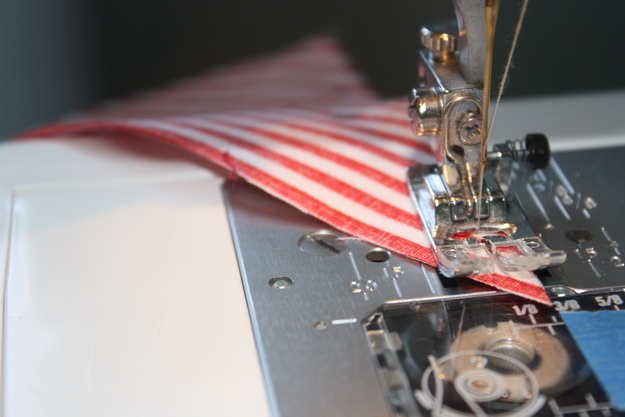
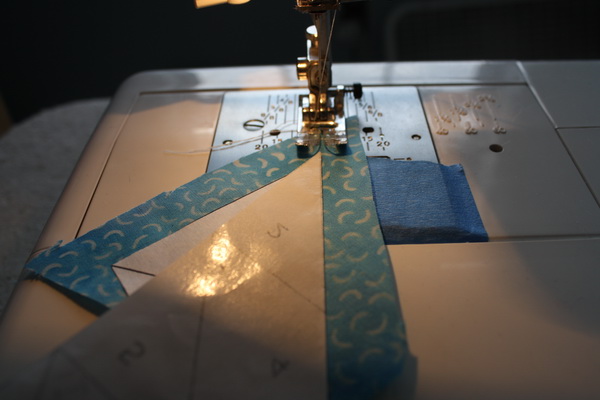
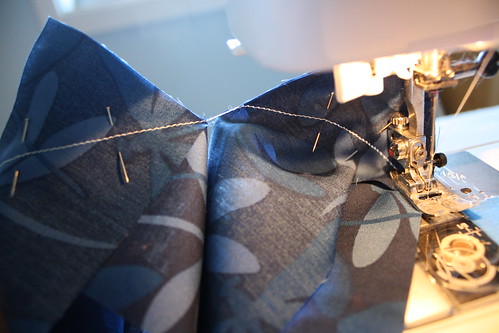
Now we are ready to sew! Imagine that your strips above are numbered 1 to 5. Take strip number 2 and place the end of the strip that does not have a fold on it face up, then take strip number 1 and place the end with a fold face down on the strip in the same direction as when we made the first fold above. (Lift it up to double check one more time). Put two pins across the seam line.
IMG_0517

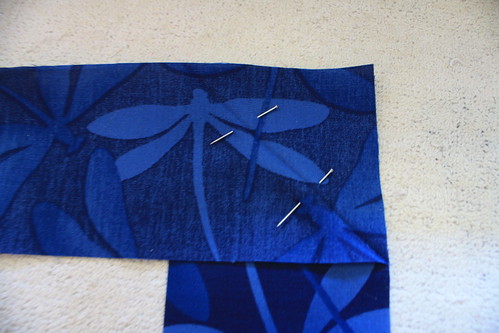
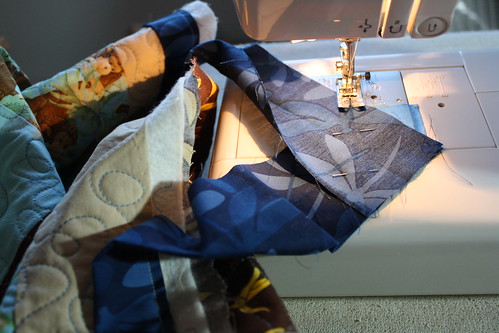
Now sew from corner to corner following the seam line you pressed.
IMG_0519

Do not break thread, go to the end of the triangle and stop.

This next part is a bit tricky, but I know you can do it! Remember right now you have 2 strips under your pressure foot. Strip 1 is face down on top, and strip 2 is face up on bottom.

Now take strip number 3 and place the end with no fold line face up. Grab the folded end of strip number 2, and place it face down on top of strip number 3, quickly check that you have the direction right and place two pins.
IMG_0517

Sew this corner right after your first one without breaking thread, you can see how my corners are connected to each other now. This will be cut free when I am done.
IMG_0520

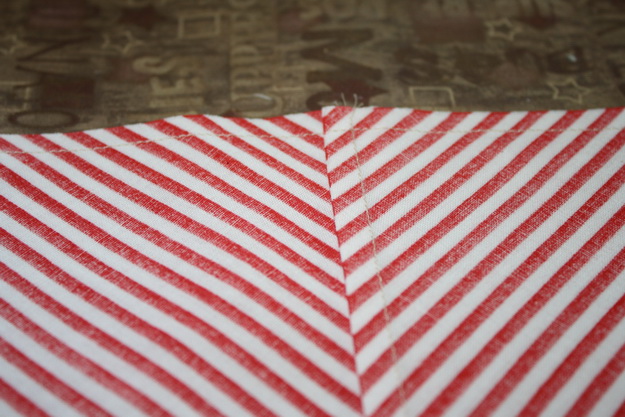
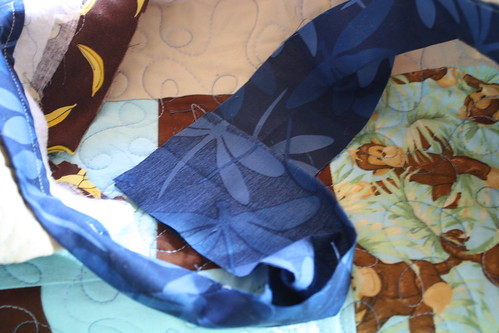
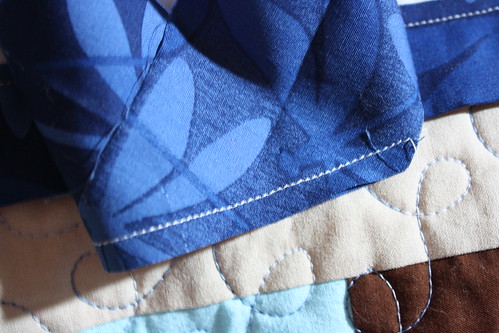
Continue on in this same way, grabbing the folded end of the previous strip under your pressure foot and an unfolded end of a new strip until you use up all your strips. Your strips will be looped, but that will be undone once you clip the connecting threads.
IMG_0521

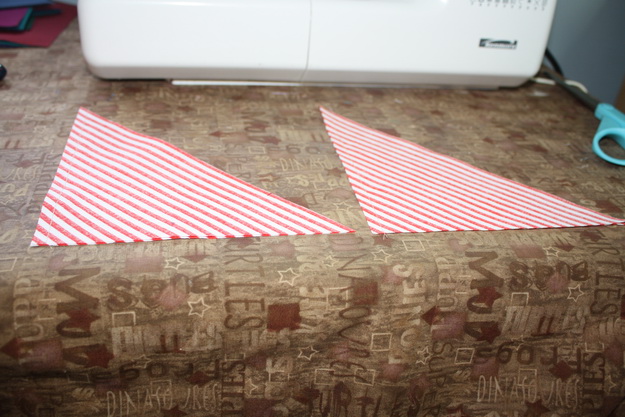
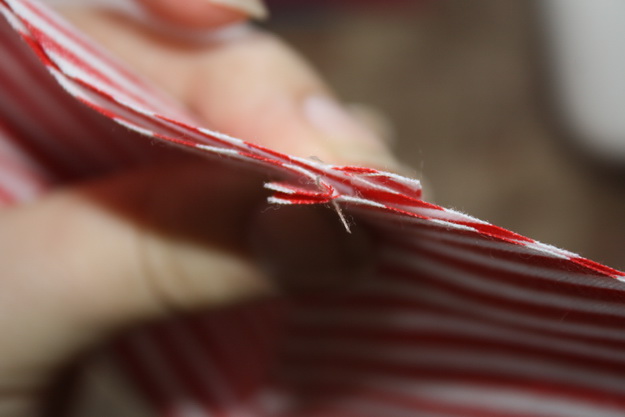
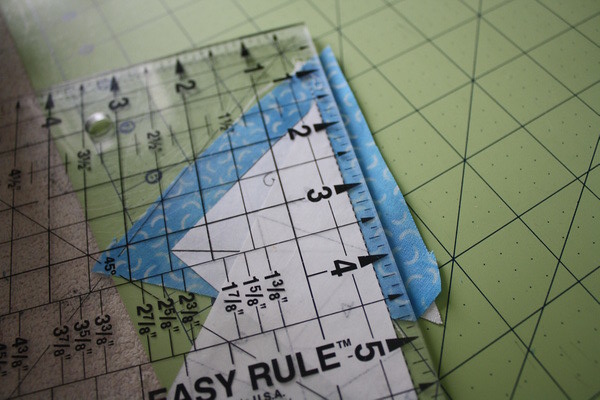
Now you can cut the connecting threads between the triangles and you should have one long strip. Before you cut the excess off your triangles, be sure to open up your seams and check one more time that everything opens up correctly and that you have one long continuous strip. Once the corners are cut it will be harder to adjust anything without a lot of trimming. (Ask me how I know this!) Once you know you have sewn correctly, cut your excess corners off leaving a 1/4 inch seam allowance.
IMG_0522

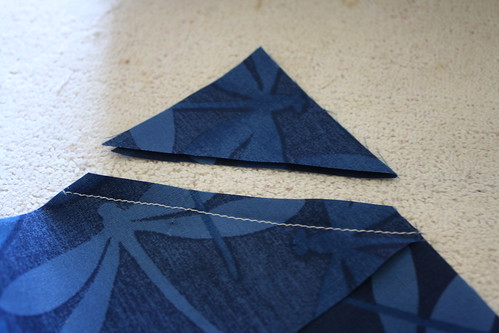
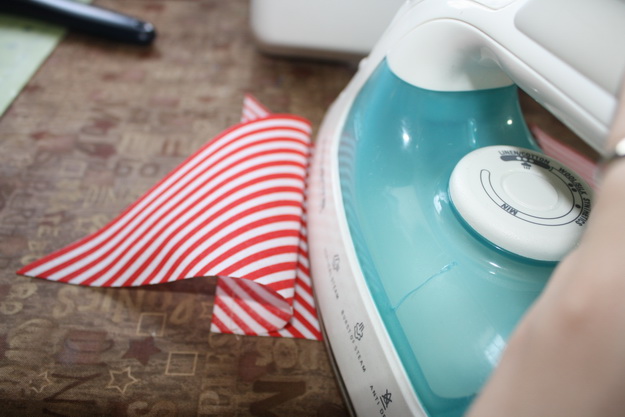
Iron your seams open and you should now have one long binding strip with nice angled seams.
IMG_0523

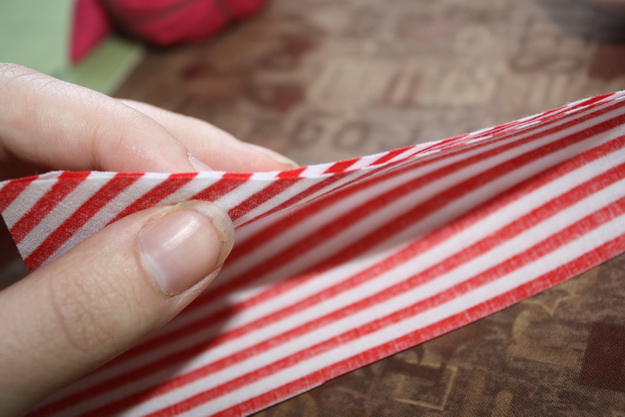
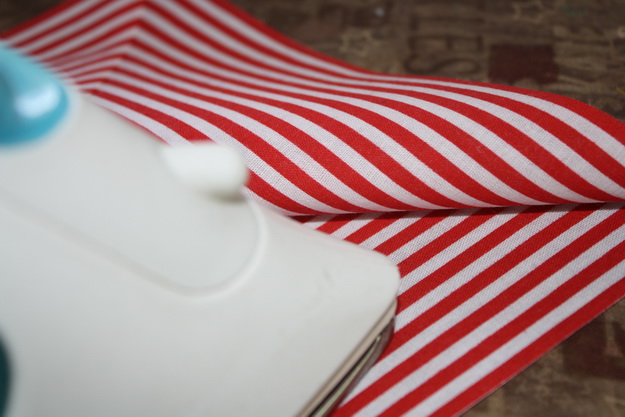
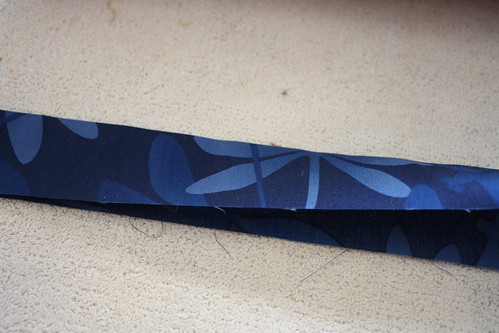
Fold your strip in half, wrong sides together and iron the fold.
IMG_0524

Make a nice pile of your folded binding and step back for a second and enjoy!
IMG_0526

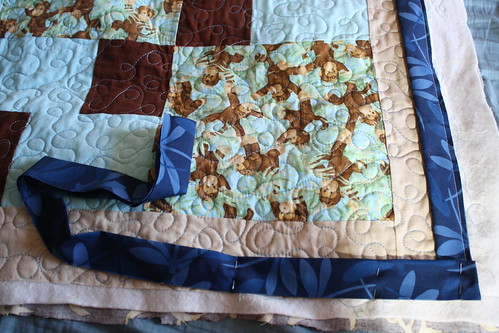
Now we are ready to attach your binding!

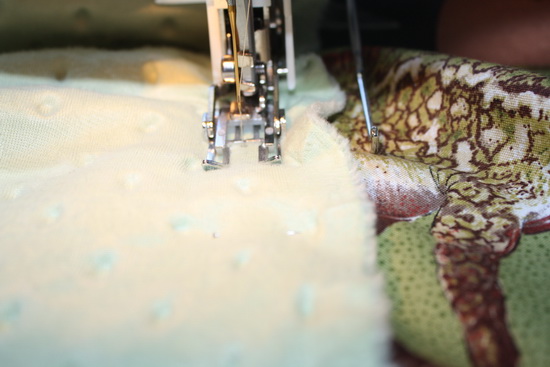
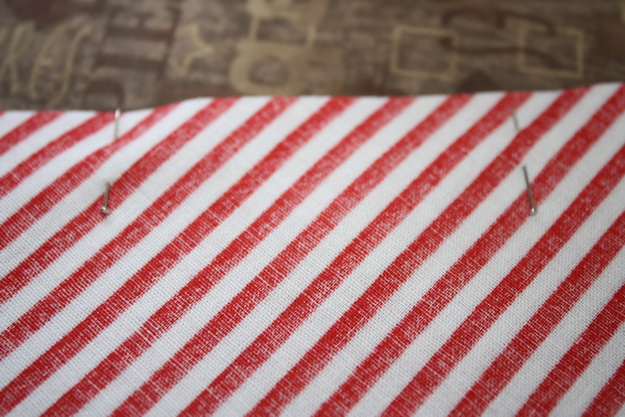
Start your binding in the middle of one side, you will want to leave at least a 5-6 inch tail, I will start my sewing where the pin is in the picture, so you can see a good size tail there. This will help us make a nice finished end once we have all our binding on. The binding should be put on so that the raw edge of the binding is against the edge of your quilt.
IMG_0527

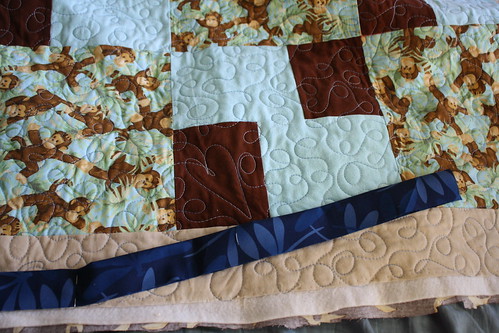
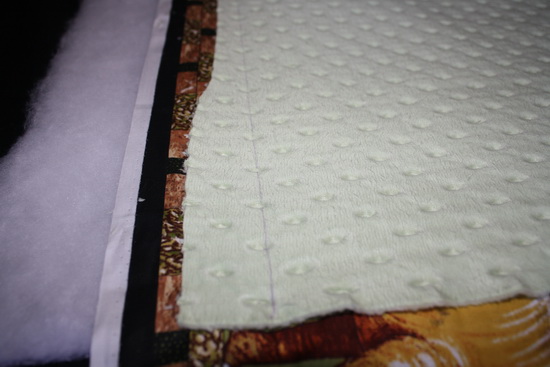
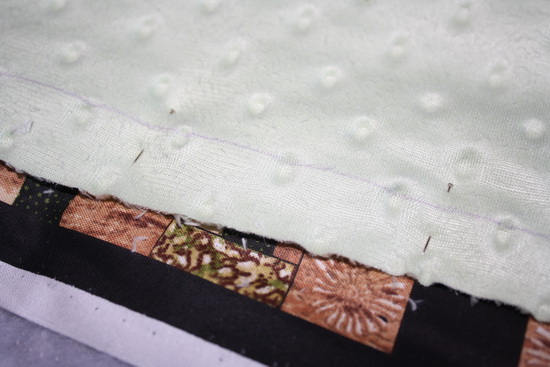
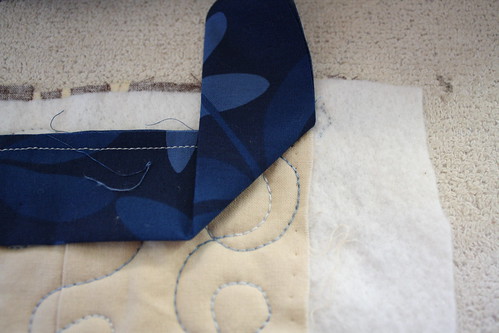
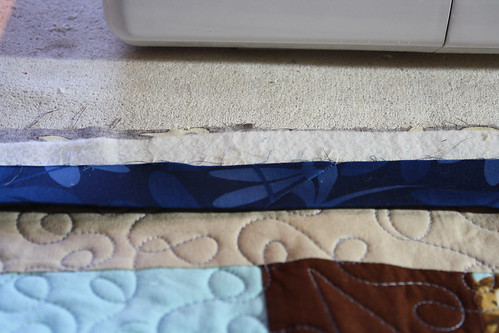
Sew your binding on with a 1/4 inch seam. You will notice in this picture that the edges of my quilt are not trimmed. I find it easier to do a nice 1/4 inch seam with all this bulk if I wait to trim at the end.
IMG_0530

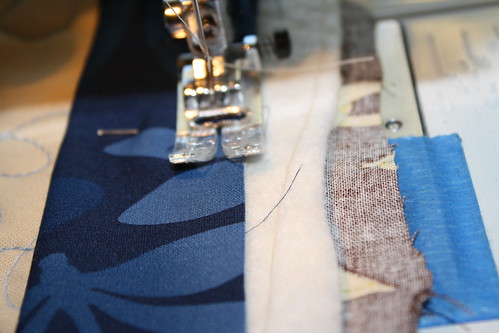
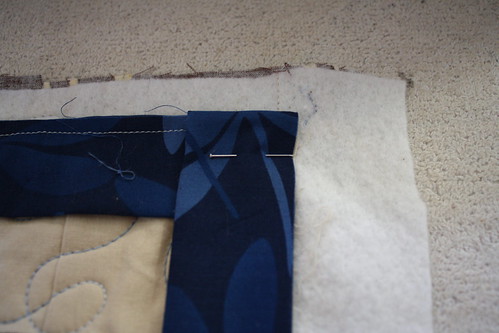
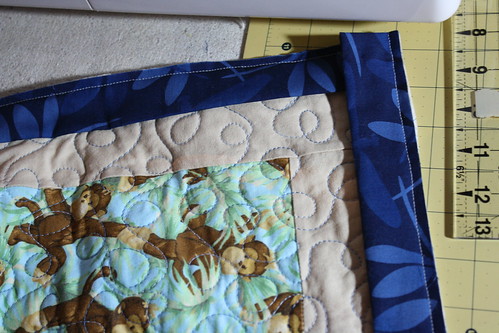
Sew your binding all the way to the corner stopping about 1/4 of an inch from the end. Stop with the needle in the down position, lift your pressure foot and pivot the quilt 90 degrees and sew off the edge of the quilt. It should look like this when sewn:
IMG_0532

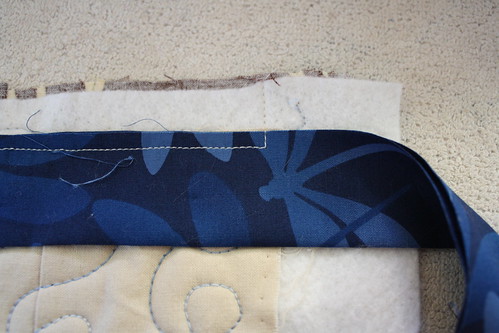
Not take your binding and fold it straight up to get a nice angle on the corner.
IMG_0533

Then fold it straight back down.
IMG_0534

Sew the binding down completely, do not start 1/4 inch in from the edge.
IMG_0535

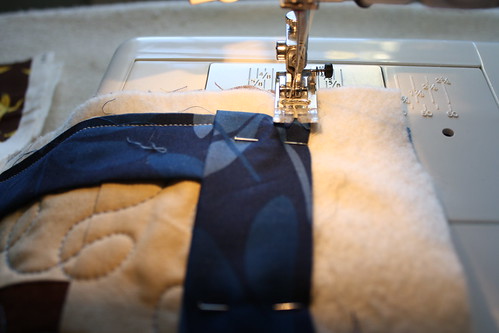
I was starting 1/4 inch in here and never had nice looking corners, since I stopped doing this, my corners have been perfect! Here is what it should look like when you sew back in:
IMG_0536

Finish sewing the binding around all four corners, when you reach the side you started on, be sure to stop about 10-12 inches from where you started, there should be a nice long tail left on the end too. I will sew to the last pin in this shot.
IMG_0539

Lay the beginning tail completely straight against the edge of the quilt, trim that tail so the end of it is right in the middle of the gap you left. The first pic is how long both tails are, and you can see in the second where I trimmed the bottom tail.
IMG_0540

IMG_0541

Take the last tail and lay it over the first, leave a slight gap so you can see where the first tail ends. Take the trimmings from the first cut and open it up, lay the trimming so one edge is even with the edge of the bottom tail.
IMG_0542

Trim the second tail so the overlay of the two is the same width as your binding trimming.
IMG_0543

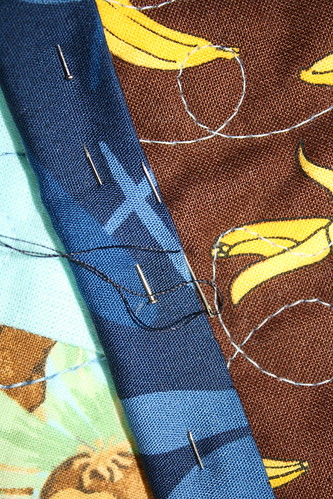
Now open up the first tail and lay it flat face up, take the second tail and open it and place it face down in the same fashion as we did when we made the binding. You will have to scrunch up the quilt to do this.
IMG_0545

I pin right along the seam line
IMG_0546

So I can test the fit and make sure nothing is twisted.
IMG_0547

Once you know you have everything right, iron your seam line
IMG_0548

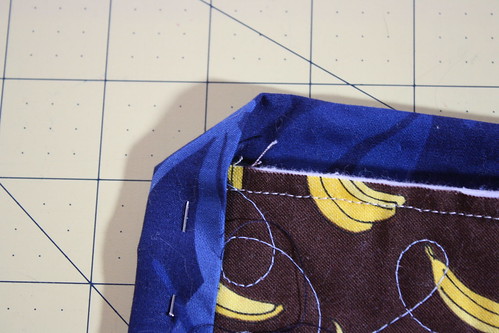
Pin with two pins and sew the line. This is bulky and a little hard to do, but I know you can do it!
IMG_0550

Check it one last time before you trim, once you know it is sewn right, trim the corner leaving a 1/4 inch seam.
IMG_0551

Iron the seam open and iron the fold again. Lay the remaining binding on the edge of the quilt and finish sewing on the gap.
IMG_0552

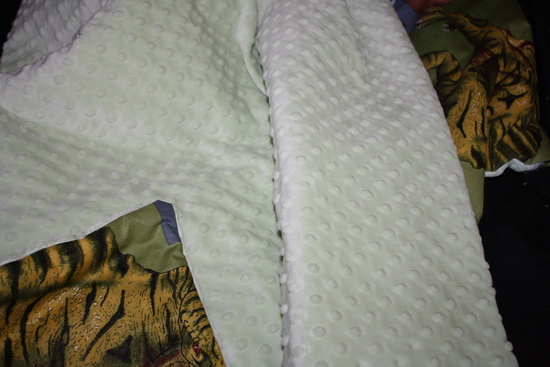
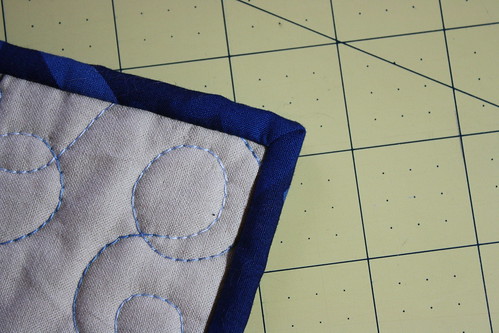
Now you want to trim the excess backing and batting away from your quilt. Trim right up to the binding.
IMG_0553

To finish putting the binding on, wrap it around to the back of the quilt and attach it with a slip stich. (this pic didn’t come out great, but you can look up a slip stitch pretty easily online.) Basically you go into the backing right along the binding, then come up catching just a few threads of the fold of the binding. When you are going through the quilt, you are not going through the front, but you want to keep your thread in between the layers so it does not show on the front.
IMG_0557

When you get to your corners, fold them up first.
IMG_0558

Then down.
IMG_0561

Be sure to tack the corner, I use two little slip stitches there. The front of your corner should look nice and crisp this way.
IMG_0562

I know this tutorial is long, but I hope you find it useful! If you have any questions or need me to clarify anything, please feel free to leave me a comment!

Happy Quilting!
Rachel