Posted on 1 Comment

Scrappy Irish Chain Quilt Pattern (Tutorial)

I am not sure if this is considered a pattern or a tutorial, I guess it’s a pattern since it ends with a finished product, but I always feel like when I just blog about it, I should call it a tutorial! Either way, my post about my Scrappy Irish Chain quilt is one of the more popular ones on my blog. I get quite a few Google hits from people looking for this type of quilt. The Original Post does not have an actual tutorial on it, so I thought I would make one up. This gave me a good excuse to test out EQ7 and some pattern writing skills too! My hope is to make some actual patterns to sell using EQ7, but of course first I have to have good practice with it. So you get the benefit of all my practice patterns! Here is the original quilt I made:
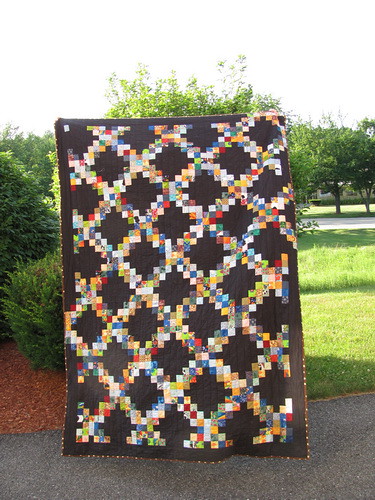
I only had black fabric at the time, but I love how it looks and it’s very different from other Irish Chains I have seen. I really should take the time to get some new pictures of it, but for now, I will just teach you how to make your own!

*One side note, this tutorial will have solid borders, but mine has pieced borders. I couldn’t figure out how put that together in EQ7, so I just stuck with the solid borders. Someday I will figure out how to describe the pieced borders for you.

Tip: When you are making a new pattern, I would highly suggest making a test of each block first to be sure that the instructions are correct before you cut into all your fabric. Pattern writers try their best to make no mistakes, but no one is perfect and it’s best to find out there is a mistake when you have only cut a small amount of fabric than after you cut it all. This also gives you the chance to test the technique and understand how it works before you have to assemble the whole thing.

Materials Needed
Based on fabrics that are 42 inches wide

3 Yards background fabric
3 Yards scrappy fabric

Finished Quilt Size
56.5 inches x 79 inches

Directions
This quilt is made up of 2 blocks.
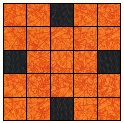

Block A
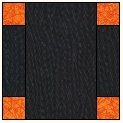

Block B

We will be putting these two blocks together to form the whole quilt.
 
 
Assembling Block A

We will be making 35 of these blocks. Cut 140, 2-inch squares from the background fabric. From various scraps cut, 735, 2-inch squares.

For one block, you will need 4 pieces of background fabric, and 21 pieces of scrap fabric.

Refer to the image above for the correct placement of the pieces. When sewing try to press the seams for each row all in one direction. Then alternate the direction for each row, this will make assembling the rows much easier. Here is a guide for sewing.

BF=Background fabric
SF=Scrap Fabric
> or < = Direction to press seams Row 1
SF > SF > BF > SF > SF

Row 2
SF < SF < SF < SF < SF Row 3
BF > SF > SF > SF > BF

Row 4
SF < SF < SF < SF < SF Row 5
SF > SF > BF > SF > SF
 
 
Now sew the 5 rows together, I find it easier to sew in pairs rather than just adding one row at a time. Here is my method:

Step 1: Sew together 1 + 2; 3 + 4
Step 2: Sew together 3&4 + 5
Step 3: Sew the last 2 sections together

You will have 35, 7.5 inch blocks when you are done.
 
 
Assembling Block B

We will be making 35 of these blocks. Cut 70, 2 x 5 inch rectangles and 35, 5 x 8 inch rectangles from background fabric. From various scraps, cut 140, 2 inch blocks.

For one block, you will need 4 pieces of scrappy fabric, 2, 2 x 5 pieces of background fabric, and 1, 5 x 8 piece of background fabric.

Refer to the image above for the correct placement of the pieces. To each end of the 2 x 5 rectangle, sew one scrappy square. You will make 70 of these pieces. Take two of these, and sew them to each side of the 5 x 8 rectangles.

You will have 35, 7.5 inch blocks when you are done.
 
 
Assembling the Quilt

To assemble the blocks, you will be alternating the blocks in each row. There will be 7 blocks in a row, with each row starting with the opposite block as the one above it. Please refer to the picture as a guide, but here is a placement guide as well.

A B A B A B A
B A B A B A B
A B A B A B A
B A B A B A B
A B A B A B A
B A B A B A B
A B A B A B A
B A B A B A B
A B A B A B A
B A B A B A B

Once each row is assembled, sew them all together. Once again, I like to sew the rows together in pairs. This will make assembly much easier than sewing one row on at a time. Be sure to match up the seams as you are sewing as well. My method of sewing these rows together is as follows:

Step 1: Sew together 1 + 2; 3 + 4; 5 + 6; 7 + 8; 9 + 10
Step 2: Sew together 1&2 + 3&4; 5&6 + 7&8
Step 3: Sew together 5&6&7&8 + 9&10
Step 4: Sew the last 2 sections together
 
 
Assembling the Borders
For the borders, cut 7, 2.5 inch strips from background fabric, selvedge to selvedge. This will give you 7 strips approximately 42 inches long. Trim the actual selvedge part from all the strips, squaring up the ends in the process.

Take two strips and sew them together end to end to form a strip that is about 84 inches long. Repeat. You will now have 2, 84 inch strips. Sew these strips to the left and right sides of the quilt. The strips will be larger than the quilt on the top and bottom. When pinning, be sure to leave a little extra on each side for easing in. Start pinning the borders on in the middle of the quilt and work your way out. Be careful not to stretch the blocks as you are pinning. Once the borders are sewn on, trim the ends so they are square with the top and bottom of the quilt.

Take one more strip and cut it in half, sew each half to another strip forming two strips that are about 63 inches long. Attach these to the top and bottom of the quilt in the same manner as above.
 
 
And your top is done! Now just use your preferred method of basting, quilting, and binding your quilt. Then take a step back and enjoy all your hard work!

If there are any questions about this tutorial or if I have made any mistakes, please feel free to let me know! I considered turning this into a PDF as well, if that would be useful to anyone, let me know in the comments and I will get on that.

Happy Quilting!
Rachel
Posted on 8 Comments

Recap for the Week!

I didn’t get a ton of sewing done this week, but I did finish a few things, which felt great. I have one quilt in my sights for next week as it only needs a binding, so that is my goal.

My biggest finish for this week was a very quick quilt I made for my son.

It’s not the prettiest quilt I have made, but it was made in under an hour and my son adores it, so it was a win-win! I wrote a quick tutorial for it too (though I warn you, it’s pretty rough!! LOL). You can find it here:

Quick, Easy, and Cuddly Quilt

My second finish was a tutorial for EQ7. I got this as an early Mother’s Day present and have been having loads of fun using it. I had a hard time finding tutorials for the program online, so I figured as I was playing around I would type up some quick tutes for anyone that might have this program.

And of course I will share the resulting quilts as patterns on my blog too! For now I have posted the tutorial for the basic quilt design in Electric Quilt 7 here:

EQ7 Basics Tutorial

I am having so much fun using this program. I have wanted it for a while, but never actually went through with buying it. I wish I had!! I think you’ll be seeing a lot more patterns round these parts. I already have my Sew Out Loud paper piecing pattern done up in EQ7 so I can share it with you guys soon!

And if you subscribe to my newsletter below, you may even find some fun stuff in your inbox soon (hint, hint)!! 🙂 🙂

Newsletter Sign-uo


I think that’s it for this week, I am looking forward to next week and seeing what I can get done!

Happy Quilting!
Rachel

Posted on

Electric Quilt 7 – Basic Quilt Making Tutorial

Every year my husband and I choose what we want for Mother’s Day/Father’s Day. We used to surprise each other, but now we use it as a way for each of us to choose a special thing that we wouldn’t get otherwise. This year I chose Electric Quilt 7. I picked it up a little early, and have been playing around with it for a few days. I have only scraped the surface of what the program can do, but I have had fun building some quilts in there. I decided to write a quick pattern for my Scrappy Irish Chain quilt as practice, since it’s one of my more popular posts on my blog. I figured while I was doing that, I may as well write an EQ7 tutorial too.

I will have the tutorial for the actual quilt in another post soon, but for now you can download the PDF instructions for building this in EQ7 here:

Electric Quilt 7 Basic Tutorial

If you have any questions (or notice any errors, I just typed it up quick!!), please feel free to ask or let me know!

Happy Quilting!
Rachel

Posted on 2 Comments

Quick, Easy, and Cuddly Quilt Finish

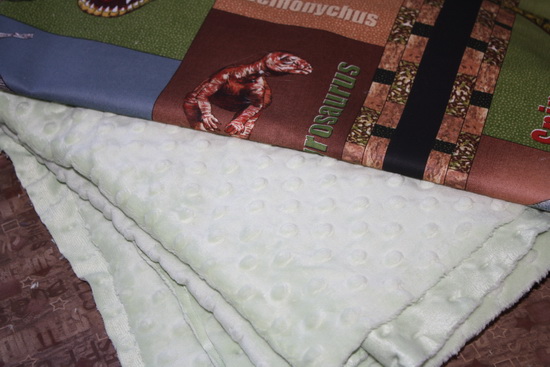
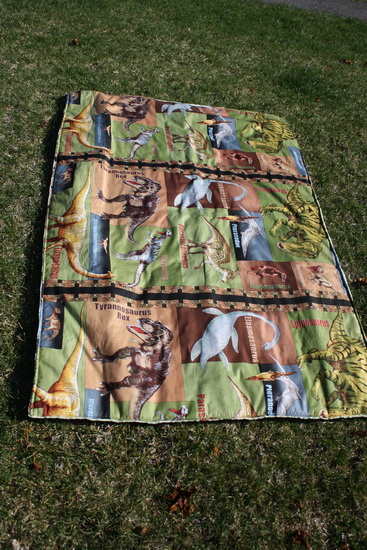
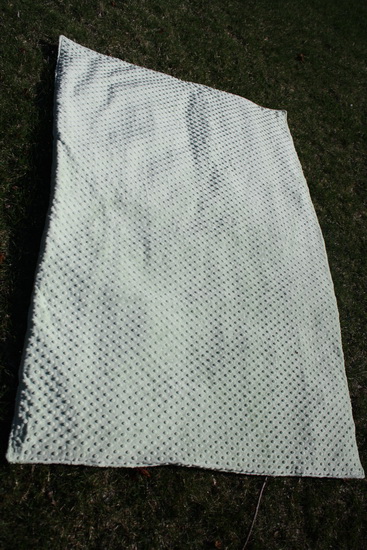
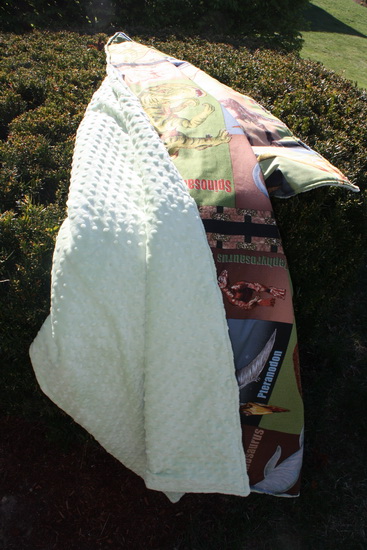
This has to be the absolute quickest finish I have had in a while. While we were at the local quilt store the other day, my son found this super soft nubby fabric. I know there is a good name for it, but I can’t think of it right now. It is usually used for the back of baby blankets, but my son just loved the feel of it. So I picked up a yard of it (it is 60 inches wide) and then 2 yards of fabric from the clearance rack as well.

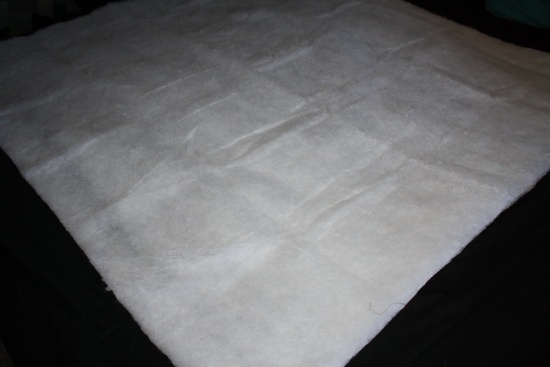
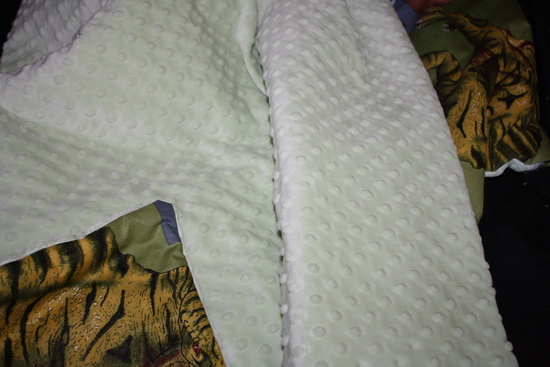
This is a very simple quilt, no piecing. I pulled out one of my Puff battings, throw size I think, and laid it out flat. If your batting has a scrim side, be sure that side is face down.

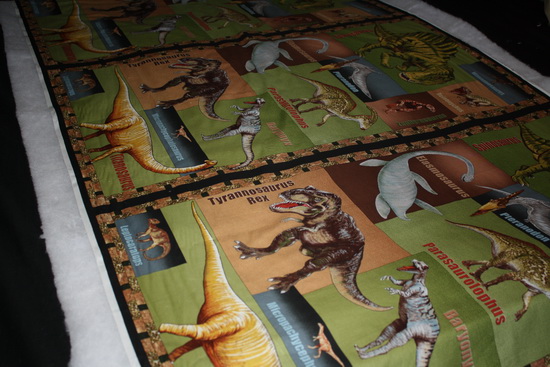
Then layer the fabric for the top on the batting face up.

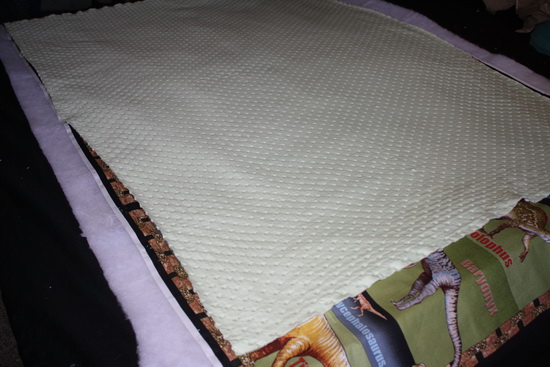
Then the last layer is the backing fabric. Place this one face down on all the layers.

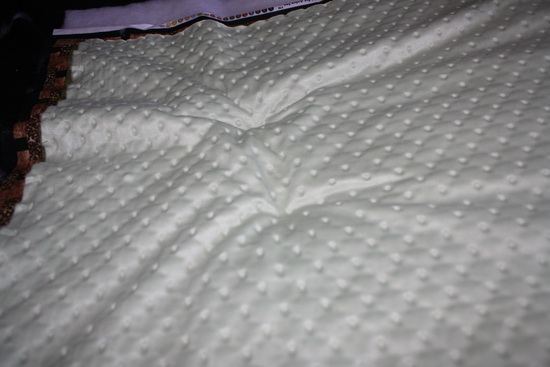
Make sure everything is nice and stretched out and smooth. Be sure that your kitties are out of the room, or this might happen.

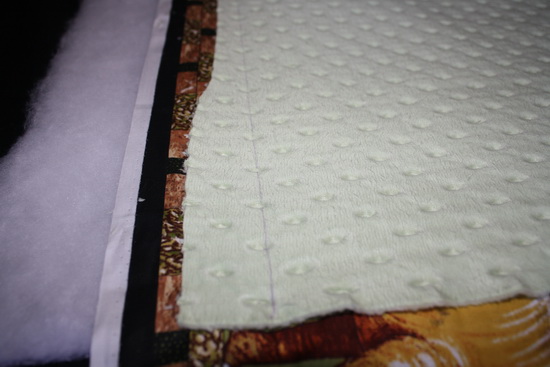
No worries though, kitty marks smooth out very easily. 🙂 🙂 If the edges of your top fabric are not straight, draw a line up each edge. This will be your sew line, so be sure it is at least 1/2 inch from the shortest edge of the fabric.

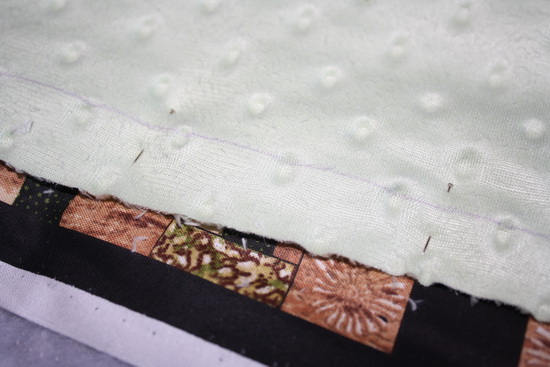
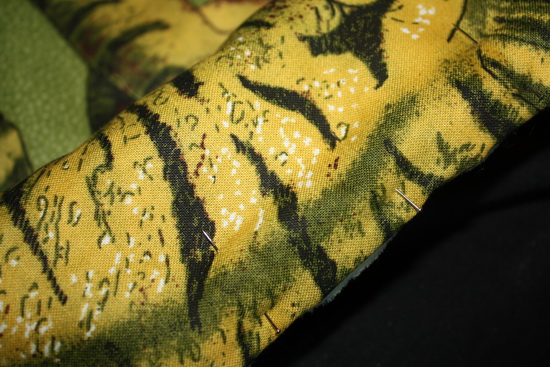
Pin through all three layers right along the line you drew. Pin all 4 sides, leaving an opening about 8 inches long or so on one side.

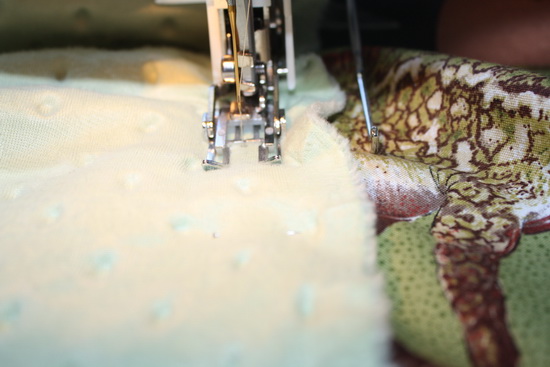
I started sewing this with my walking foot.

But found that my regular foot worked just as well. I didn’t do a very good job of spreading out my fabrics so I did get a bunch of tucks on the nubby fabric as I sewed (with both feet), but it really did not make a difference as because of the nap of the fabric you couldn’t see them at all.

Sew around all 4 sides leaving the 8 inch opening unsewn. Once you are done, clip the edges back to a 1/2 inch from the sew line, clip the corners a little closer, but do not cut through the stitching. Turn the quilt through the opening you left and push out the corners. Adjust everything so it lays flat. This is a weird photo, but you can see the corner turned out here.

Fold back the top and bottom fabrics a 1/2 inch and pin the opening closed.

Top stitch 1/4 inch from the edge all around 4 sides. You do not need to hand stitch the opening closed as this top stitching will close up the opening for you.

Once the top stitching is done, your quilt is finished and ready to be loved!

Sorry if this isn’t the most polished tutorial, I just tried my best to take pictures as I was making it, but didn’t really plan it our real well. LOL If you have any questions as you are trying it, be sure to ask! This is a very quick and simple quilt, I didn’t do any ties or quilting as I did not want to interfere with the softness of the nubby fabric.

Happy Quilting!
Rachel
Posted on

Sew Out Loud QAL – Entry #2

I decided to give another block a try as an entry for the Sew Out Loud contest. My embroidery is not so good, but my block should give the idea.

It is a stack of quilty books that have punny titles.

“Sewing Farm”
“War & Quilting”
“Quilter in the Rye”
“A Patchwork Orange”
“One Flew Over the Scrap Pile”
“To Kill a Y-Seam”
“Of Quilts and Men”
“A Quilters Guide to the Galaxy”
“Gone With the Pin”

Cute right? Or is it just me again?

The block also include a mini quilt (okay really mini judging by the size of the books!!) hanging on the wall. 🙂

Happy Quilting!
Rachel
Posted on 12 Comments

Rainbow Quilt with Blended Fabrics

First off I want to say a big thank you to the two bloggers who joined me for my very first Virtual Sew Day. Leila, from Where the Orchids Grow and Mary, from Mary.Emmens were great fun to quilt with and seemed to get a lot of sewing done, which was the goal!! It was nice to not be talking to myself all day.

If you are interested in joining along next time, I plan to have another Virtual Sew Day on May 20th. This will be the weekend after the US Mother’s Day. It should be a lot of fun, so mark your calendars!!

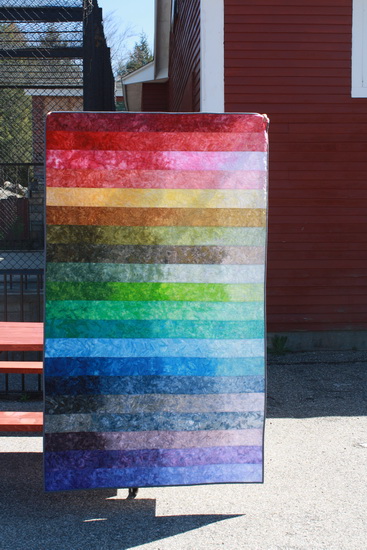
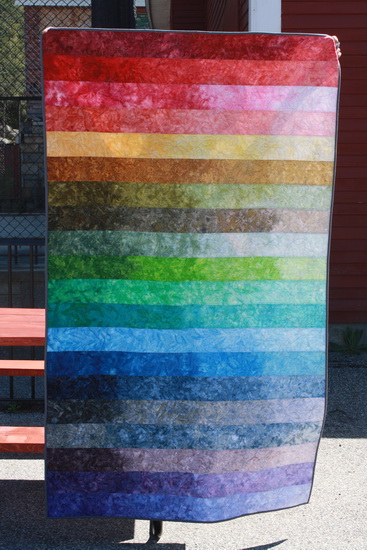
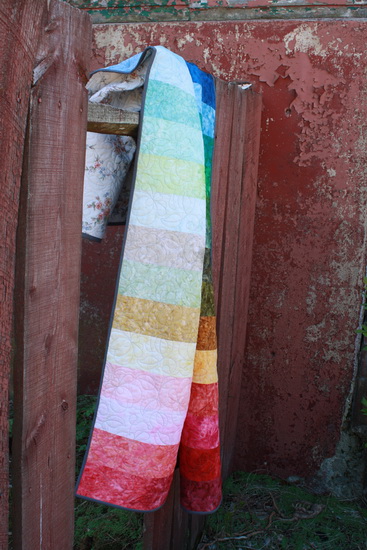
The project I was working on was binding my rainbow quilt. I finally finished my quilt today. Here it is!

This quilt will be given to a friend of mine.

My friend organizes a luncheon that includes a raffle and silent auction each year for the breast cancer center he works for. Donations help raise money for women getting tested for or having to deal with breast cancer.

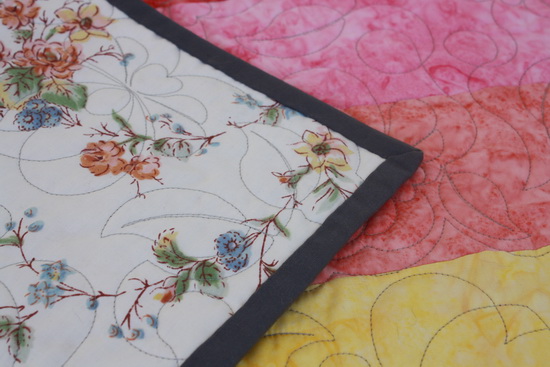
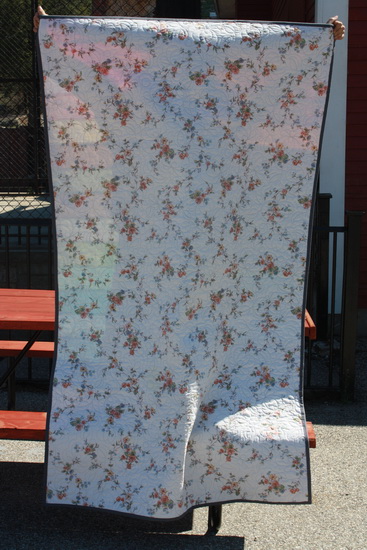
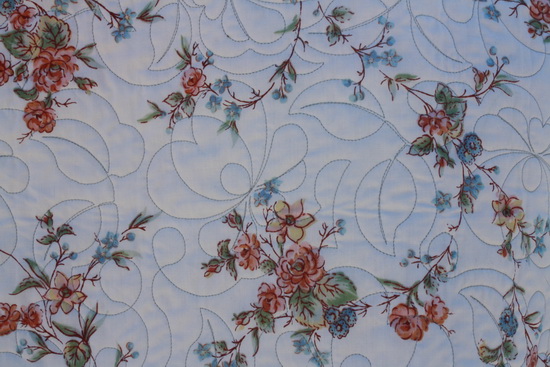
The back of this quilt is a floral print that I had in my stash, my quilter thought it might be a vintage sheet, which is quite possible since it was wider than normal. I have used sheets as backing many times and have always had good success.

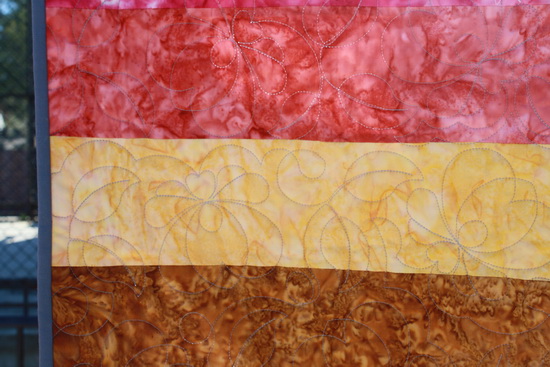
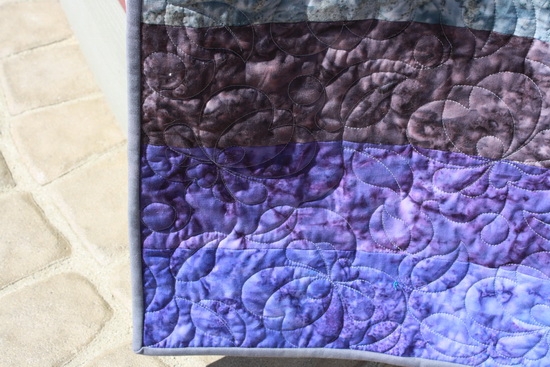
Even though I have my own longarm, I knew this quilt needed something special done with it. Mary, over at Quilt Hollow was able to quilt my quilt with a wonderful flower pattern.

She fit me into her schedule and had the quilt back to me in record time since the function happens near Mother’s Day, I didn’t have much time to get it done. Here is a shot of the quilting from the back.

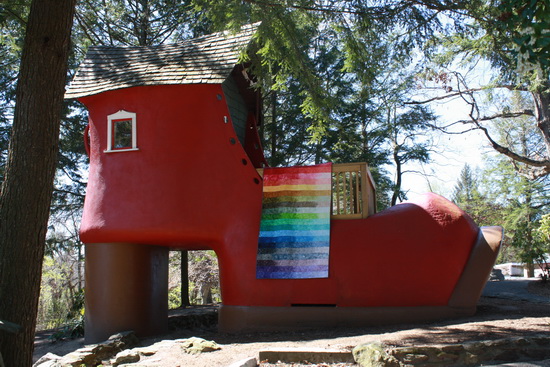
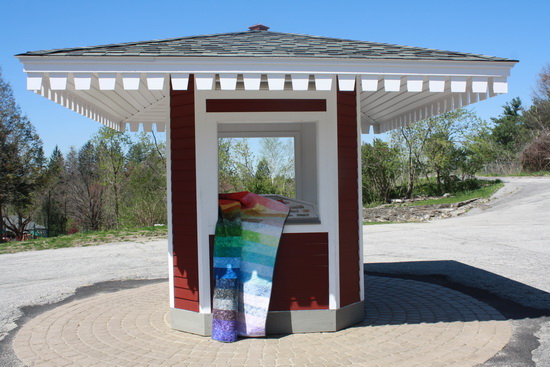
I took the quilt to this great park we have near us that used to be a zoo/amusement park. It was fun to get some different shots of the quilt.

As I said, this weekend for the Virtual Sew Day, I worked on the binding for this quilt. I chose some kona grey I had in my stash, I wasn’t sure how it would look, but I think it actually frames the quilt well.

I used my own binding tutorial for this one. I was going to machine stitch it to the back, but I decided to go ahead and take the time to hand tack it to the back.

I finally finished today. Now all I have to do is put a label on the quilt and it will be all done.

I know whoever wins this quilt will love and appreciate it. I will also be bidding on this quilt as, let’s be honest, I would love to keep it all for myself!! hehe

Happy Quilting!
Rachel
**ETA I just found out (like literally minutes after I posted this) that my friend is no longer with the breast cancer center, but he has moved on to Fundraising for the Boy Scouts. So it looks like the quilt will be staying with me for a while. I was only associated with this center through my friend, but no worries, this quilt will be loved, and perhaps one day will find a wonderful charity to help out. I am sad about this, but I have learned in life that all things happen for a reason.

Posted on 4 Comments

Sew Out Loud QAL – Block Entry

One of my favorite blogs, Very Kerry Berry, was a participant in the Sew Out Loud quilt along. Due to her postings on her blog, I got interested in the blocks they were making. These bloggers are SUPER talented. I haven’t actually tried any of the blocks yet (intimidated much?), but when I saw they were having a contest where anyone could design their own block, I knew I had to give it a try. I have never designed on my own before, so I was nervous, but I had an idea, so I figured why not try?

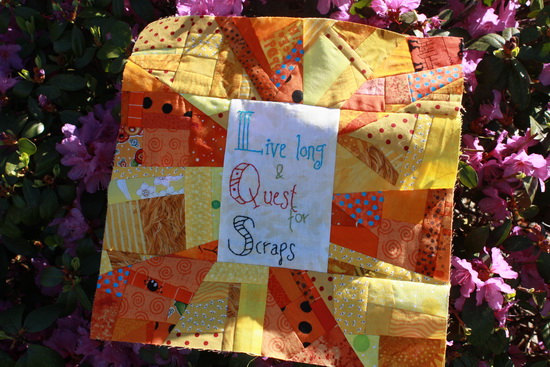
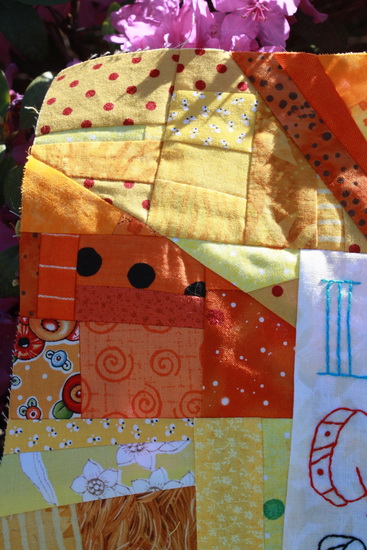
So of course you want to see the block I designed right? Well here it is!

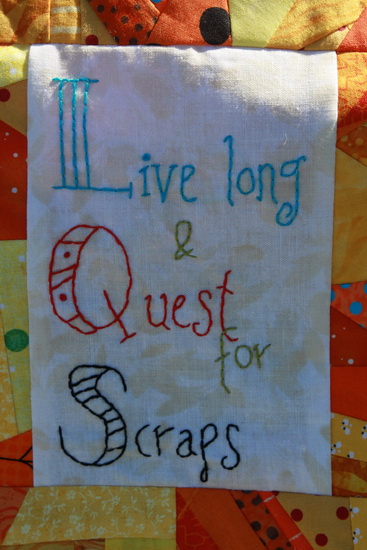
The quote says “Live Long and Quest for Scraps” … this is a little play on the phrase “Live Long and Prosper”. The theme of Sew Out Loud is “Quilter’s Wordplay”, so I figured changing up a famous phrase is a pretty good way to have wordplay!! Also, did you notice something else about my phrase?

Down the left side, the larger letters of the main words give the initials “LQS” which is also short for “Local Quilt Store”. Pretty clever right? Oh yes, I was rather proud of myself for thinking of that one!! hehe (maybe it’s only clever to me! :))

The outside edges radiate orange and yellow. These two colors blended together more than I would have liked, but this block would look great with any color combination of scraps. Each ray is made up of lots of scrappy pieces.

Aren’t we always on the quest for more and more scraps as we cut more and more fabric into beautiful quilts? That’s the idea I was going for here. The larger your scrap pile, the more love you have created with all the quilts you have made. Then of course we have to find a way to use all those wonderful scraps, so even more quilts are created!!

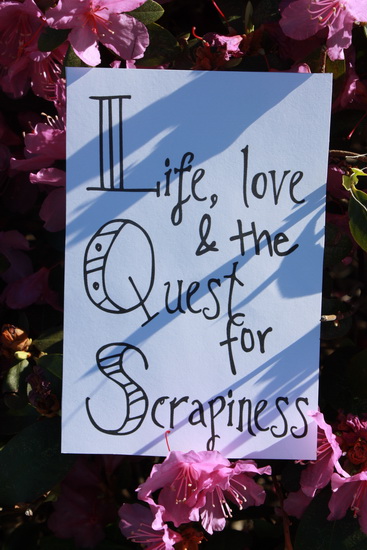
Whether I win or not, I will post a tutorial for this block on my blog. I just have to figure out the best way to create the template for the block first. The pattern will actually come with two options for the phrase in the middle, the one I stitched and another one I thought of …

“Life, Love and the Quest for Scrapiness” Again this is a play on another famous phrase. “Life, Love and the Pursuit of Happiness” and you’ll also see that this phrase also has the initials “LQS” and fits very well with the scrappy theme of the block.

I have entered my block over at the Sew Out Loud’s Flickr page. It is now up to the judges to pick their favorite.

Just the fact that my lonely little block gets to be in the same universe as these same absolutely wonderful bloggers is a huge accomplishment for me. Honestly, this is the very first time I can say that I independently designed a block. I had no specific outside inspiration for this block (except of course the guidelines for entry). The idea just popped into my head one day. I really and truly enjoyed the designing process, and even if I don’t win, just the amount of joy I got from making this block, and knowing what it will mean for my future of quilting and designing, is worth every second spent on this block.

Keep your fingers crossed for me!

Happy Quilting!
Rachel
Posted on 1 Comment

Virtual Sew Day – Lunch Time Update

No pics right now, but I have gotten the binding sewn down. Originally I was going to machine sew it to the back, but since this is for a charity, I think I will go ahead and take the time to hand tack it to the back, so I may be doing just that for the rest of the day!! I probably will take a break in the afternoon though and sew a little bit of something else to break up the monotony.

I will have pics of this quilt hopefully by the end of the day!

How is everyone else doing?

Happy Quilting!
Rachel
Posted on 3 Comments

Virtual Sew Day – Mid-Morning Update

To learn about virtual sew day, be sure to check out this post.

I have been sewing now for a few hours and have gotten a few steps closer to my goals.

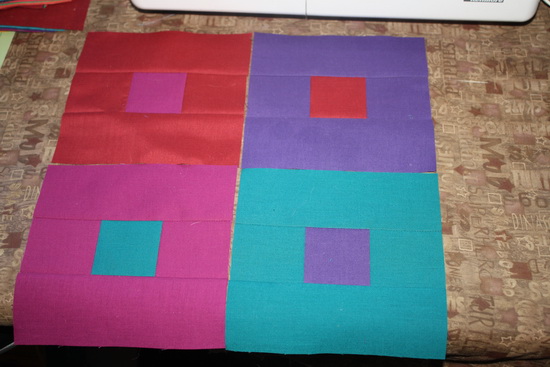
First off I started the morning by sewing up a few blocks for my solids only quilt. Which was goal #3. I do hope to get a few more done today, but I am happy to have accomplished at least one goal so far!!

I also got started on the binding for my first quilt. I was reading Mary’s goals today on her blog, Mary.Emmens.co.uk and discovered that she cut binding strips using her Accuquilt Go! I haven’t used my Baby Go! much and I couldn’t remember which dies I had picked up, but I knew I had one strips one. Luckily for me I had been smart enough to pick up the 2.5″ one, which is perfect for binding. Since my cutting board is currently being taken over by projects,

I decided to take Mary’s idea and give it a go (get it a Go!? hehehe).

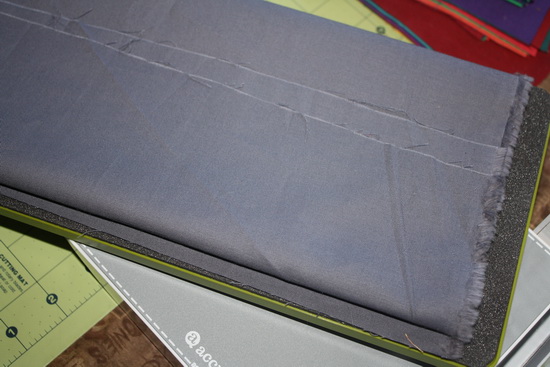
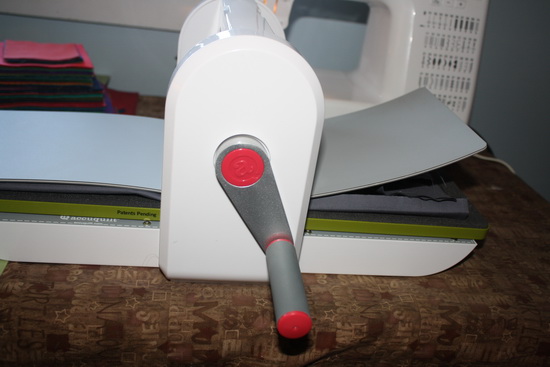
I folded up the fabric so I could get 5 strips from my first cut. I was cutting through 6 layers of fabric on one side and 4 on the other.

It went through the Go! pretty well, but I could tell things were kind of bunching up.

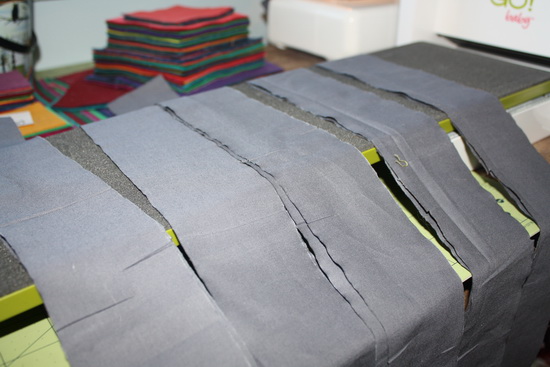
There was not much scrap leftover from the cut, though i think if I had taken the time to clear off my cutting board and trim everything up and cut it with a ruler, I *may* have gotten one more strip out of it, but for the time saving and space saving aspect, I was okay with that.

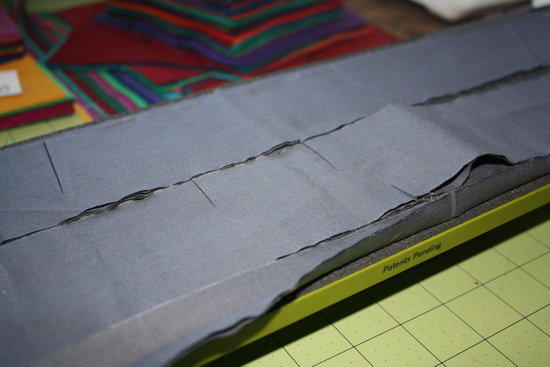
The first set of strips were a little ruffley and pinch folded in spots,

but I think this was more my own fault for not ironing and not being careful as I ran it through the machine. The second set of strips was fine.

I had a heck of a time actually sewing mys trips together this time. Usually I never have to unpick my binding, but for some reason half my strips went on backwards so I had to do a lot of unpicking and resewing. I hate doing that, but I sucked it up and everything turn out fine in the end. Hopefully my binding goes on the quilt much easier than it went together.

So that’s what I have gotten done so far. Now I am off to keep plugging along. I hope everyone else is getting a lot done today too.

Happy Quilting!
Rachel
Posted on 1 Comment

Virtual Sew Day – Come Sew With Me Today!

I am very excited to be sewing today. I hope that some of you will be joining me as well! If you will be sewing today too, let me know. You can do this by putting together a post on your blog with your goals for the day (and link back to this post so others can join in too!). Then come and leave me a comment with a link to your post so I can see what you are working on. If you do not have a blog, just leave your goals right in my comments.

Then through out the day, be sure to update us on your progress by posting a comment here. We would also love to see progress pics if you have them. Post your pics on your blog, or link us to your pics on Flickr. This is really low key and meant to be a fun way to keep ourselves motivated through out the day to reach our goals!!

At the end of the day, be sure to give us a full update either by a new blog post with pics or by commenting below. Did you reach your goals?

Here are my goals for the day:

1. Bind my charity rainbow quilt.
2. Make 2 Stripe blocks for my stripes quilt
3. Make a few blocks for my solids only quilt
4. Bind pink quilt for my niece

That is a good start. I have a feeling I may only get #1 done, but we shall see. I will have to be careful to spend as much time sewing as being on the computer!! 🙂

You can also travel over to QuiltingBoard and check out my virtual quilting thread there. I will be updating both there and on my blog.

So what are your goals for sewing today?

Happy Quilting!
Rachel
Posted on 4 Comments

Virtual Sew Day Tomorrow – Sunday April 15!

I just wanted to post a quick reminder about my virtual sew day tomorrow. You can read more about it here:

Virtual Quilt Day

I know I’ll have at least one blog reader joining me, and also some friends on QuiltingBoards. I am hoping to get more blog readers, but I know life is busy. Hopefully as the word gets out, we’ll have more friends join us in the future!! Either way me and my one blog friend, Mary from Mary.Emmens.co.uk, will have a lot of fun and get some much needed projects done! So will you join the two of us?

I have made a quick little button to go with our virtual sewing day:

If you want to put the button on your blog, here is the code you need:

Just copy and paste that right to your blog or blog sidebar.

There are no rules for Virtual Sew Day. I call it “sew” day now instead of “quilt” day because you can sew anything you want!! A quilt, clothes, purses, whatever your heart desires. Work on a much neglected WIP, finish up some swap blocks, make a new purse for an evening out, or how about a fun shirt? I love sewing with other people, but dragging my machine around is no fun, so I decided to have a virtual sew day so we can all work on projects and give encouragement along the way. Even if I am talking to only myself and Mary on Sunday, I know that I’ll get so much more done.

If you want to play along, look for my post tomorrow. I will have it up nice and early, so even if you are in another time zone, you can check in and tell me what your goals are for the day!!

Happy quilting,
Rachel

Posted on 6 Comments

Let’s Virtually Quilt Together – Sunday 4/15/2012

I love quilting (obviously) and I have always wanted to go to one of those all day sews held by a LQS. I have never actually done it for a number of reasons.

1. I don’t know anyone. I know this seems shallow, but I hate sitting in a room full of women and not be able to chat it up, because half the fun of these things is the social aspect. Now yes, if I actually went, they would get to know me more and be more chatty with me, but the first time is too overwhelming for me.

2. Dragging my sewing machine around does not sound like fun. Nope. Not at all.

3. What project would I work on? I have so many going on, and I very rarely work on only one at a time. So to bring just one would be boring, and to bring more than one would be a lot of stuff to drag around.

It is for these reasons and more that I decided it would be fun to pick a day and virtually quilt with other quilters all over the country. I love chatting with my virtual friends, I don’t have to move my sewing machine, and I can work on as many projects as I want. Win/Win/Win!!

I am going to have a thread on Quilting Boards for my virtual sew day, but I also want to host this on my blog. Who knows, maybe some of you will want to join me too!! I might even have some door prizes to give away!

Here are the deets for Virtual Sew Day:

1. Date – Sunday April 15, 2012 – start any time you can

2. Post your goals for the day on your blog, and link back to my blog so we can get more friends virtually quilting with us! Pick any project you want to work on!! No rules at all about what you can sew on this day.

3. Leave me a comment with your blog post address so I can see what you are working on (maybe I’ll even get a linky thingy if I can figure it out)

4. Throughout the day, check in either by commenting on my post, your own post, or creating a whole new post.

5. Be sure to check out all your friends that are quilting with you!

If you do not have a blog, feel free to leave your goals on the post I will put up on Sunday. We will keep the conversation and accolades going through there. You can even send me final pics and I will do a final post of the day and feature those that don’t have their own blogs.

If I do have door prizes, they will be picked at random among those who participate throughout the day.

So what do you think? Want to spend the day virtually quilting with me?

Happy Quilting!
Rachel
PS. I am going to get some kind of button made for this, but my Photoshop is being very mean to me right now. 🙂