Posted on

Applique & Free Motion Quilting

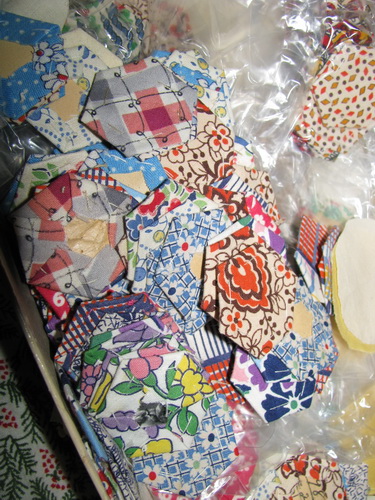
I made this little project about a month ago. I picked up a Halloween appliqué pattern, but I have never done appliqué before. I searched all over the web for some tutorials on different methods of appliqué. There are basically two types, needle turn or raw edge. Needle turn means that you leave a seam allowance on the pattern when you cut it, and you turn that edge of the fabric under before stitching. Raw edge appliqué means that the pattern is cut right to the edge. There are numerous ways to attach raw edge, usually fusible is used to keep the edges down, and then you can satin or buttonhole stitch the edge to the raw part does not show. If you don’t mind the raw edges, you can also just stitch with a regular stitch just slightly inside the pattern.

As you can see there are many options when it comes to appliqué, so it took me a while to find one that looked like something I wanted to try. For my first foray into appliqué, I settled on the back basting method of needle turn. You can find the instructions I used here:

Back Basting

It actually worked really well for even the smallest pieces.

Though I have to say I probably won’t do the whole quilt this way. I kind of like the idea of raw edge, and actually leaving the edges raw so they get a little fuzzy when I wash it, but I will have to try that method in another small project to see.

I also tried my hand at free motion quilting on this little project. I have a new machine that lets me do it, and though I am horrible at it, I was surprised that it actually didn’t look half bad when I was done (except that I caught the edge of the appliqué, which I didn’t mean to do!)

Now this super-mini quilt sits on my shelf along with my other permananently displayed Halloween items.

Happy Quilting!
Rachel

Posted on 2 Comments

Geese in the Forest

About a year ago, there was a really fun quilt that became popular in the quilting world. You can take a peak at it here:

Liberty Print Quilt

I bookmarked this quilt because I absolutely loved the way the color moved through the quilt, and I thought the different shape triangles were so endearing. Plus it wasn’t “perfect”, which is right up my quilting alley. I wanted to make something similar to this one day, even though I had never attempted triangles before.

As I said, this quilt was very popular in the community at the time, and one of the quilters on a blog I follow, Twiddletails had decided to do a free pattern for a quilt that was inspired by the one above. She called it “Geese in the Forest.”

The quilt had 6 paper pieced blocks that would be arranged in such a way as to look random and really does have the feel of the original inspiration. She offered each pattern up for free for one month, and then for only $1 after that. You can find them all still for sale here. I grabbed them when they were free of course as this was perfect for what I wanted to make.

Geese in the Forest (GITF) was designed with green and red in mind, but I was still inspired by the colors in the Tokyo quilt, so I went searching through the fabric that I had. A long time ago I bought an ‘Around the World’ pattern along with enough batiks in green and blue to make a king sized quilt. I never actually got started making that quilt, and decided that the batiks would look great in this design. I grabbed all the ones I thought played well together and arranged them from green to blue.

I then printed out the GITF picture and made a template for how I wanted the colors to run through the quilt. I used crayons and a numbering system to help me keep track of where I wanted each fabric to go.

This pattern helped me keep track of my colors because as I said, she released one block style a month, but that block was placed all over the quilt, so it wasn’t as easy as making all the blue blocks first, then green etc… My colors were all over the place, so it was important to keep track of which ones went where.

Here are the first 6 blocks I completed:

I have done more of them, but I haven’t taken a picture lately. (I will do that sometime soon). The quilt isn’t even close to done, but I figured it would be one that I would be working on for a while. The paper piecing takes a long time to do, so I would say each block probably takes me an hour or two. I pull it out every so often and do a few blocks, so at least I feel like I am making progress. I am just hoping I don’t run out of fabric as none of the fabric I am using was actually bought for this project, so I am not sure if I have enough!

Happy Quilting!
Rachel

Posted on 3 Comments

Breast Cancer Quilt for a Friend

About a year ago I found out a friend of mine had breast cancer. She is doing fine today, but I cannot even fathom having to go through such an ordeal. I was at a loss for what to do for her, so I decided to fall back on my passion and make her a quilt. This is actually the first full blown quilt I have given away to someone outside my immediate family. I used lots of pink and the pattern is a wonky star pattern that was popular at the time. I ended up tying the quilt instead of actually “quilting” it as I was not confident in my ability to quilt it on my machine at the time, and I did not know about Long Arm Quilters then either. I hope that she enjoys it and that it may bring her even just a little comfort.

Happy Quilting!
Rachel

Posted on

Embroidery

I have been fascinated by crazy quilts lately.

All the beading and embroidery is so yummy to me.

I have never really done much more than an outline stitch as far as embroidery is concerned, but I really want to start using this on my regular quilts.

So I decided that I would do some embroidery on my ‘Funky Chicken’ quilt. Since it already had a few beads and buttons for embellishments, I thought it would be a great one to practice this technique on.

For supplies, I just went to Michael’s and bought two embroidery hoops in different sizes, some embroidery needles, and a bunch of colors of DMC floss. Then I went to my favorite places for inspiration, Flickr and Google.

After finding pictures that inspired me, I looked around the web for some websites that would show me how to do the actual stitches. A really good one I found was this one:

Embroidery Stitches Library

I think I will print the stitches out and put them in a binder for better viewing and probably make a sampler with each stitch type on it for practice. But I had fun this past weekend trying out some of these stitches on my chicken quilt. They are by no means perfect, but I imagine as I do more of it, my technique will improve. I will show pictures of my embroidering soon!

Happy quilting!
Rachel

Posted on 2 Comments

Funky Chicken Quilt

So all the blocks came in not too long ago. They were all so adorable!!! I am so happy that I joined this swap. All the blocks were different sizes, so it was a puzzle to fit them all back together. Here are the pictures of the blocks placed together for the quilt:

I have sewn them together already (though they aren’t sewn in these pictures), but I am doing some embroidery on the blocks for something a little different. I will show my progress on it later!

Happy Quilting!
Rachel

Posted on 1 Comment

Funky Chicken Swap

I have mentioned swaps before. In my last post I talked about the first type of swap I am in. Today I am going to talk about another. A few months ago I was browsing the swaps on a quilting forum I visit and I came across a “Funky Chicken” swap. I have a very odd obsession with chickens. I adore them. However, I do not own very many things that have chickens on them. Not sure why, maybe because I want to keep them special? Anyway when I saw this swap I knew I had to join!

For this swap, each participant had to make sets of blocks and mail them into the centralized hostess. Each set was 6 blocks all the same. The blocks could be any size so long as the finished size was divisible by 3 on both sides. We could send in as many sets as we wanted to, and however many blocks we sent in would be how many we would get back.

I ended up making 7 sets (42 blocks), which will hopefully make a good size quilt. Here are a few of he blocks I made:

Happy Quilting!
Rachel

Posted on

New Digs

I decided to move my blog away from blogger, I like to give my blogs their own URL, but since I never really used this blog before I just kept it on Blogger. But I like updating this thing, so what the heck …. Here are my new digs! Feel free to book mark the new site, I’d love to see you around!

Happy Quilting!
Rachel

Posted on

More Journaling on the 365 Quilt

Just a quick update on my 365 Quilt! I have been doing good about keeping up with my journaling ideas for each day on paper, and I write a few blocks each day to try and catch up on fabric. I went Scrapbooking with a friend this past Friday, but instead of scrapbooking, I wrote out a bunch of my journal blocks. I go more for the company anyway, so it was good to get close to caught up. I have blocks through April 1st written now. Here are a few more of the journaling I have done, I will add the rest soon!

March 6 – Got our tax refund – Shopping Spree!
March 7 – Visiting my Mom
March 8 – My son buying 3 Nintendo DS games
March 9 – All about our cat Whiskers
March 10 – Doing our calorie diet
March 11 – My son watching Spongebob Squarepants
March 12 – Eating at a new Pizza place in town
March 13 – Watching the new movie, Alice in Wonderland
March 14 – My son’s first sleepover at a friend’s house

I hope these give you some ideas for your own quilt if you plan on making one! It’s fun for me to look back at these even now as I have already forgotten much of it. I am very excited to see this whole quilt come together.

Happy Quilting!
Rachel

Posted on 7 Comments

Grandmother's Garden

When I was in high school, I had to do a senior project. I decided to learn how to sew. I chose my grandmother as a mentor for the project. I learned a lot, but one of the best things she did was give me a beautiful quilt that was unfinished. It was a grandmother’s garden quilt. The quilt was in various stages when I got it, and I was only able to work on it a tiny bit at the time. When I went off to college I packed the quilt away and it has moved from place to place with me for the last 10 years. I finally pulled it out a few weeks ago to look at it again.

There are a few parts to this quilt. First I have the parts that are already sewn together.

Then there are the flowers that are done, but not attached yet.

And finally the small shapes that will eventually make up more flowers, but are not sewn to anything yet.

The fabrics are beautiful.

I asked for some help dating these fabrics on a quilting board I am on. Most people seem to think the fabrics are from the 30s. I pulled a few of the newspaper centers out of the parts that didn’t need them anymore to look for a date. I found a 1931 date that looked like an advertisement for farm equipment. This tells me that it was put together right around that time, so it would make sense that the fabrics are from that time too.

I love this quilt though it has to be pieced by hand, so I don’t know how much of it I will get done any time soon. But if I do a little bit here and there, hopefully one day I can finish what was started in 1930.

Happy Quilting!
Rachel

Posted on 2 Comments

Bee Creative Swap Blocks – March

I used to do a lot of swaps when I was a part of online scrapbooking communities, but since I have gone digital with my scrapbooking, I haven’t been a part of any swaps. Recently I joined a quilting community, and found swaps again! I have been very into sewing lately (my passion for one craft or another comes and goes), so it has been fun to join a few swaps and see what other people create too.

If you have never done a swap, there are a few kinds. I will outline quickly the two types I am in now.

The first swap has 12 members. Each member has a month. When your month comes up, you send a packet of fabrics to each of the other 11 members. You tell them the type of block you’d like to see (size and style), and they make it for you using the fabrics you sent and their creative ideas. Once completed, the 11 members send their blocks back to you and ideally when done you have a completed top. In the months that you are not the chosen member, you will be on the receiving/creating end. It’s a lot of fun, and you get a whole coordinating top using techniques you yourself may not know how to do!

The second type of swap is more similar to the type of swaps I used to do when I did scrapbooking swaps. These swaps have a centralized hostess. The hostess will choose the theme and style of the swap. Then members sign up, some swaps have limited spots, but most allow for any number of members. Each member makes blocks in the style the hostess has set, usually in sets of 6 or 12, sends them into the hostess, and then they get all different ones back (so if I send 12 blocks, I get 12 different ones back). Each member uses their own fabrics to make the blocks. This type of swap gives more variety than the last one, since it’s not all the same fabrics. These are also fun because they don’t involve a one year commitment like the first.

I am currently involved in a few swaps, but the blocks I want to share today are from the first type of swap. The name of our group of 12 is “Bee Creative.” The first girl that had March sent us lovely Kona solids and asked for sharp lines, no wonky. Here are the two blocks I created for her.

I am not usually a straight line kind of gal, so this was out of my comfort zone, but I still had fun making them for her.

Happy Quilting!
Rachel

Posted on 1 Comment

Bow Tucks Purse

Last weekend I worked like a little worker bee on a purse. Having never made a purse before, I wasn’t really sure how it would go. It ended up working out really good though! I was pretty impressed that I ended up with a purse I am actually proud to carry around with me. I love purses, but my problem has always been that I can’t find a fabric I like when buying one. Now that I have made my first purse, I think I might be making all my own from here on out! I can pick my own fabrics, make the pockets the size I need them, and I can be proud that I did it myself!

Here are some pictures. This is an every day purse that carries all my stuff. The pattern I used is called “Bow Tuck,” it is a pretty hot pattern right now. We have it listed in our store, Dewberry Lane for $8.10.

This first picture is the front view.

A side view, my bows ended up a little short, but I think I like them that way actually.

An inside view, I had a lot of fun making the pockets just the right size to fit everything I carry.

A close up shot of the beading I did. The pattern calls for quilting, but I wanted to do something different, so I stopped by the bead store and got some little flower beads and sead beads and put these on instead of quilting the outside.

Happy quilting!
Rachel