Posted on

Football Shirt & Accessories Roundup!

With football season fast approaching, now is the time to pick up some unique shirts for the family and some great accessories to go with them!

This shirt is perfect for the football mom watching her little (or not so little) ones play this fun sport!


Football Mom Shirt

Accessorize this shirt with a personalized silver football charm bracelet from BlessedRideCompany.


Silver Football Charm Bracelet
 
 
Get ready to wear your favorite players number with this fun Football jersey style shirt!


Football Number Shirt

Keep your legs and arms warm during the game with this comfy blanket from seechriscreate.


Football Blanket
 
 
Throwing a sports themed birthday? Deck out your toddler in this unique shirt!


Football Tie Shirt

Keep your legs and arms warm during the game with this comfy blanket from thelittlestfunk.


Football Leg Warmers
 
 
Add a little football to your Christmas spirit this year!


Santa Football Shirt

Decorate your tree this year as well with this ornament from ChristmasClay.


Football Christmas Ornament
 
 
Happy Buying!
Rachel

Posted on

What Size Shirt Do I Need?

Buying shirts online can be a scary proposition! Every seller uses a different brand shirt, and you can never really be sure of how the shirts will fit. Today I am going to explain more about the shirts I use in my shop and how you can find just the perfect size for you or your child.

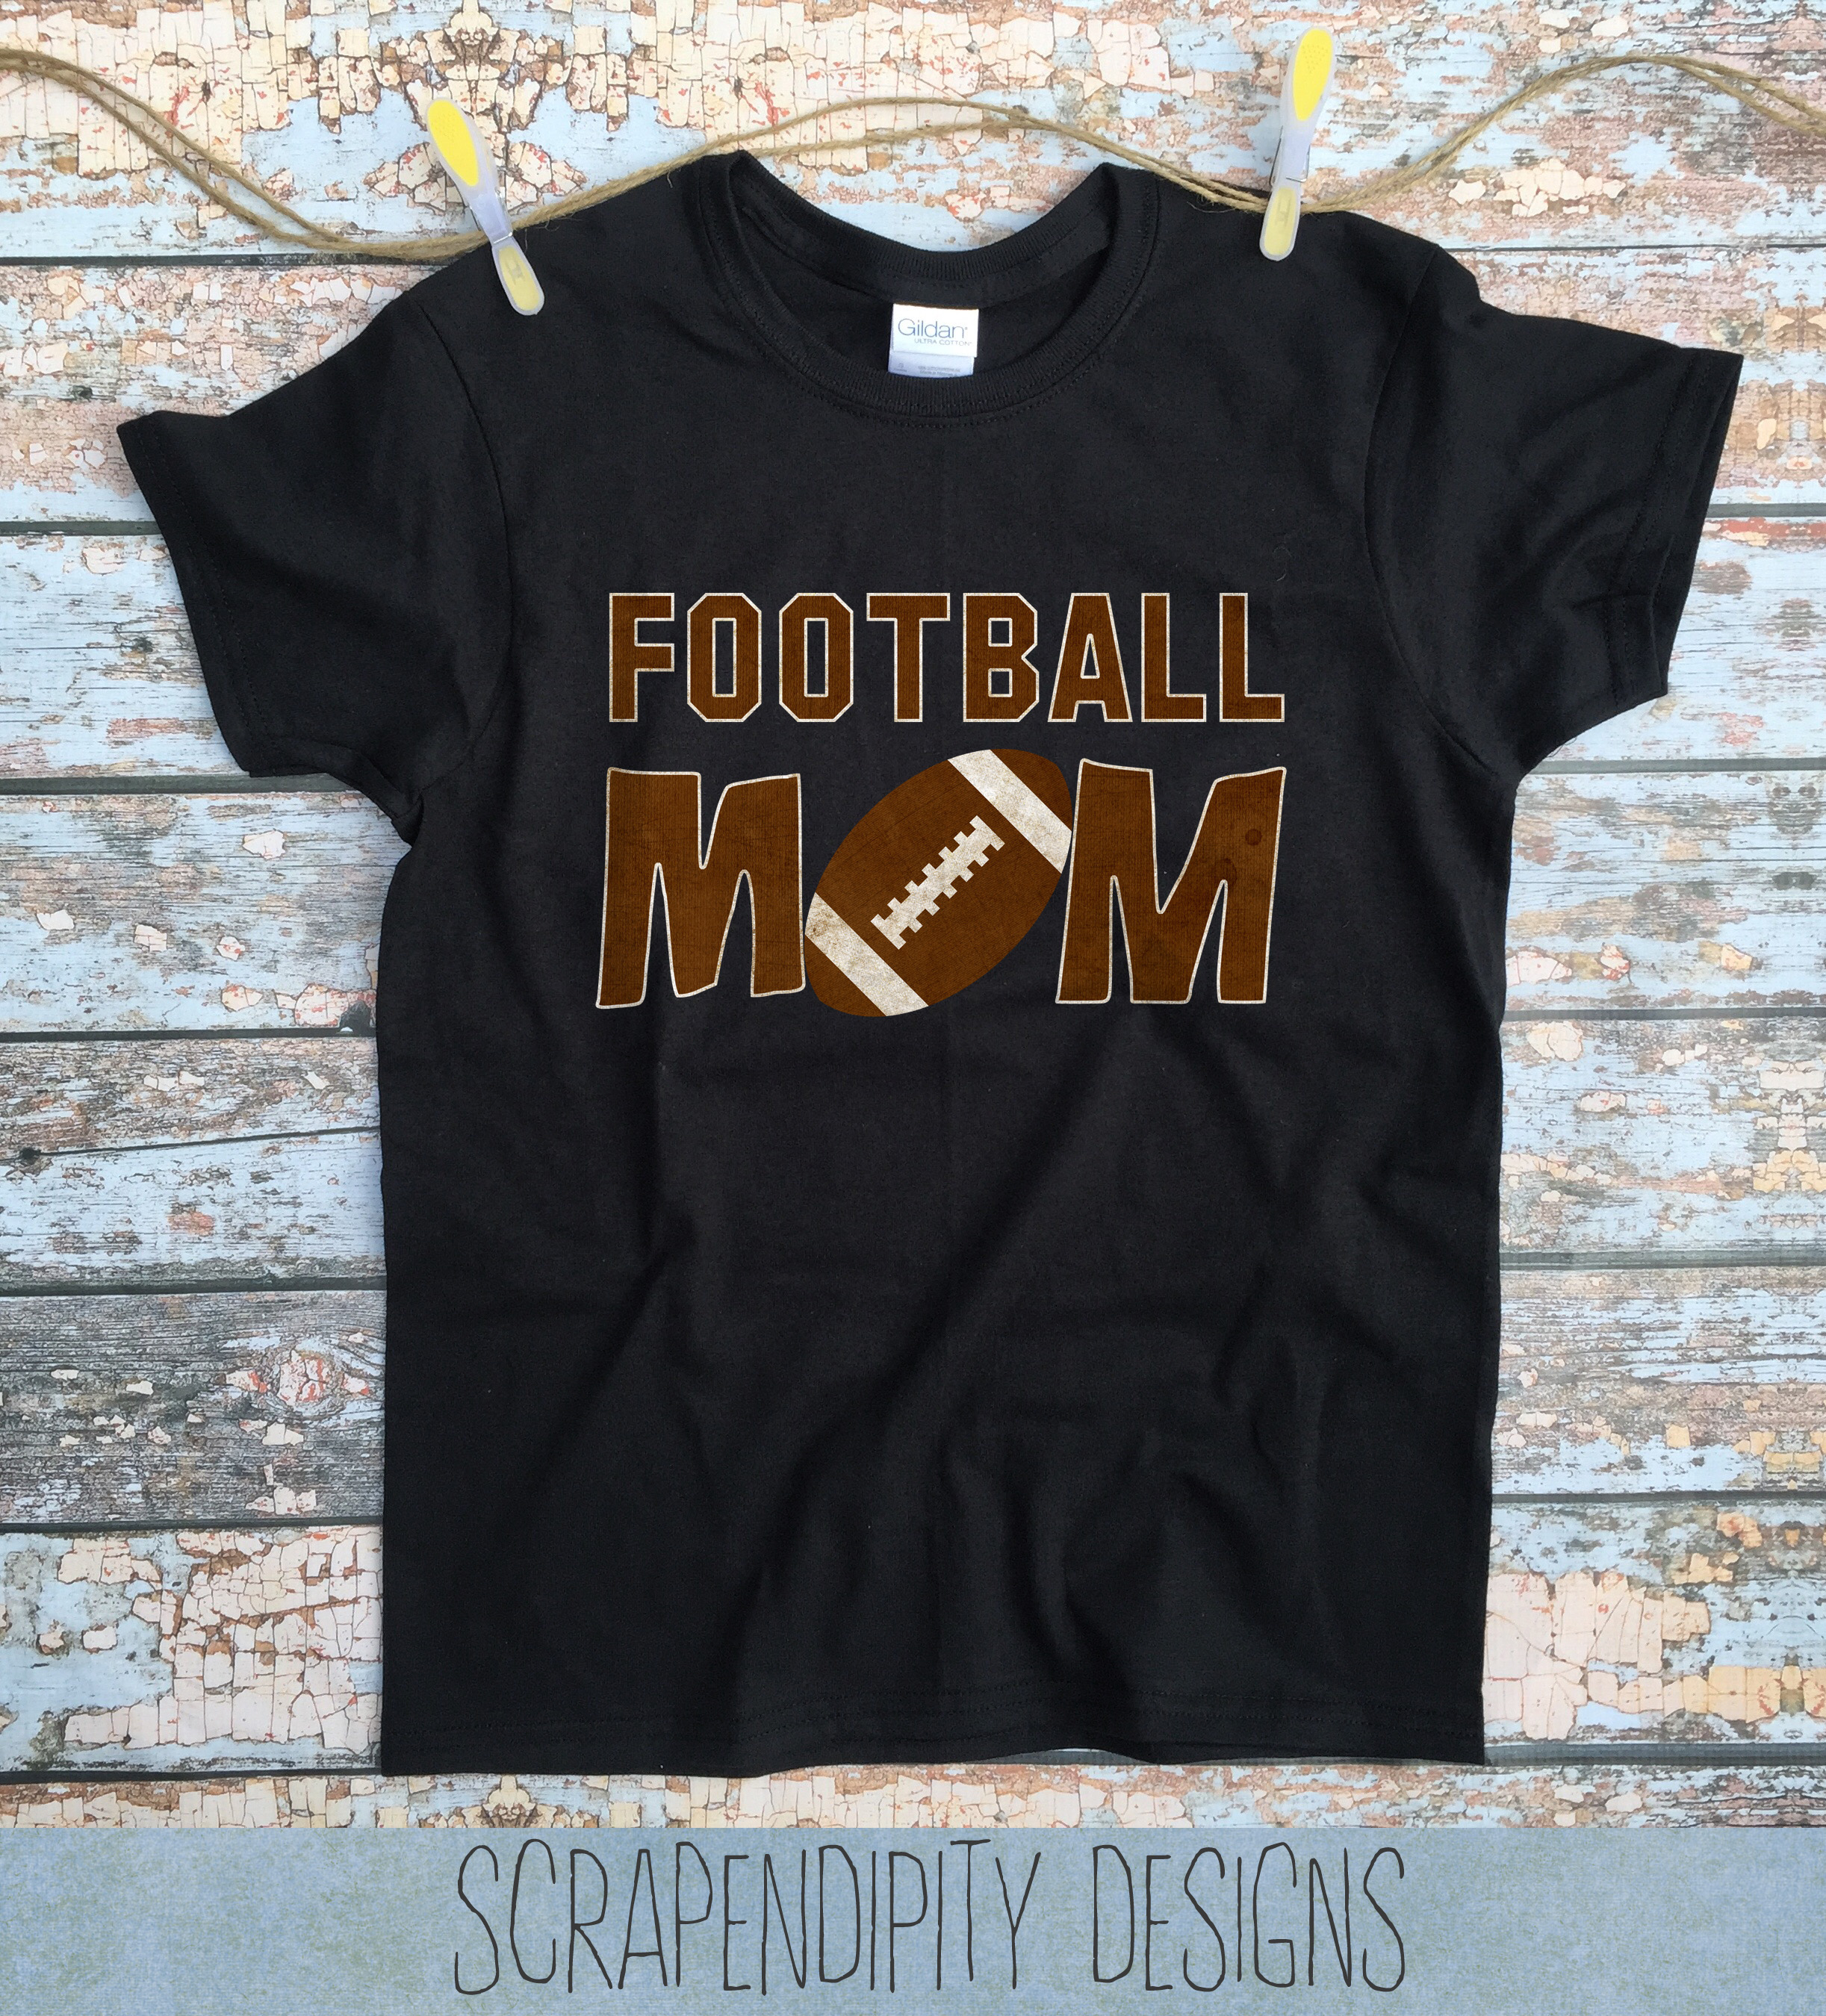
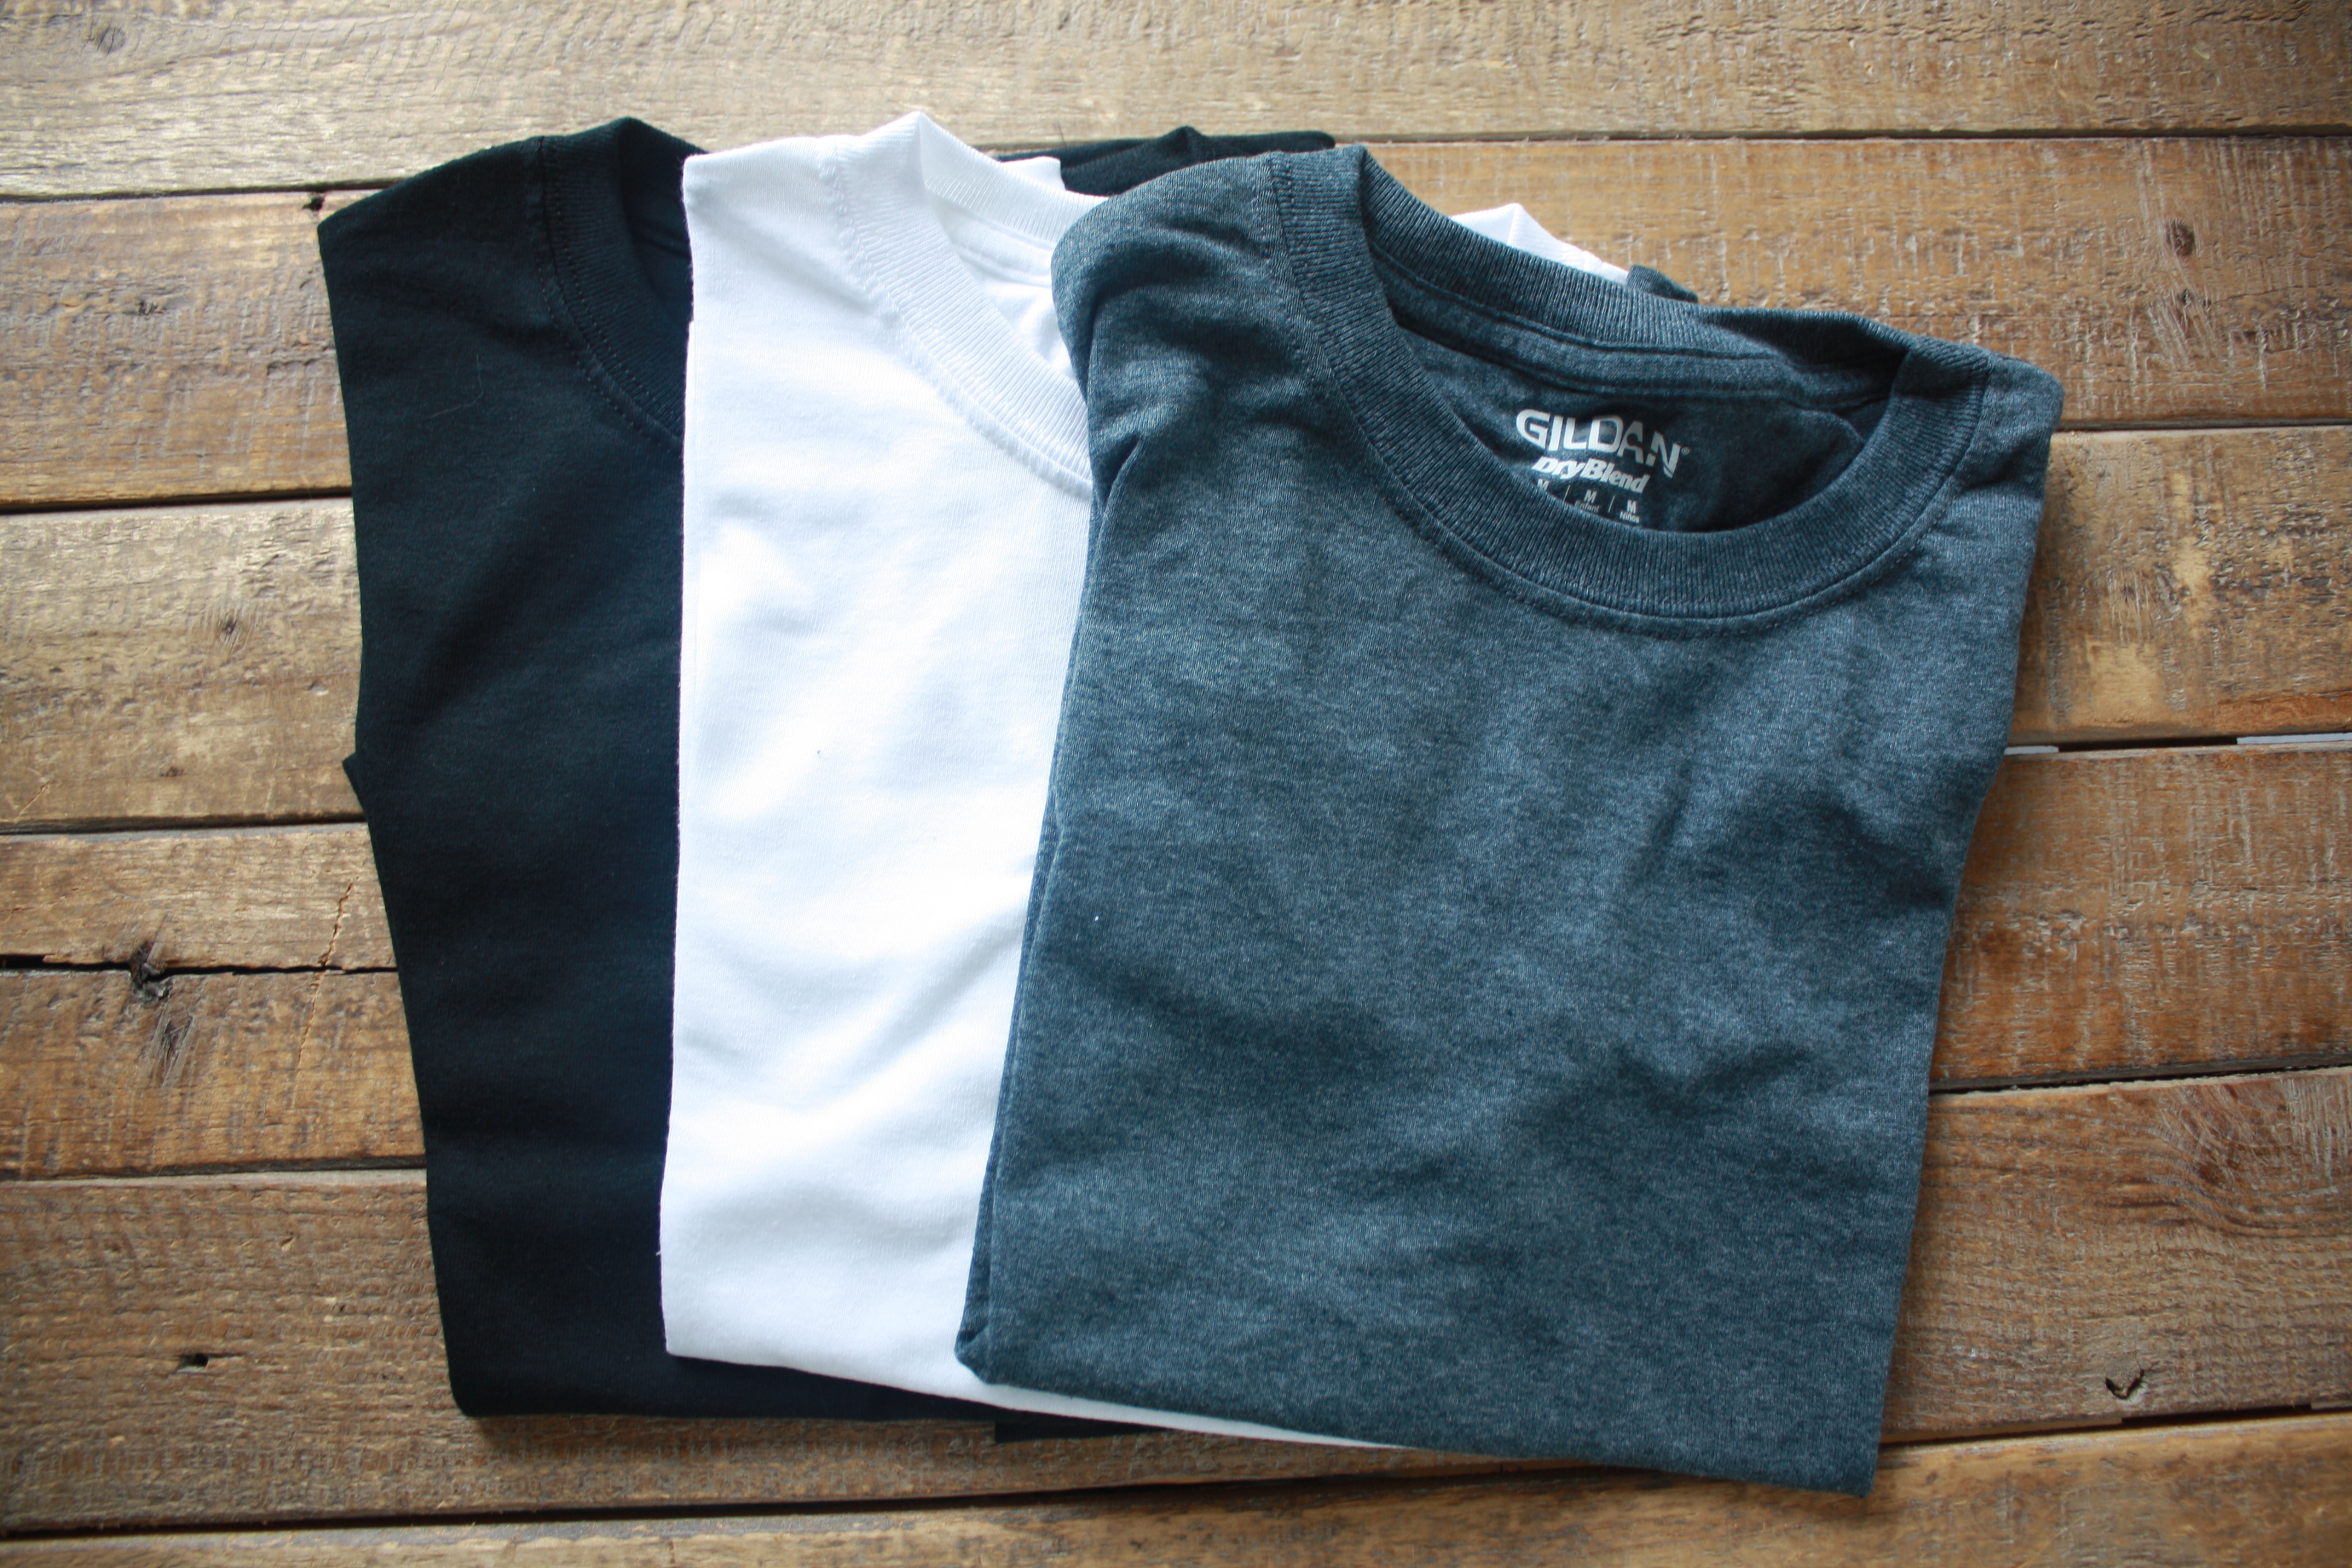
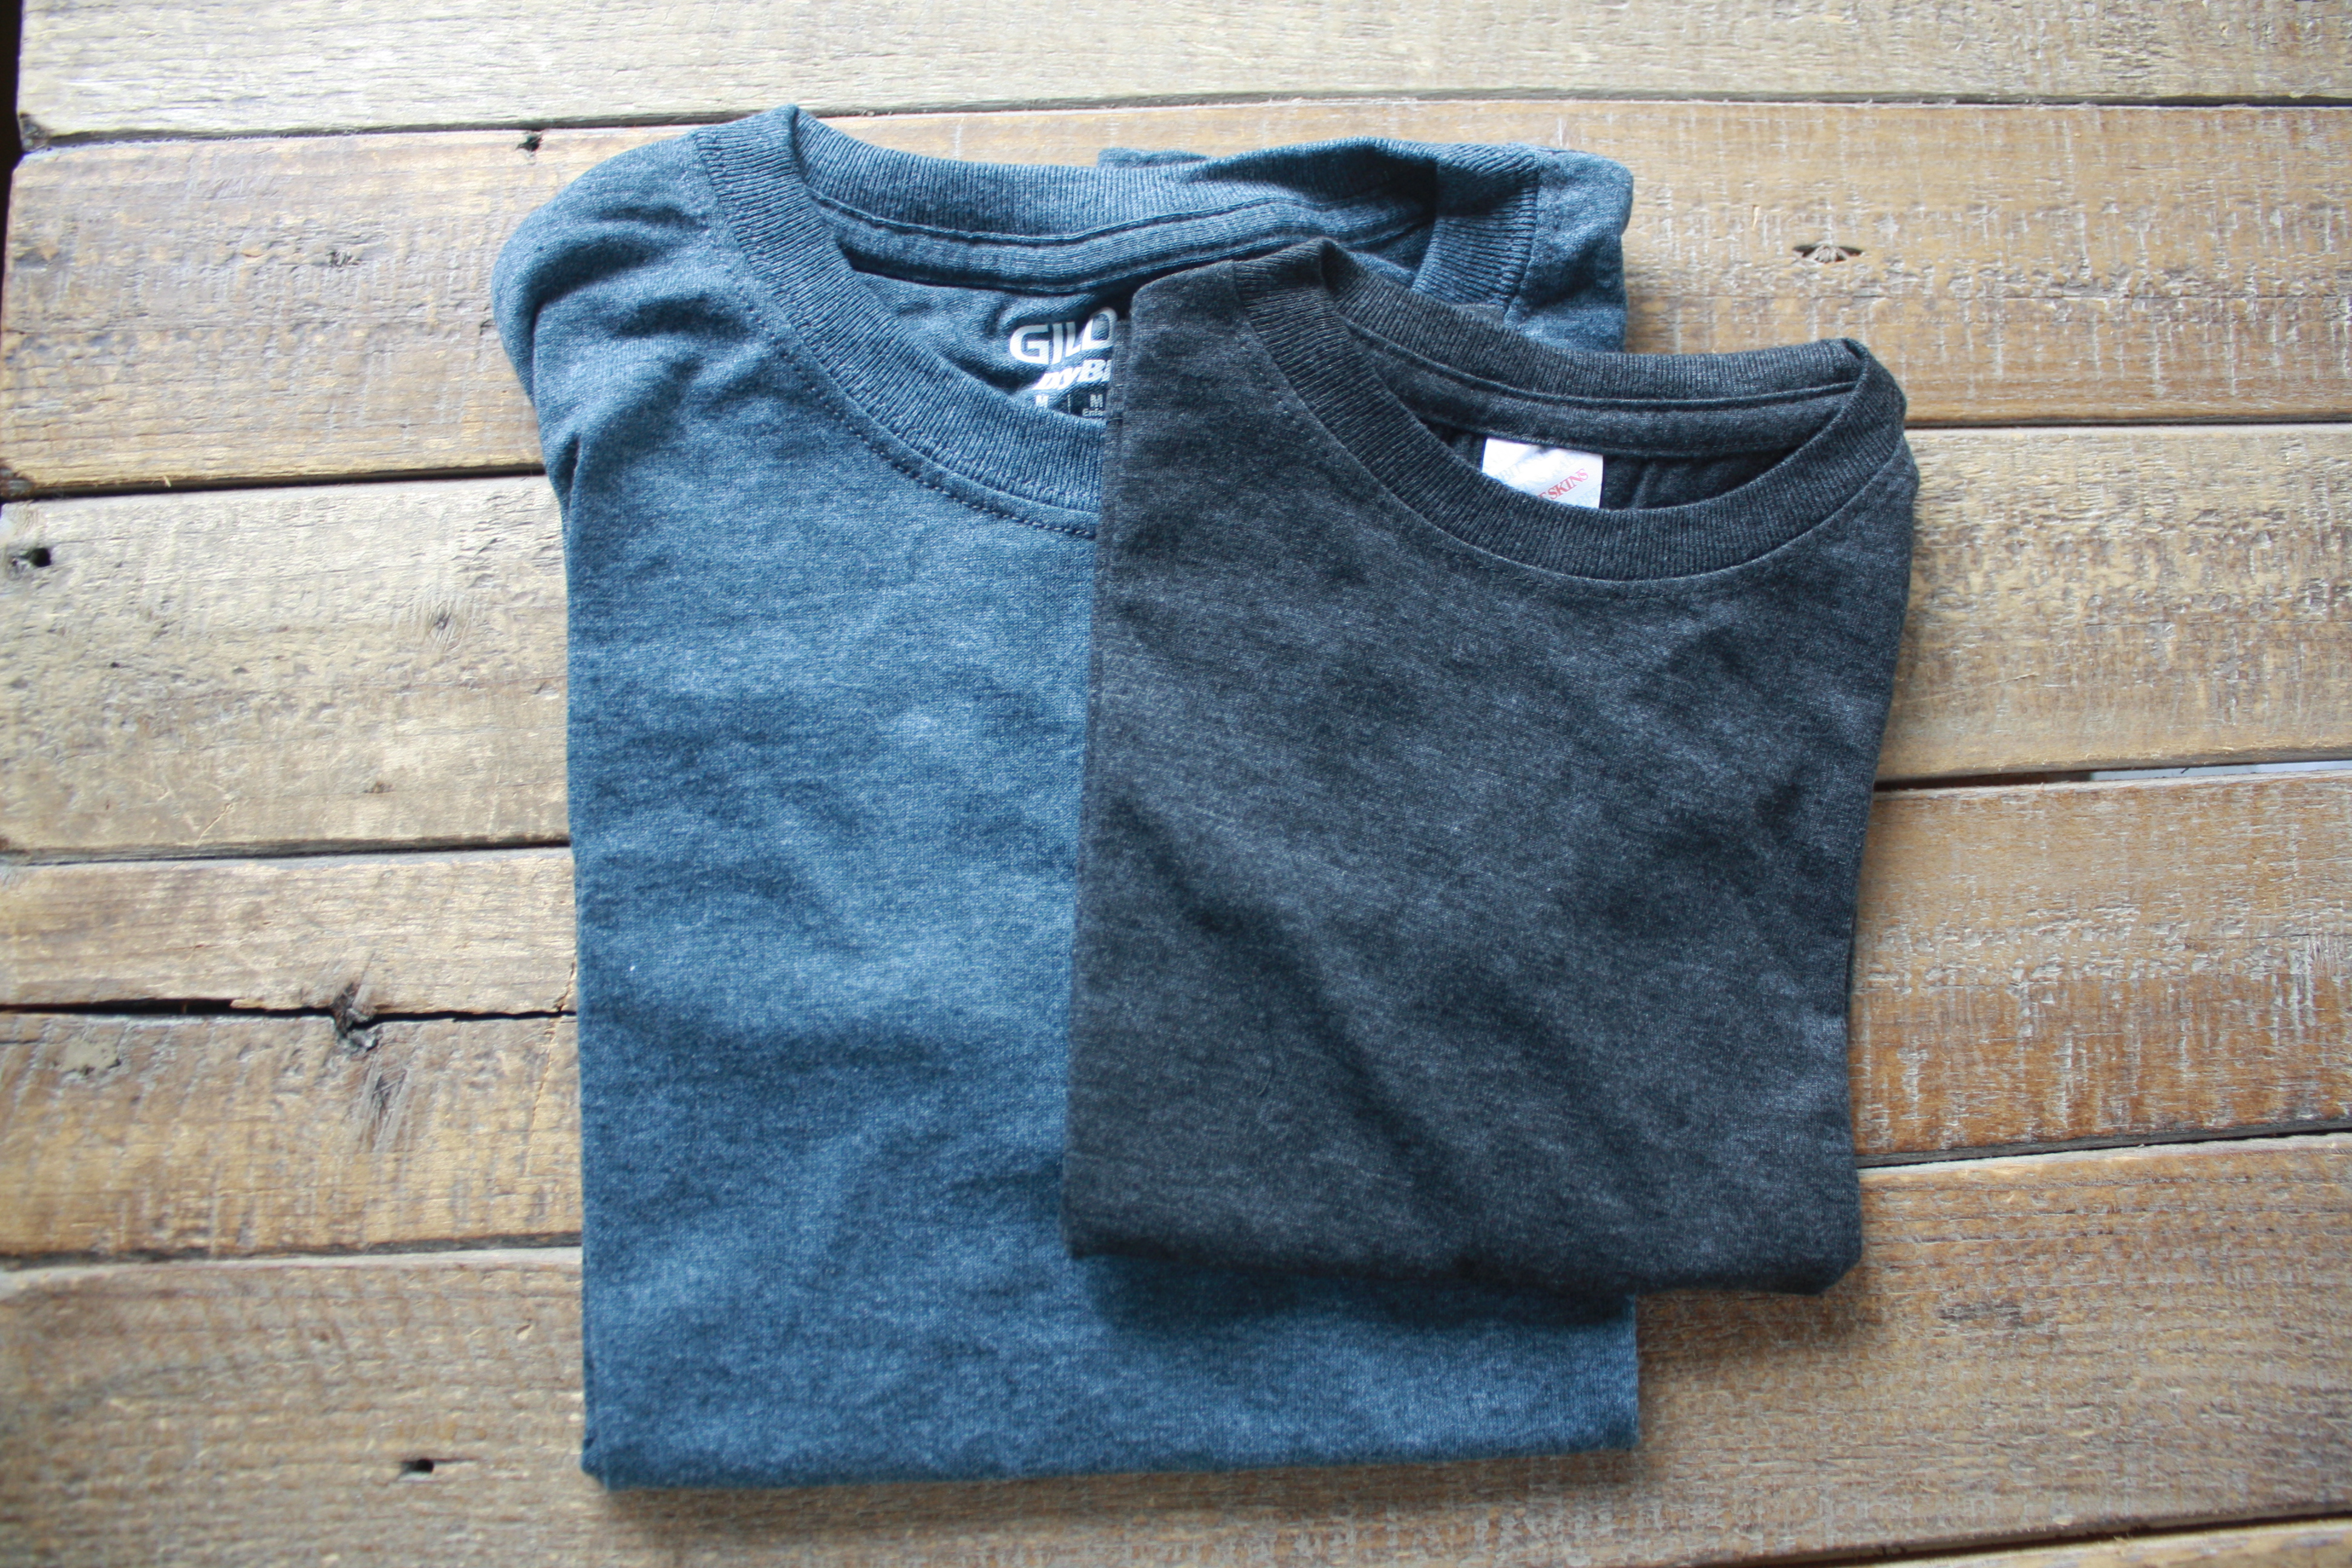
For my shirts, I use Gildan brand for the Youth and Adult sizes. I like this brand as I feel it holds the design really well, washes up nicely without much fuss, and stands up best over time. For the Toddler and Infant sizes I use Rabbit Skins. This brand also washes up well and holds up over time, and it’s one of the best kids brands out there right now. I regularly stock all my sizes in 3 colors. Black, White, and Dark Heather Grey. I can pretty much do any design on any of these 3 colors.

One thing to note is there is some variation in my dark heather grey shirts. The youth and adult sizes are all the same color as above. However, because I use a different brand for the toddler and infant shirts (Gildan does not do the dark heather grey in those sizes), the color is a bit darker on those sizes.

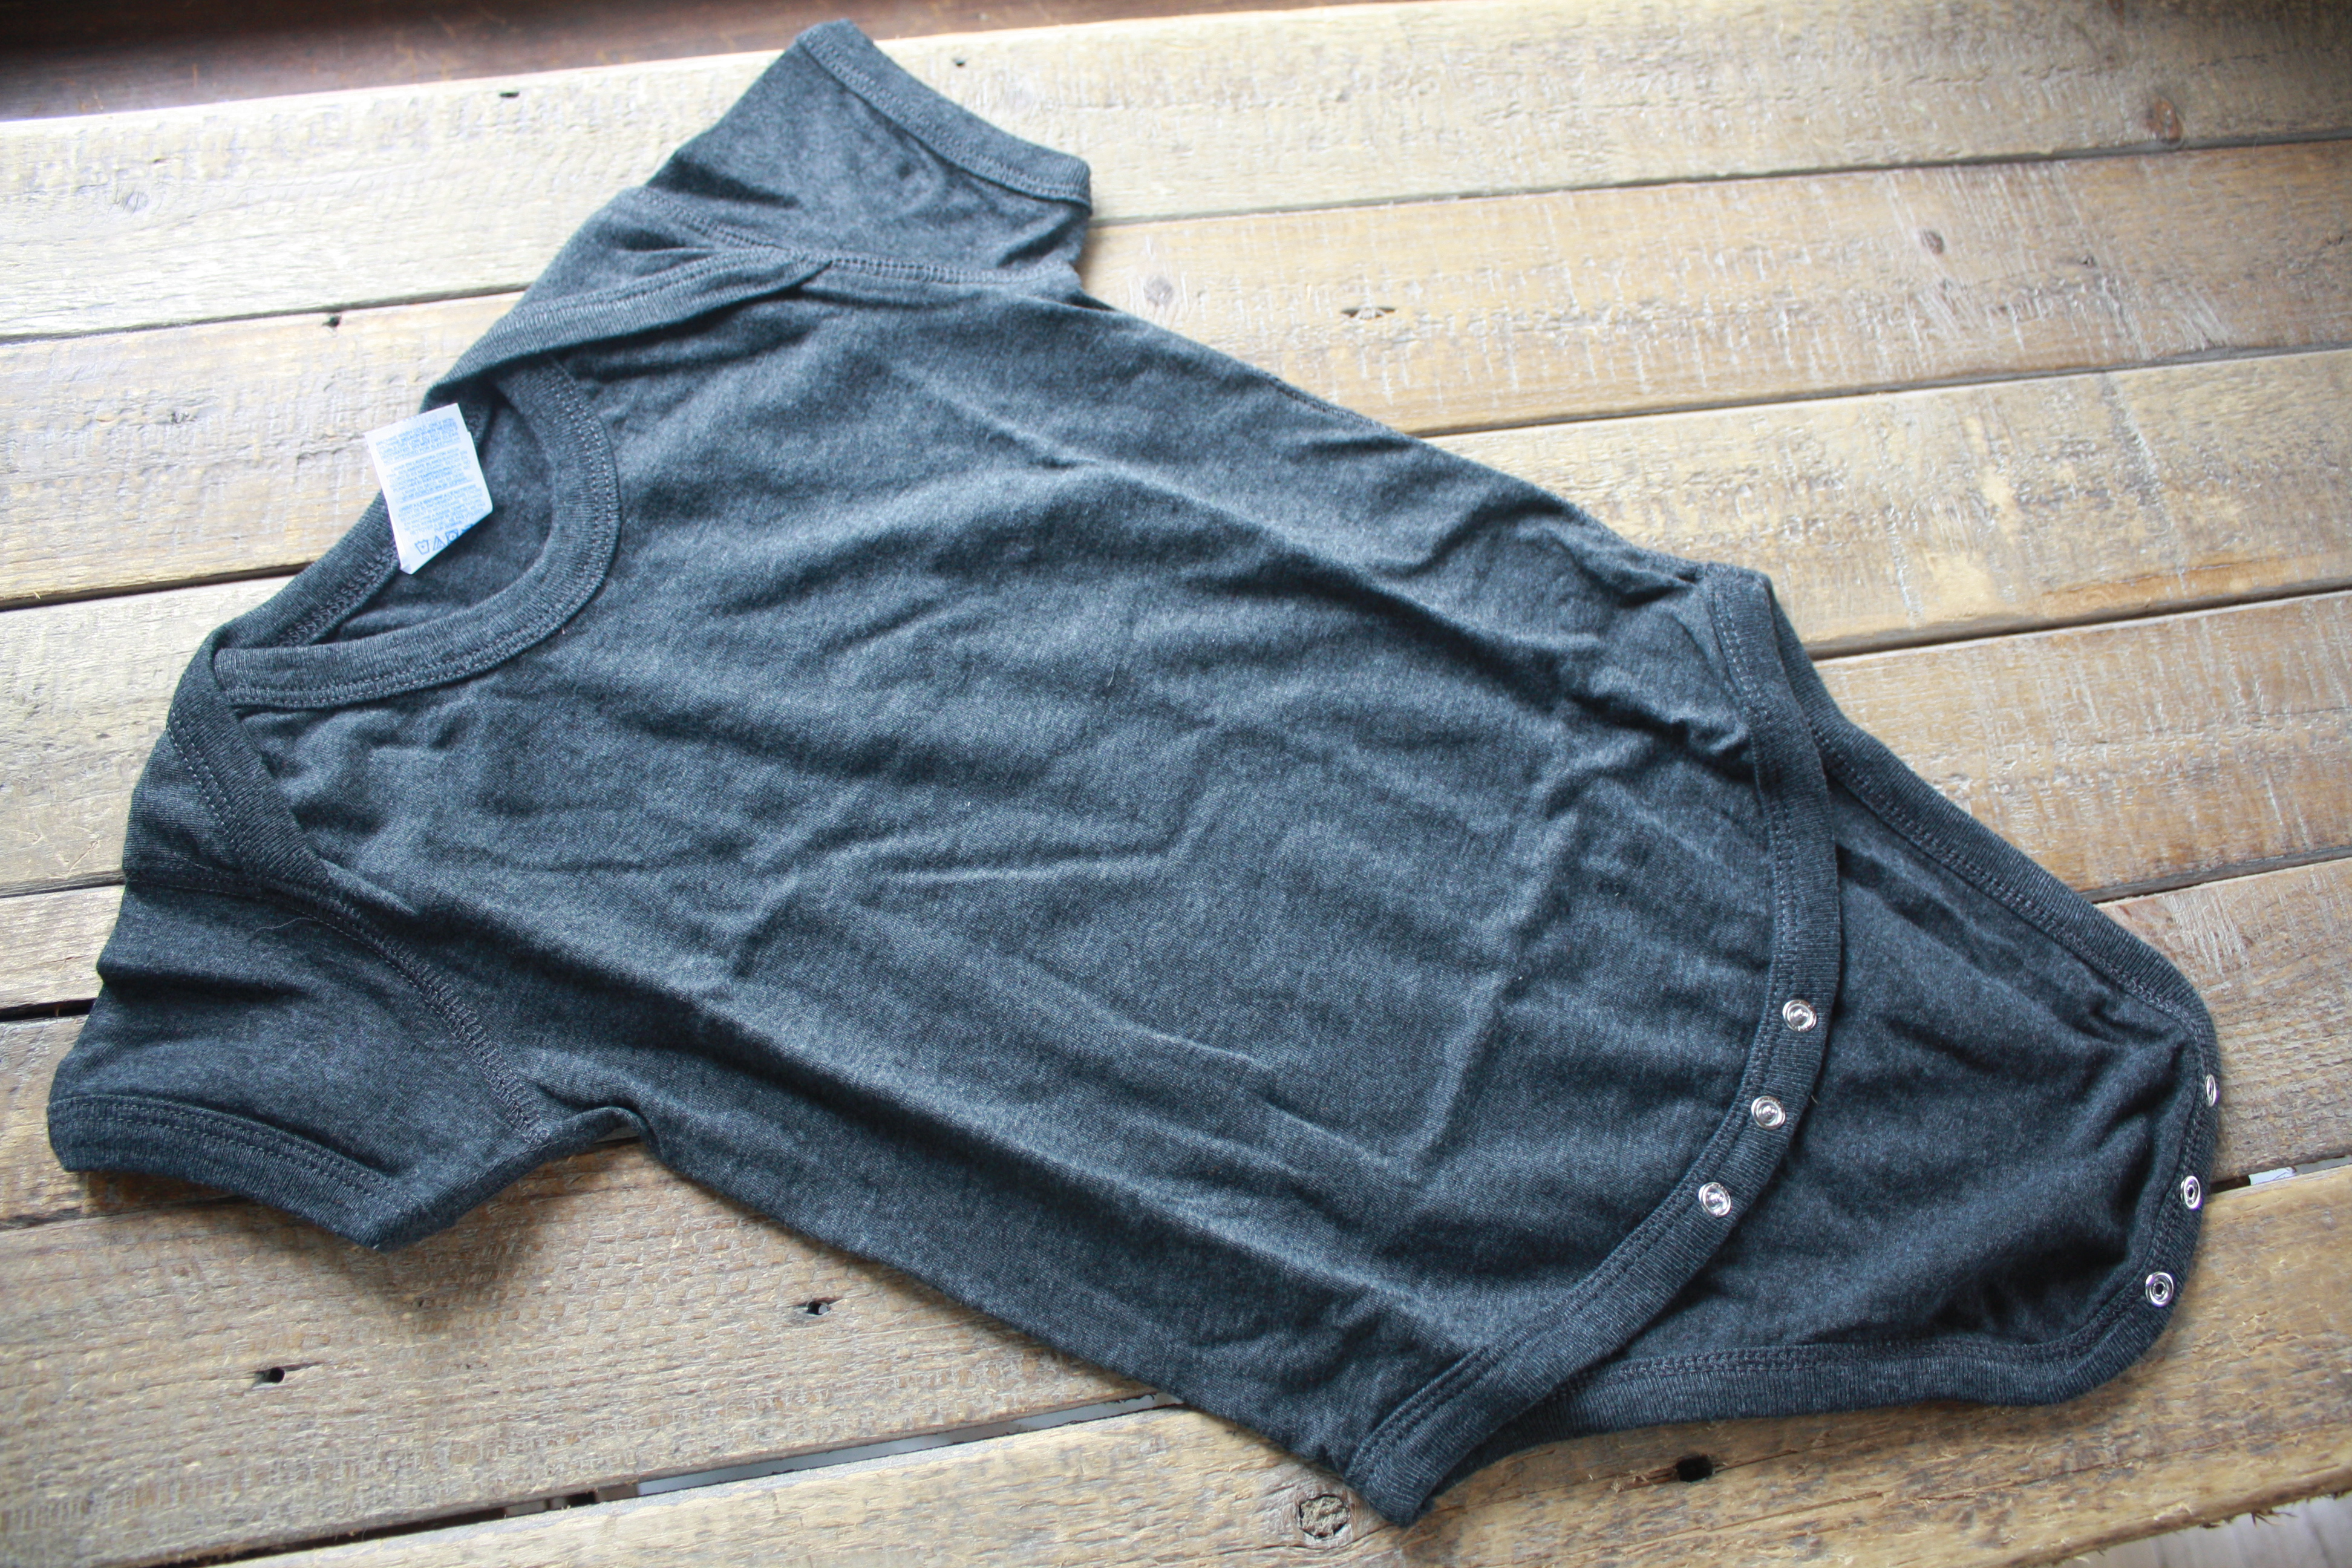
And also, the infant sizes in the dark heather grey is a one-piece, in the white and black the infant sizes are shirts. Again, Rabbit Skins only makes this dark heather grey in the one-piece style, not in a shirt style for infants.

One question I get asked a lot is how the adult shirts are sizing-wise. My adult shirts are a regular unisex sized shirt. The material is super soft and should not be tight fitting to the body. I used to use junior style shirts quite some time ago, but the tighter fit of that style shirt is not a good fit for women of all shapes and sizes. Personally I always had to purchase a size or two up with that style just to prevent the shirts from clinging to every bump on my body! The shirts I use now are a regular cut, one that we are used to seeing in the past. I think you’ll find that you can just choose your regular size and be fine. I would say the majority of my buyers pick their regular size and I very rarely have complaints about sizing unless someone thought these were junior style shirts!

If you are still worried about sizing on the adult shirts, the best way to choose the right size is to make use of the size chart included in the shirt listings. Here is the chart:

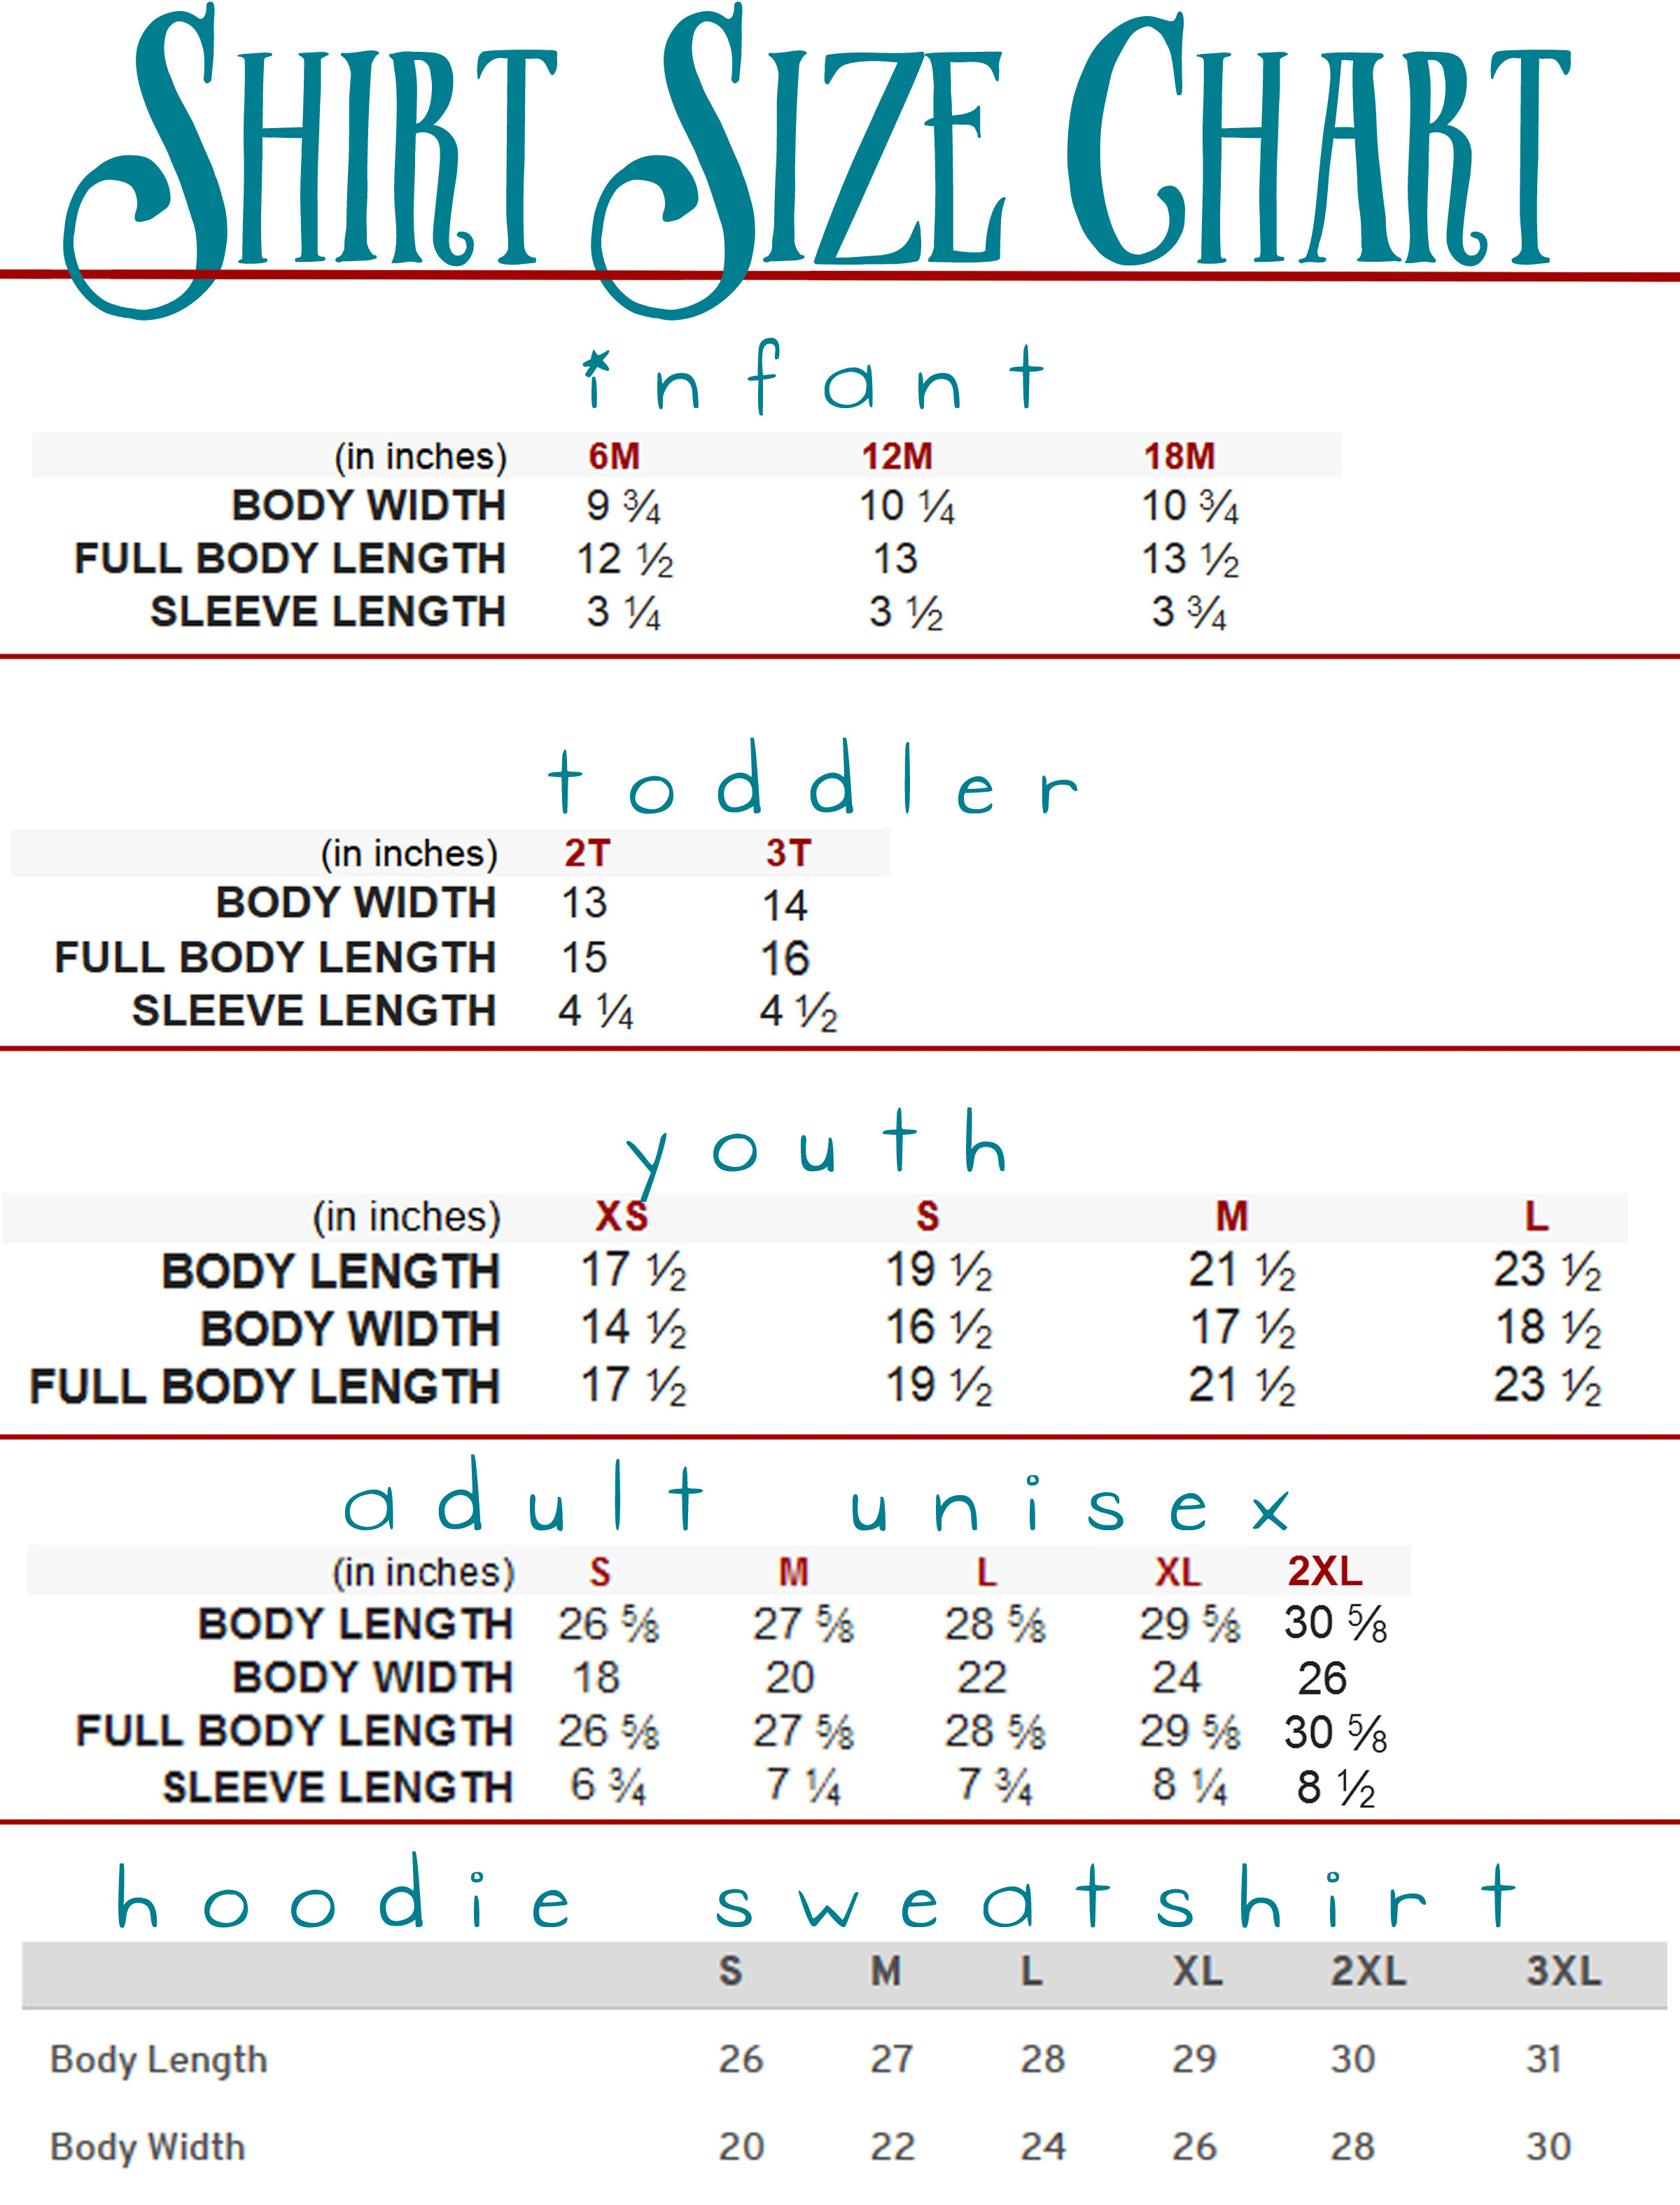
Using the size chart is really best for you and especially for your child. My son was always at least 2 sizes bigger then the “regular” sizes, so just choosing 3T when he was 3 would have never worked. The size chart above helps you figure out the best size without worrying about the size on the actual tag.

To use the chart best, take a t-shirt that fits the subject you are buying for really well. Lay it flat and measure the width.

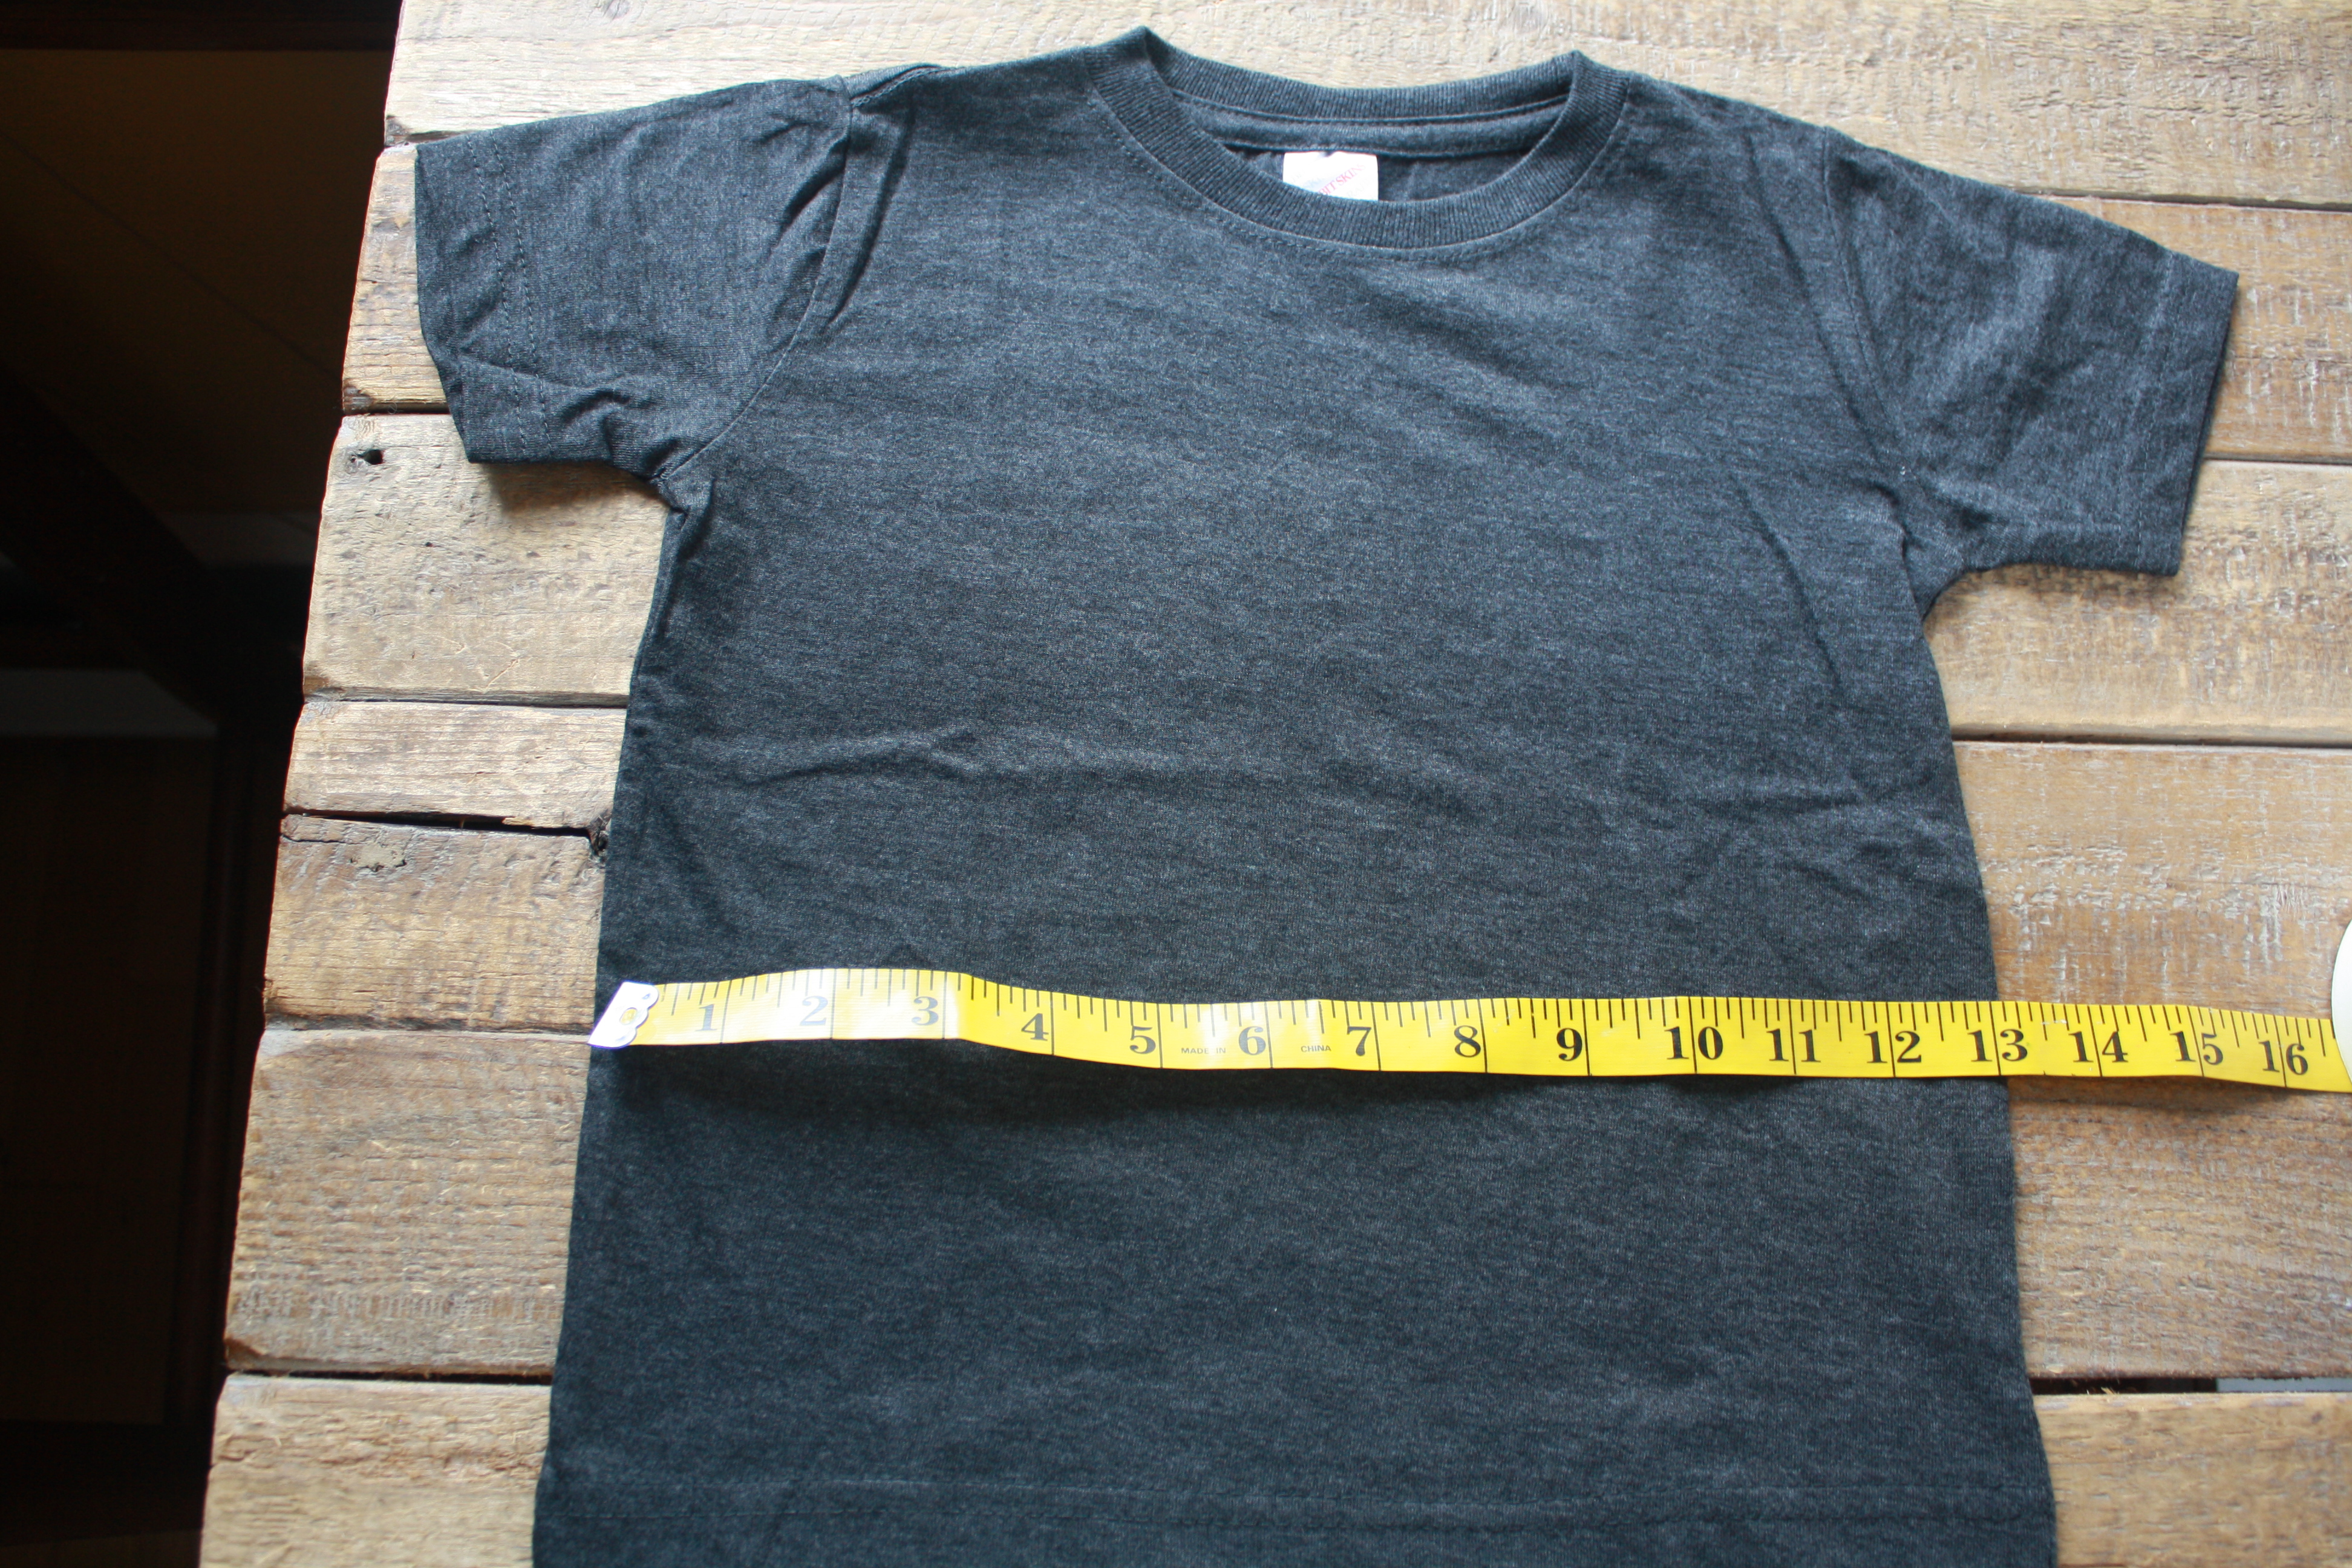
Take that measurement and compare it to the chart. You can see here that this shirt measures 13 inches, so it would be a 2T as compared to the chart. If your measurement falls in between two numbers, always go with the bigger size. You can also measure the length, but that number isn’t as critical to the sizing of the shirt as the width is.

I hope this post helps you choose the right style and size shirt from my shop. As always if you have any questions, do not hesitate to contact me!

Happy sizing!
Rachel

Posted on 2 Comments

The Last of my Bee Creative Blocks

I have already finished the whole quilt top, but I wanted to post up the rest of the blocks before I showed you the whole top put together. These are the last of the blocks that were made for my Bee Creative Halloween quilt.

By Behindtheseams:
Wonky eyed cat for Rachel's Halloween quilt

Second block for Rachel, June BEE Creative

From abbyreed3:
June '10 Bee Creative Blocks

From mamamary2:
Blocks for Rachel- Bee Creative

From Lynds0517:
Bee Creative June Block

There are a few others that don’t have pics on Flickr, but soon I will show you the completed top. It actually went together really easily.

Happy Quilting!
Rachel

Posted on

Playing with the New Machine

About 2 weeks ago I finally had my Handiquilter machine delivered. The girl that I bought it from brought it over and her husband set up the whole thing in our basement.

IMG_0393

Luckily it fit the spot we were thinking for it perfectly. We had to rearrange the whole basement to clear that spot, but I am just glad it fit!!

The machine came with some thread, so I loaded up a practice piece to try some different stuff out. I used muslin for the back, Warm and Natural for the batting, and some sale fabric from my LQS for the top.

IMG_0334

I had taken a class for the machine a few days earlier, so I already knew how to check tension, thread the machine and try some stitches. The first thing I tried was a simple meander, this will probably be what I use the most in the beginning.

IMG_0335

Not too bad if I do say so myself. It’s hard to stay focused on making the pattern random, but I am sure it will get better with practice. The next one I tried was a pebble pattern.

IMG_0336

This one took A LOT of thread, I went around each pebble two or three times, I think I could get the same effect just going around twice, I will have to work on that one more, but I do like it. Another one I tried was loops with hearts thrown in.

IMG_0337

This was a little hard at first, especially to get the hearts going different directions, but I got the hang of it eventually.

Overall the practice quilt turned out pretty good. I did have one or two minor issues on the back.

IMG_0338

But that was mostly due to how I was changing bobbin threads and starting back up, I need to work on that a bit more. I ordered some Quilter’s Dream batting and some more thread to try out some actual quilts. I can’t wait to show you my very first finished quilt!

Happy Quilting!
Rachel

Posted on 3 Comments

A New Toy!

I have a new toy coming to my home real soon:

A woman local to me had her Handiquilter 16 for sale as she had already upgraded to a newer version, and while it wasn’t really in the plans right now, the price was right, we had the money, so we went for it!

I will get the machine on August 1, and then I get to play. I have picked up a few orphan tops from a woman that was cleaning out her quilt room, which I will use for practice. I think this will definitely help me get past the piecing stage to the completed quilt stage.

Happy Quilting,
Rachel

Posted on

Dear Jane Blocks M-11 and M-1

My first pair of Dear Jane blocks was made on June 19, 2010. This is block M-11.

This was not an overly hard blocks, but lining everything up just right did come with its own set of challenges! I can already tell that I will learn a lot by making these fussy little blocks. This one was paper pieced using the software and the instructions found on ‘That Quilt’.

My second pair of blocks was finished on June 27, 2010. This is block M-1.

This block was actually fairly easy. The toughest part was lining up the little triangle so they were centered right on one of the nine patch squares. This was paper pieced again using the software and the instructions found on ‘That Quilt’. As you can tell I had some issues with the one on the left, I completely forgot to change the color of the corner 9 patch blocks!! Oh well, I am going to leave it for now and if I feel like changing it once all my blocks are done, I may. Somehow I doubt that I will though.

Happy Quilting!
Rachel

Posted on

365 Quilt Progress

I have not mentioned my 365 Day quilt lately, and I didn’t want you to think I had given up on it! Obviously this is a year long project, so posting about it every day just would not be interesting. Things have been going well so far, but I have not been writing on my fabric blocks since April. I had the blocks up on my design wall, which fell and made a mess so it was just easier to pack those away. However I have been keeping up with my journaling notes. I have a little journal that I keep in my purse and at the end of each day I jot down something from that day. I am currently up to date on that. I have then been taking the notes I wrote and going back and expanding on it and keeping a file of the full journal entry that will eventually be written on the blocks. It is just easier for me to do it this way. I have a nice long vacation in the summer, so I may pull out my fabric blocks and start writing them again then. I still have to buy some more fabric for the bottom portion of the quilt, but even if the actual putting together of the quilt takes more than a year at least I have the proper journal entries to put on there!

Sorry I don’t have nay pictures as there really are none right now, so I guess this is just a really boring post. But I will have pictures of some of my Dear Jane blocks soon!!

Happy Quilting!
Rachel

Posted on 2 Comments

My Sewing Corner

Last weekend I had a bit of a scare. I don’t really have a sewing room, and I like to be around my family when I sew anyway, so I sew in my bedroom. I had two wooden tray tables set up with a towel over them so I could iron. My sewing machine was on one and I would rotate between having my cutting mat on the other and nothing but the towel for ironing. This set up was always up so I could hop on the machine to sew anytime I wanted. Well last weekend, hubby and I were awakened by a deafening crash in the middle of the night. My fat cat decided she needed to be on the tables, and knocked them over along with my brand new sewing machine. Ugh. Hubby said I needed something better than that, so we went out and got me a real sewing table from Sears.

http://www.sears.com/shc/s/p_10153_12605_02098601000P?prdNo=1&blockNo=1&blockType=G1

With this table I can lower my sewing machine bed so it is level, which will make machine quilting so much easier!! But the best part is, it’s stable. It is pretty much the same size as the set up I had previously, but I don’t have to worry about my cats knocking it over anytime soon.

Since I really liked being able to iron as I sewed, I have covered the table with two layers of batting and my towel. They are just placed on the table like a tablecloth, so they can come off when I want to machine quilt.

I cleaned up the rest of my sewing corner in my room, it’s a bit cramped, but it works for me. Next to my sewing table I have my desk, which has my computer that I can turn to watch TV or movies on as I sew. It also has a bin that holds my two inch squares that I use for my leaders and enders, as well as my scissors and rotary cutter. I also have a little tin for trash and a bowl that holds odds and ends. My iron also sits on my desk. Not the best place for it to be as I almost always end up with a burn or two after a long day of sewing, but it is convenient.

Across from the sewing table, I have my bookcase. It has all my works in progress stacked up …

The boxes hold projects that I am currently working on, while all the stuff stacked around it are patterns and pieces of fabric that will soon go into a new quilt.

So now you have seen my sewing corner, it’s not the best set up in the world, but it allows me to be able to sew and spend time with my family, so it works for me.

Happy Quilting!
Rachel

Posted on 2 Comments

More Bee Creative Blocks

I just wanted to take the chance to show you a few more blocks that have been posted for my Bee Creative Swap swap. June is my month, and I sent all my swap partners some Halloween fabric. They basically had free reign to do any style and any size. It has been so fun to see what they are coming up with! Here are the latest ones:

From Quilty Girl2:

From Sew Lori Sew:

From Robin Heart Quilts (can’t post picture directly):

http://www.flickr.com/photos/redneckandfairytaleprincess/4693999566/in/pool-beecreative/

Aren’t they so lovely?? I can’t wait to get them all back and start figuring out how to put them all together into one top!

Happy Quilting,
Rachel

Posted on 2 Comments

Scrappy Irish Chain

This is my latest finish. When I first got back into quilting about a year and a half ago, I saw this quilt design on the Quiltville website. She called it a ‘Scrappy Irish Chain’. Her background was in white, but I happened to have a whole bolt of black from a yard sale find, so that is what I used. I had never heard of Irish Chain before, but I really liked the design, so I found a tutorial online and went puttering along with all my scraps. It was a lot of fun to make, and really not all that hard. It took me a long time to finish it as the final quilting part of a quilt is not my favorite thing to do. But it is done now. My husband uses this quilt every night.

**Update — I have posted a tutorial/pattern to this quilt. You can find it here.

Happy Quilting!
Rachel

Posted on

Orange Fabric for Dear Jane

Before I even had everything figured out for my Dear Jane quilt, I did know that I wanted to make it in blues and oranges. This is one of my favorite color combinations, probably because of the year I spent at Syracuse University. I knew the blues would be a solid colored fabric, most likely I will just use a Kona cotton. However, I wanted to have a good variety of oranges.

Ideally I would like to have a different orange for every block. This is a tall order since nice oranges aren’t always the easiest to find. To help get me started in my quest for all these oranges, I put a request out to the members of Quiltingboard.com. I offered up some of my scraps in exchange for pieces of orange fabric that people had. I had quite a few people take me up on the offer, and here is what I have gotten so far:

That’s a lot of orange! And I do believe that there is more coming too! The people on this board are so generous, I feel lucky to be a part of the community. These pieces will be a great start to my collection of oranges for this quilt. Now I just need to sort through these fabrics and assign them all a spot on my quilt.

Happy Quilting!
Rachel

Posted on 8 Comments

Twice the Craziness

If making one Dear Jane quilt makes you crazy, what would you be if you made two?

I finally got the software for my Dear Jane quilt about a week or so ago. The software is actually pretty nice. It took a little reading to be able to use it properly, but the instruction book that comes with it is pretty thorough. The good thing about the software is I can use it for some basic non-Jane Sickle related quilts as well, which was a nice bonus.

I showed you previously what someone had created for me as a design idea for my blue and orange Dear Jane quilt. I took her ideas and ran with them once I had the software for myself. I really liked her idea of the rings of color rather than the more traditional ‘Around the World’ look. I also liked the idea of using some white blocks with the orange ones. Here is what my final design looks like:

I think it has a lot of visual impact. Now I just have to work on getting a lot of different oranges as I would like each orange block to be a different fabric.

While I was working on my blue and orange Dear Jane, I thought about actually making this quilt. It will be a real learning experience for me, because precision piecing is not my strong point at all. Now I am not going to get hung up on some lost points or not so straight lines in this quilt, but I would like to do my best on it and hopefully learn a lot more about quilting in the process. Since I knew I would probably screw up every block the first time I made it, I thought it would be good to have a practice quilt too. One where I could make the block for the first time, screw it up royally and hopefully learn how to do it right for the real quilt. Here is the second design I came up with:

So am I completely nuts to be making two of these quilts? Probably. But the rainbow one will be made with muslin and colored scraps. I am hoping that I won’t have to buy anything above that for this one, though I may as I don’t have an unlimited supply of scraps!!

I have already made 2 blocks on my Rainbow Jane and will hopefully be working on my first block for the Blue and Orange Jane tonight. I will show you all the blocks in another post. I have a feeling I *may* have these finished on the eve of my son’s wedding day (and he’s only 7!), won’t one of them make a great wedding gift? LOL Okay, let’s hope it doesn’t take that long, but I know it will certainly be a long term project.

Happy Quilting!
Rachel